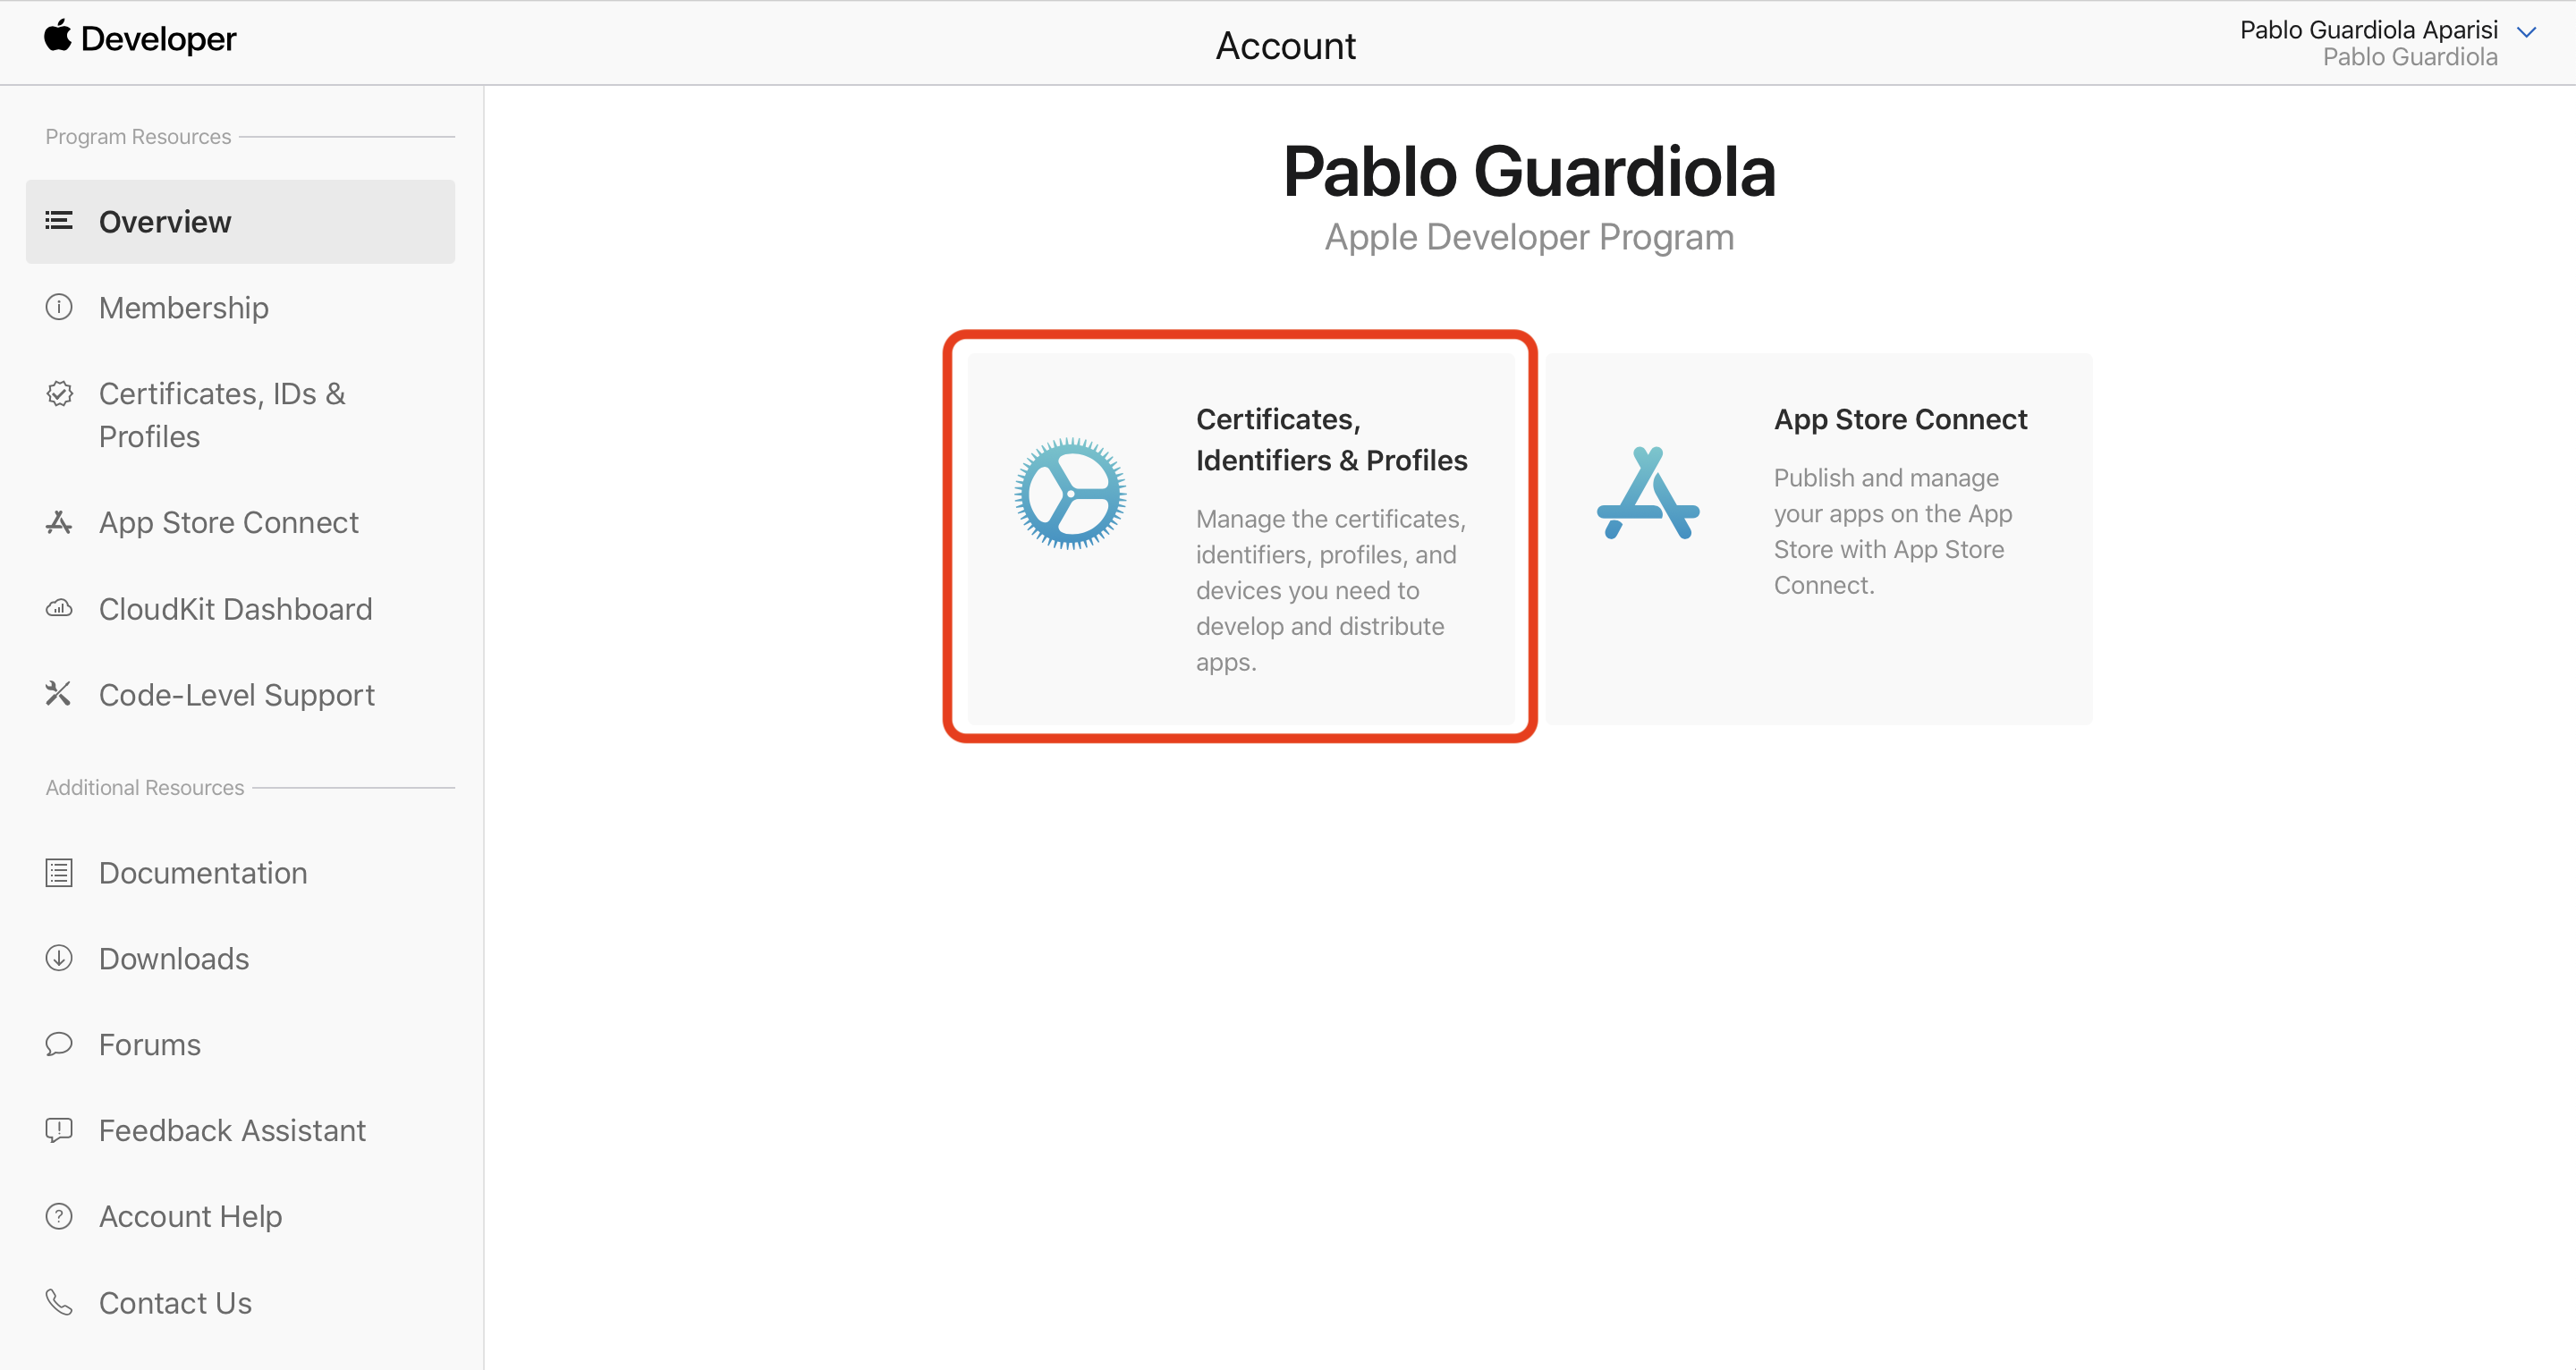
As we saw in the article Certificates I, we can always check the Automatically manage signing box to let Xcode generate the necessary certificates. However, when working in a team, we will need to manage the certificates ourselves.
To follow this article, you will need a paid developer account, whether Personal or Organization.
Development & Distribution
When creating certificates, we need to differentiate between those for development, used for installations via USB or testing on a list of devices, and those for distribution, used for uploading our app to the App Store.
Provisioning Profile
The ultimate goal is to obtain a Provisioning Profile, which is the file Xcode will use to sign our app. This Provisioning Profile is created using a Certificate (linked to our Mac and our developer account) and an Identifier (which identifies a specific app). This Identifier will also include a list of devices, which will be the only ones where our app can be installed.
Let’s see how to create these components, as well as how to add our device to the allowed list step by step:
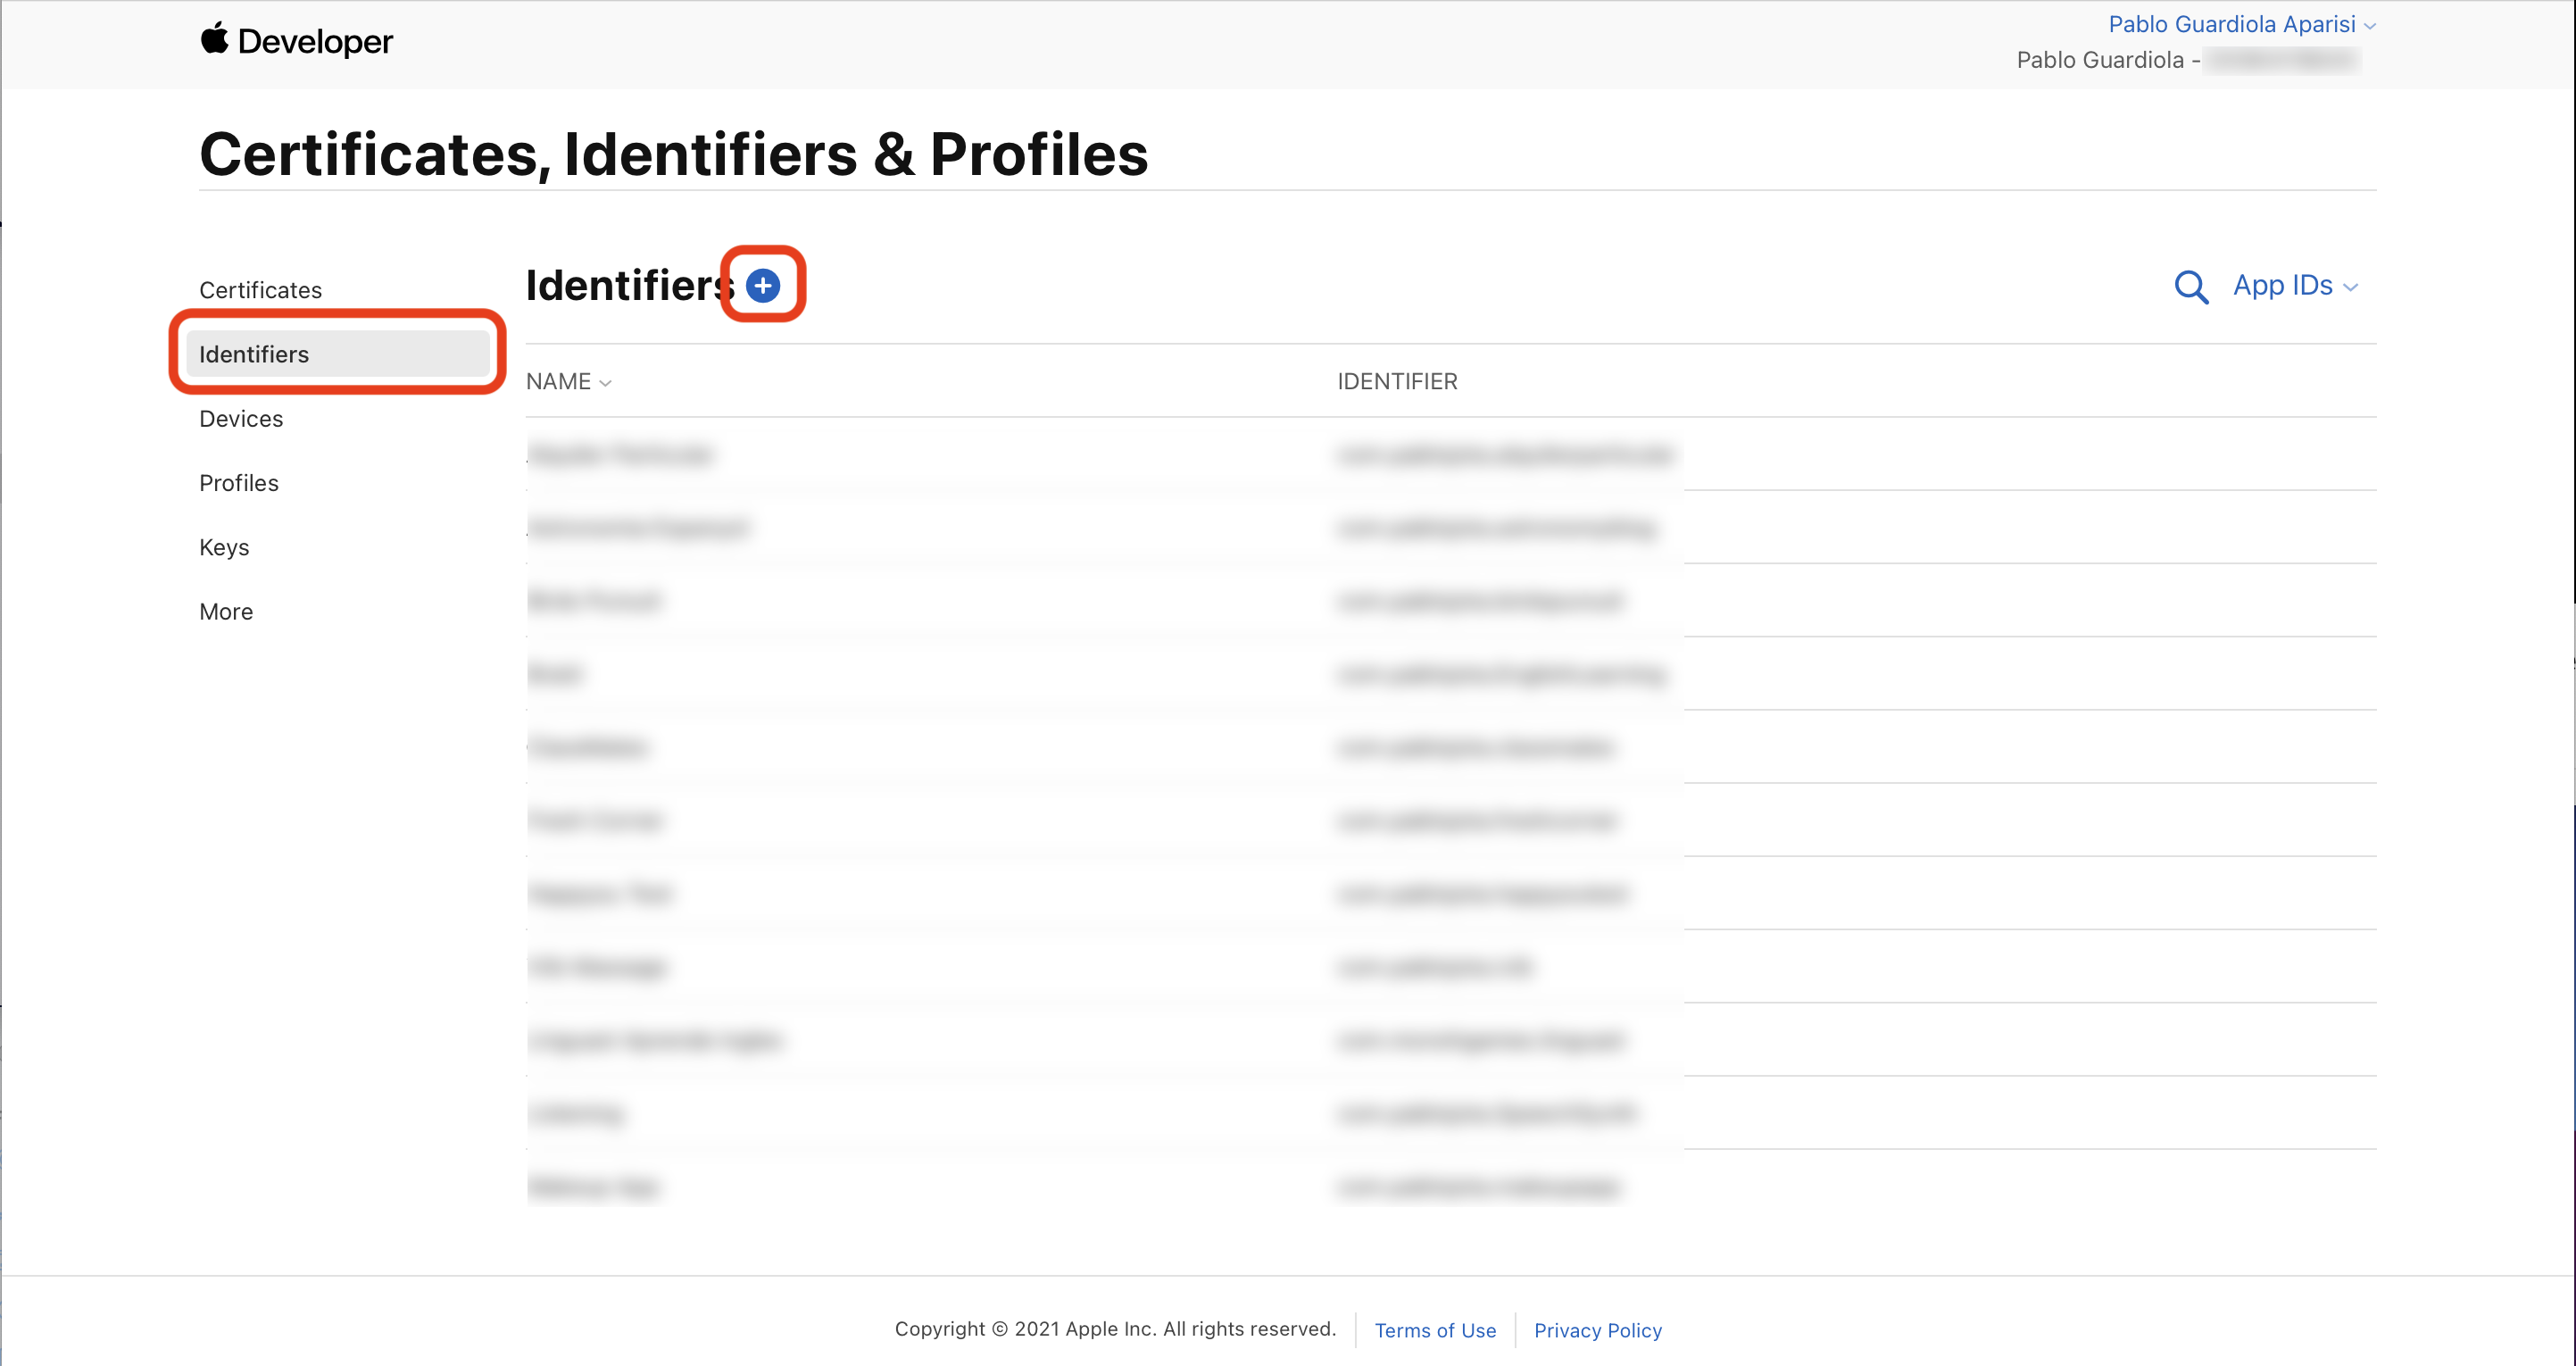
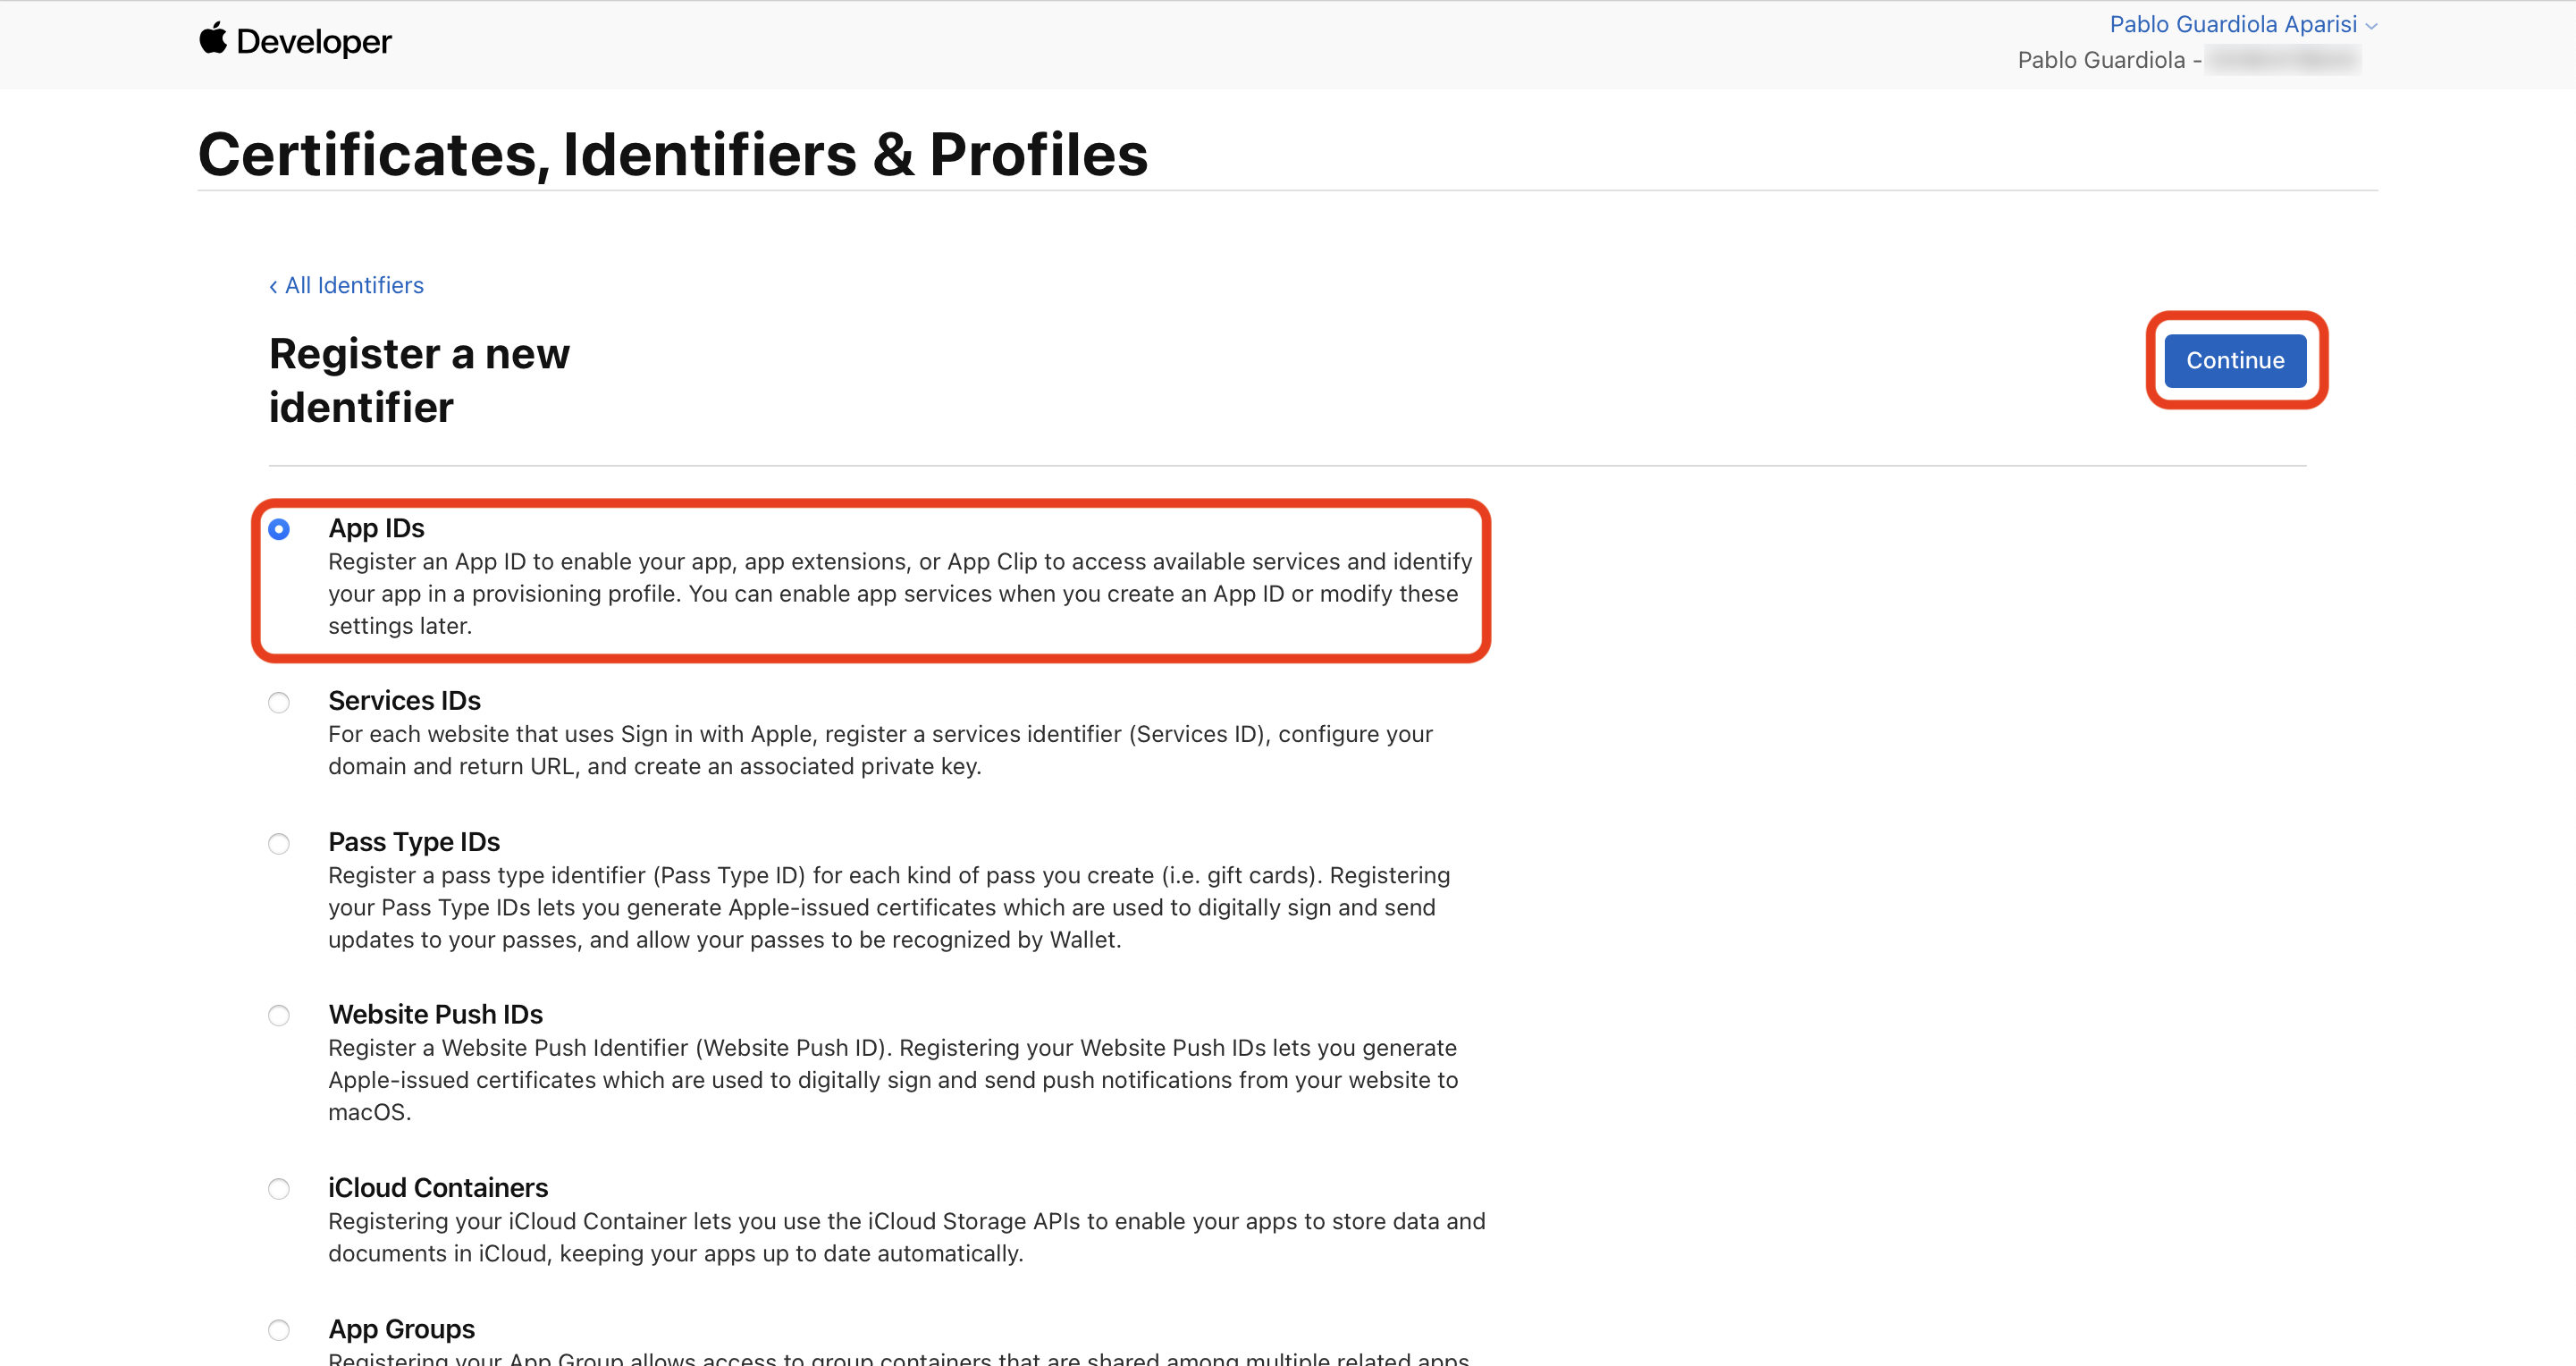
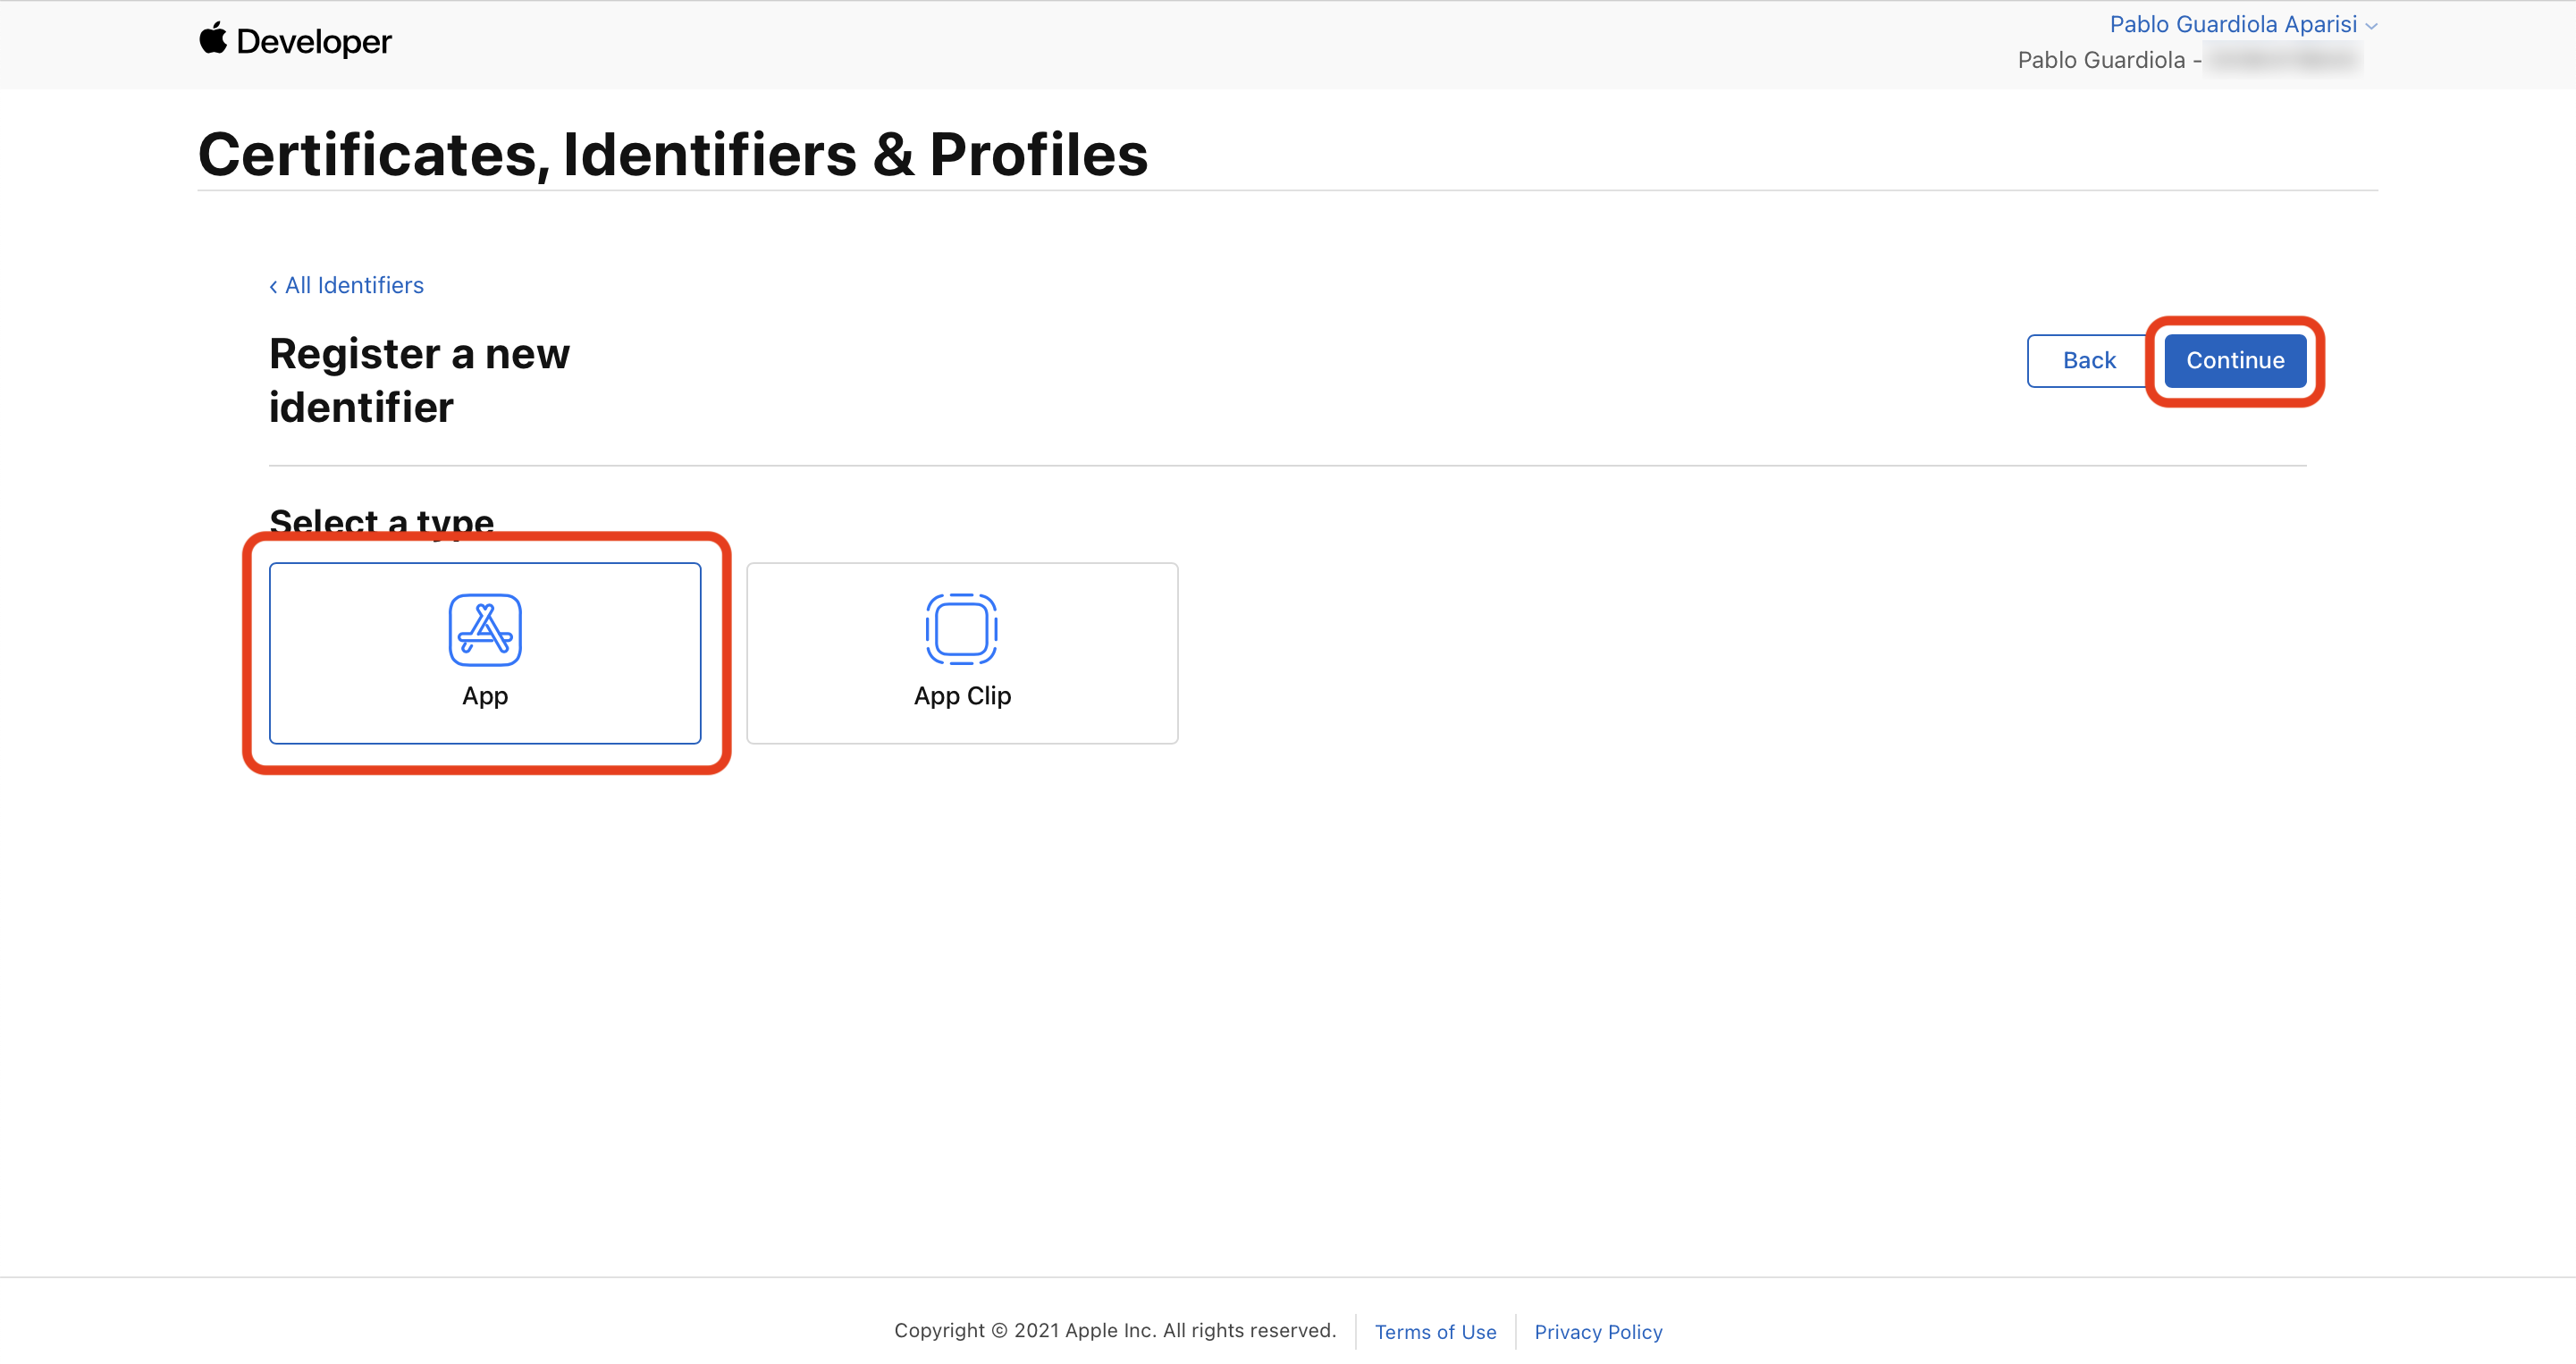
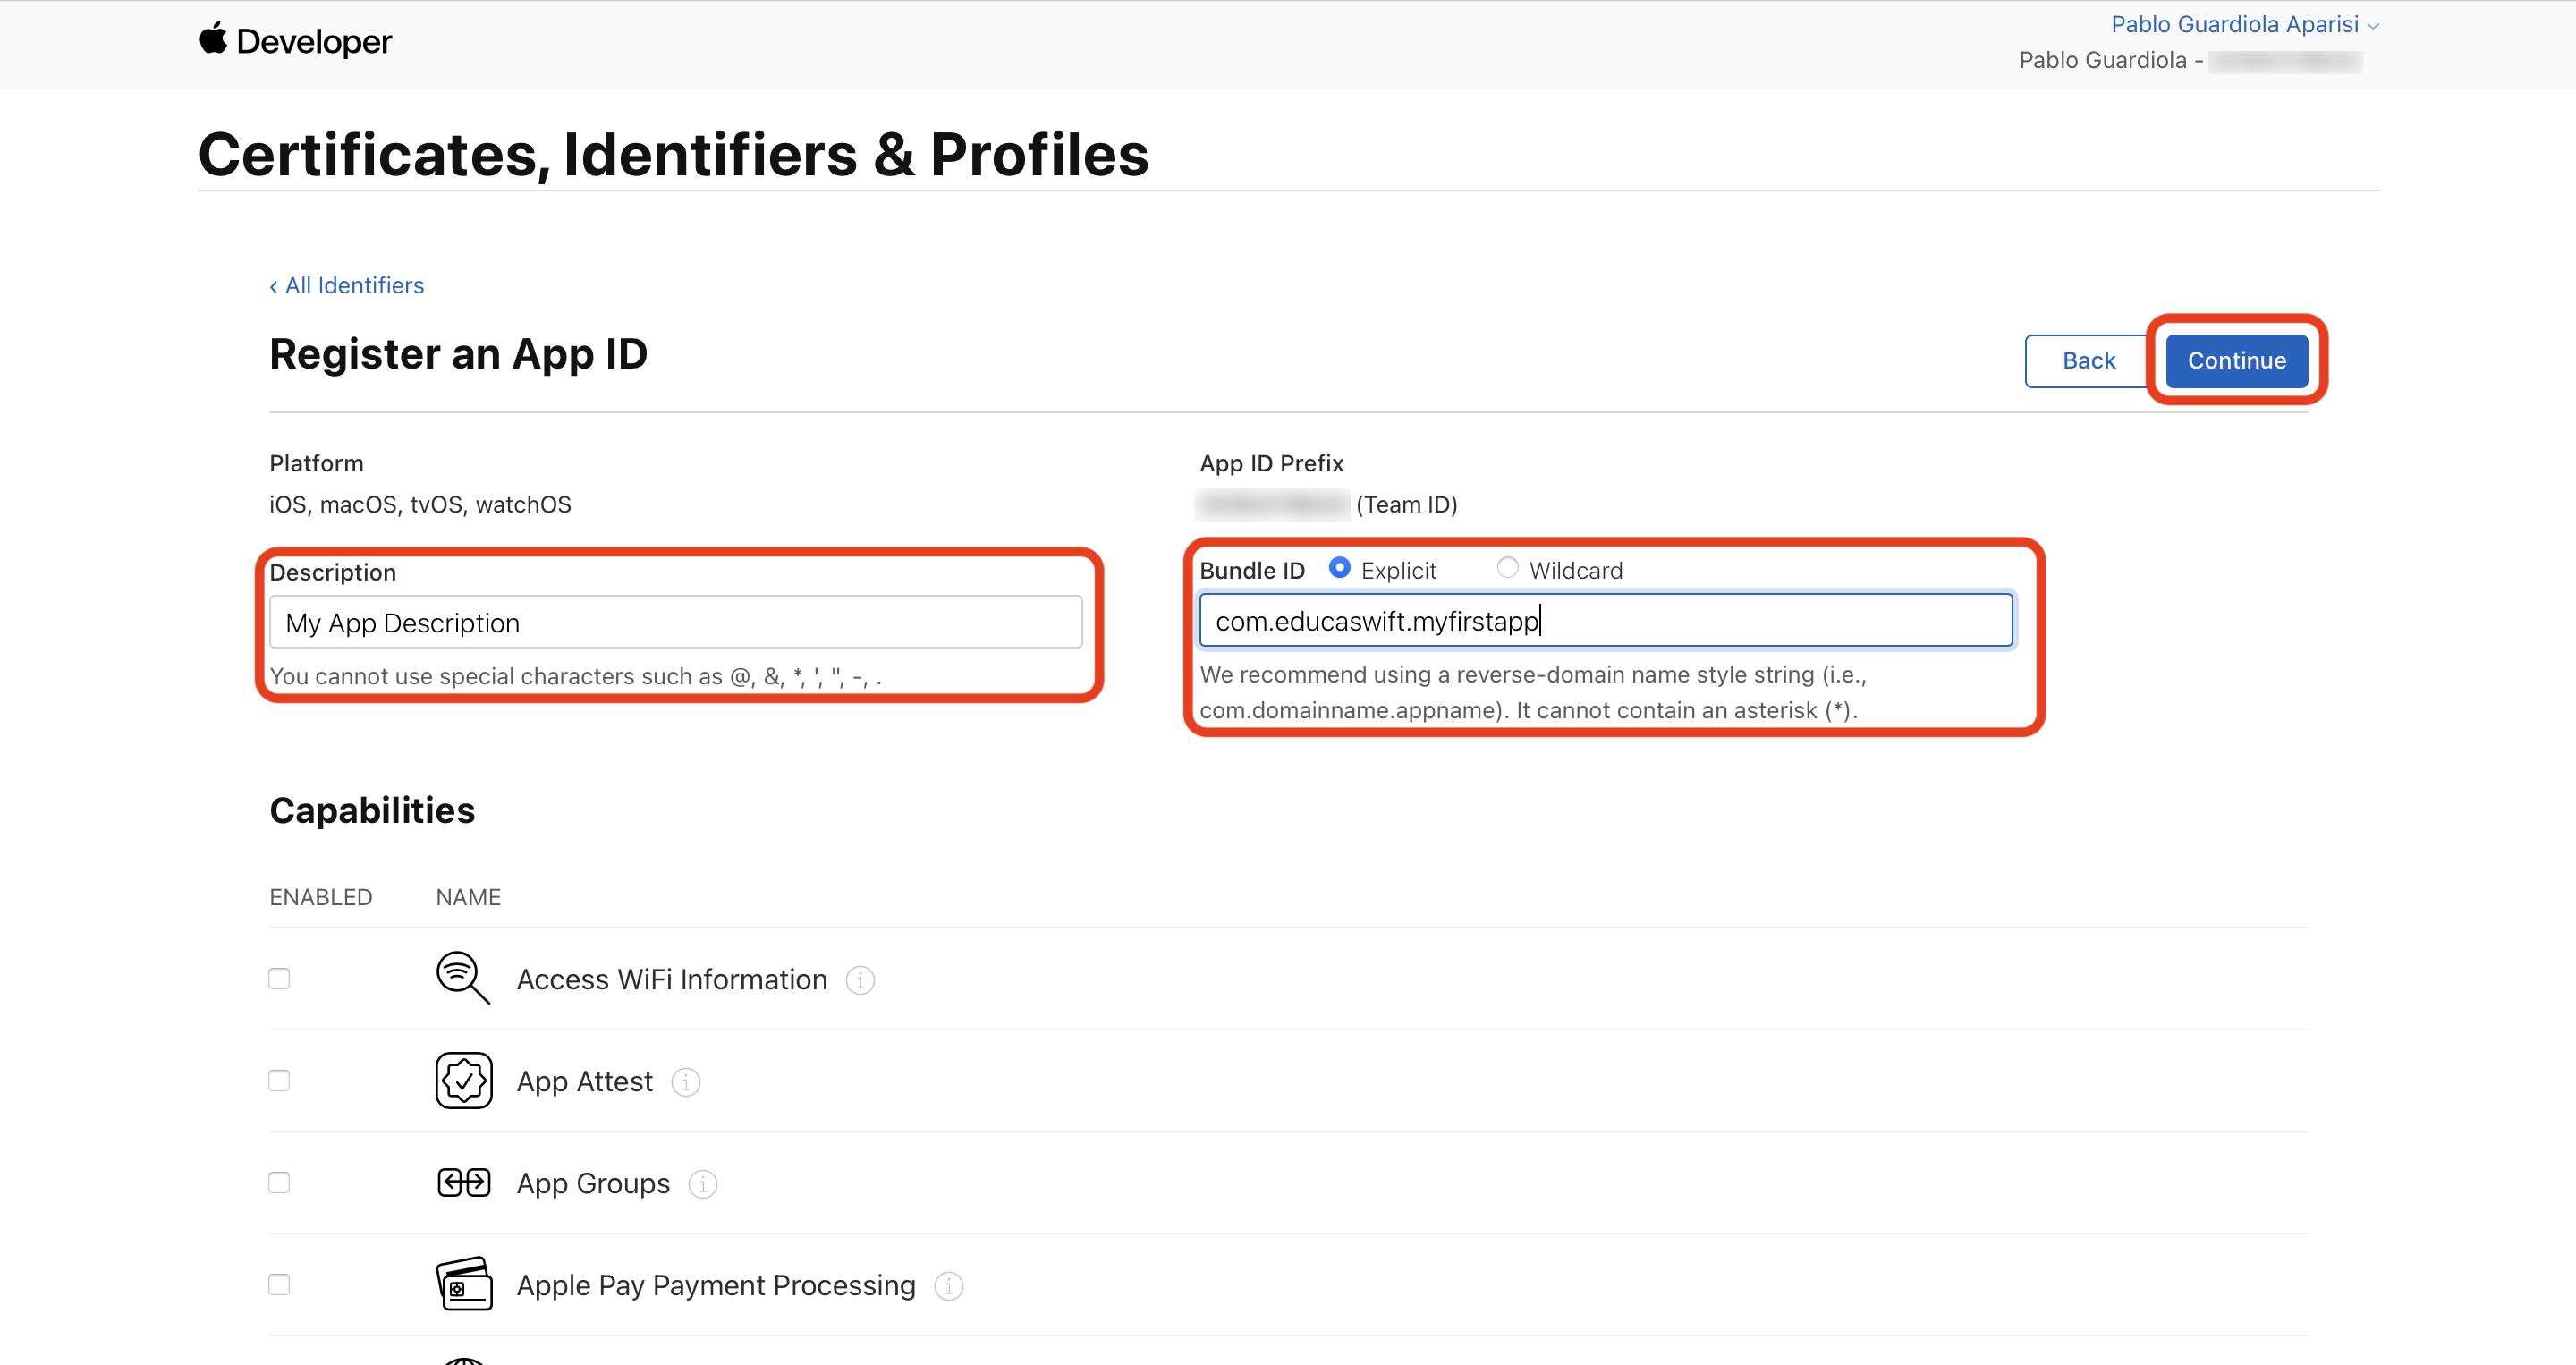
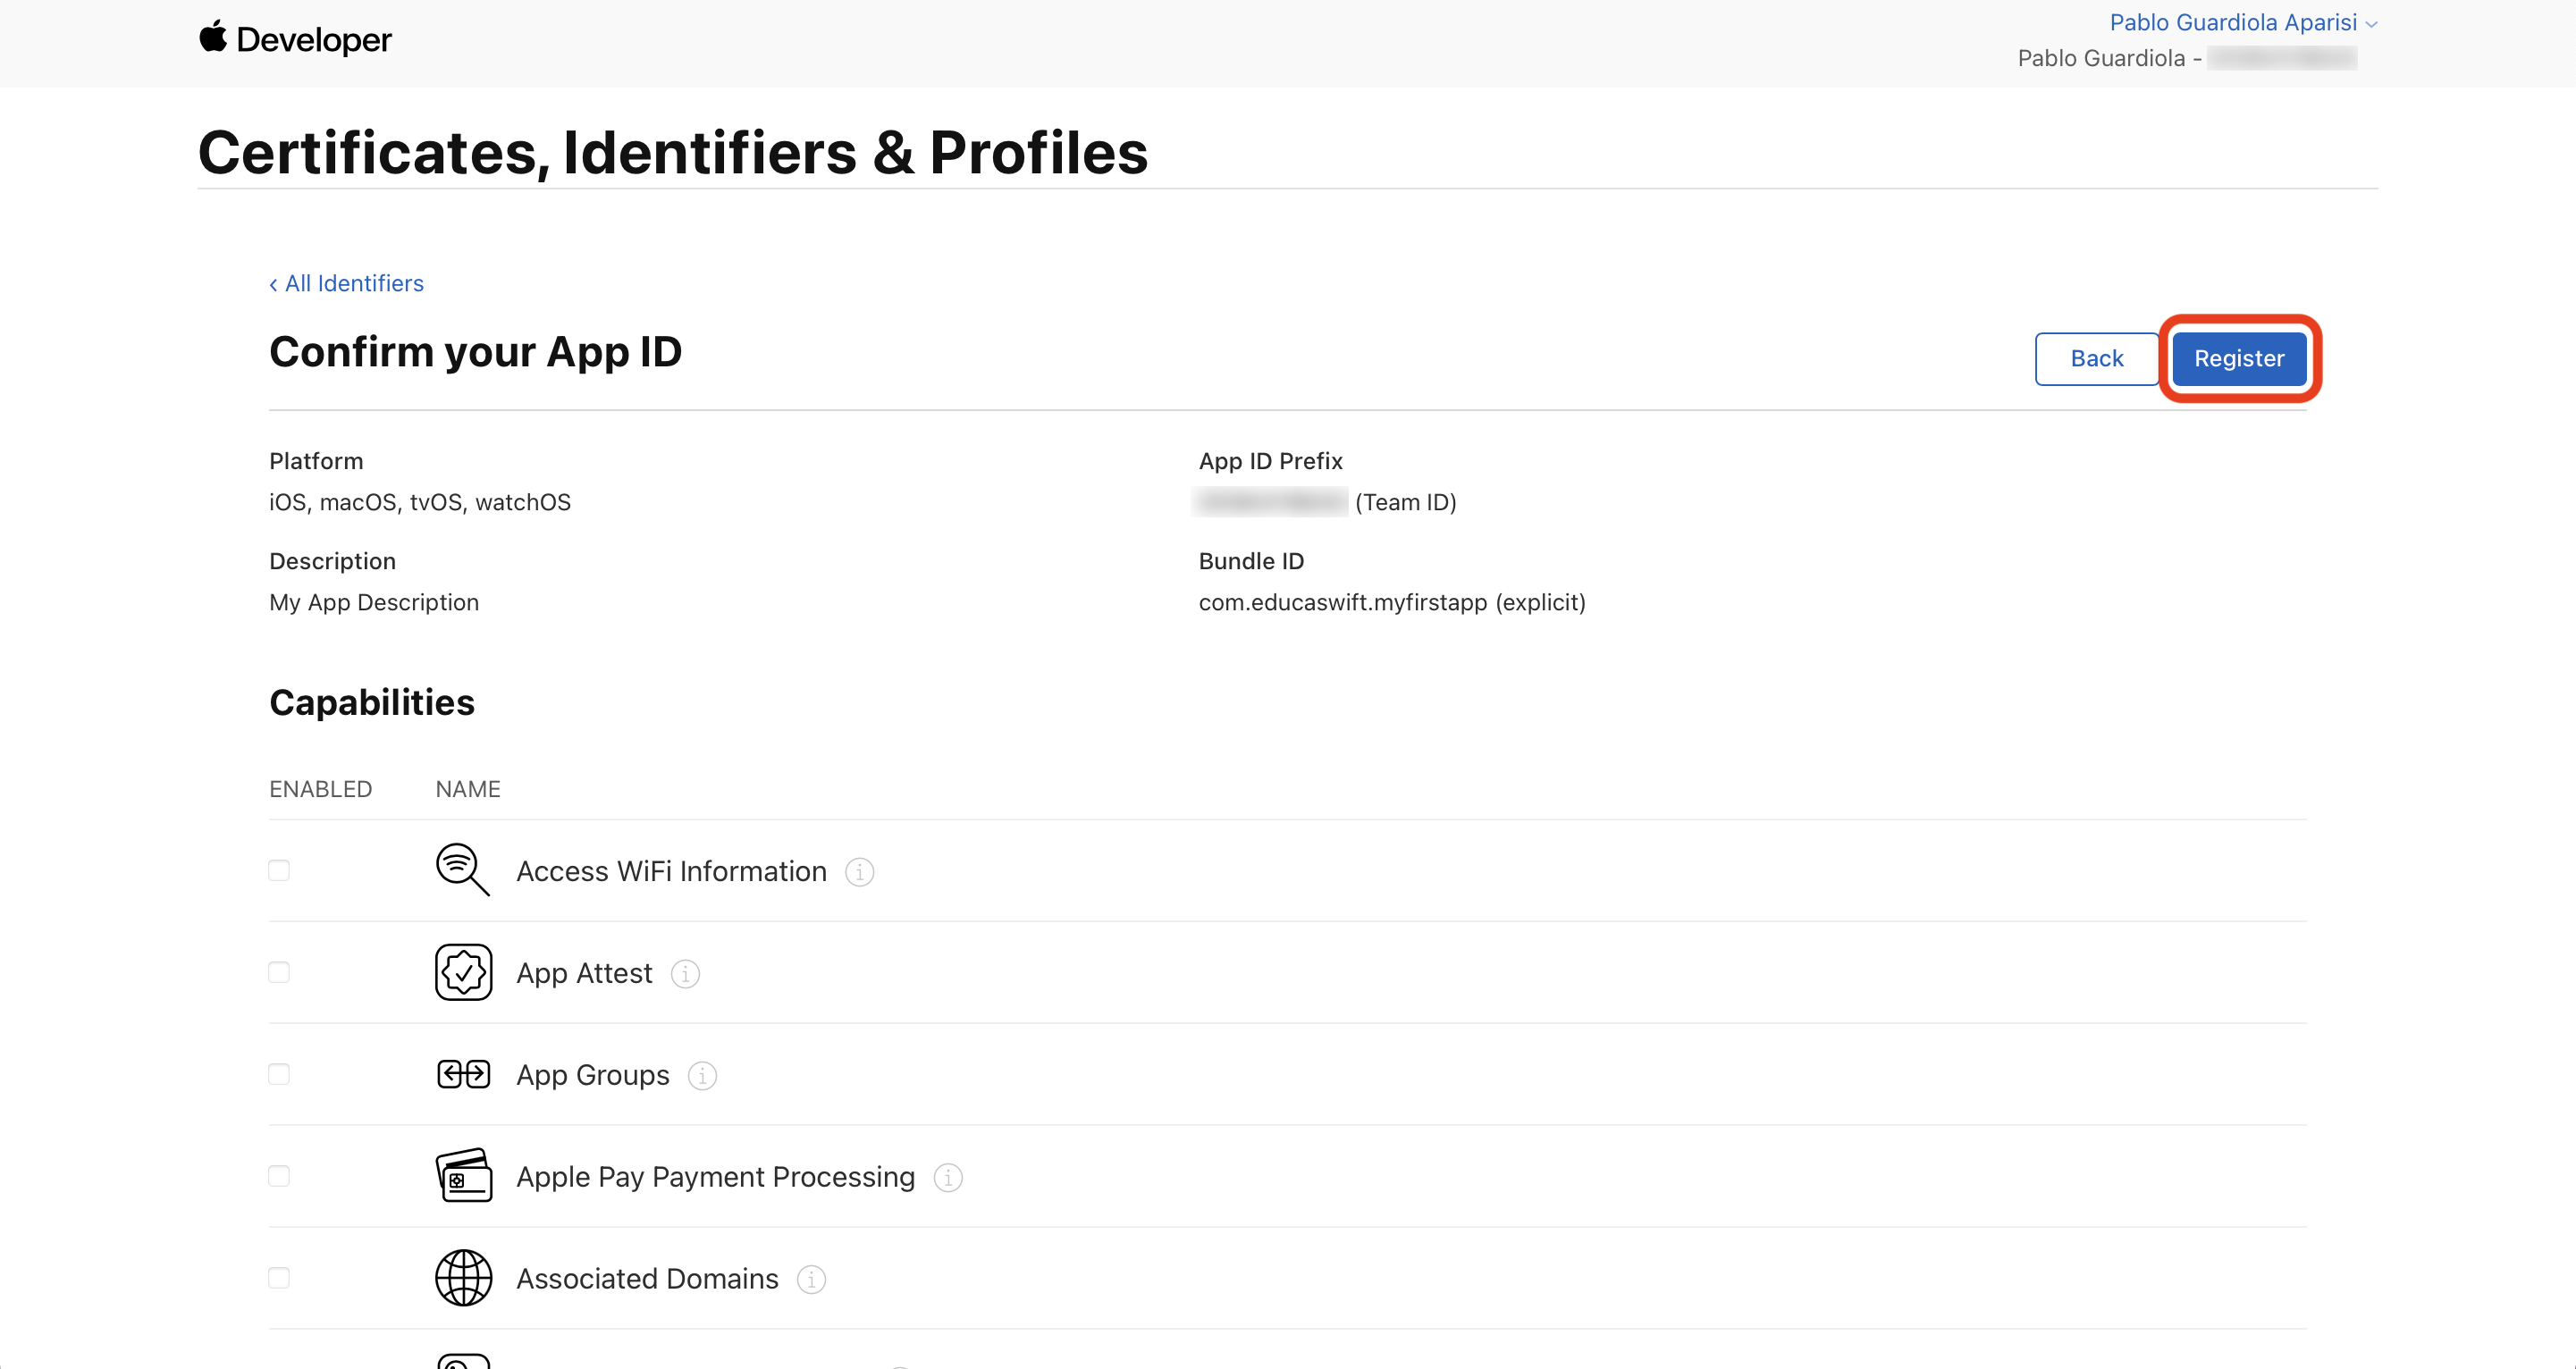
1. Identifier
The first step is to create an Identifier, which will include the bundle identifier we use in Xcode.
2. Certificate
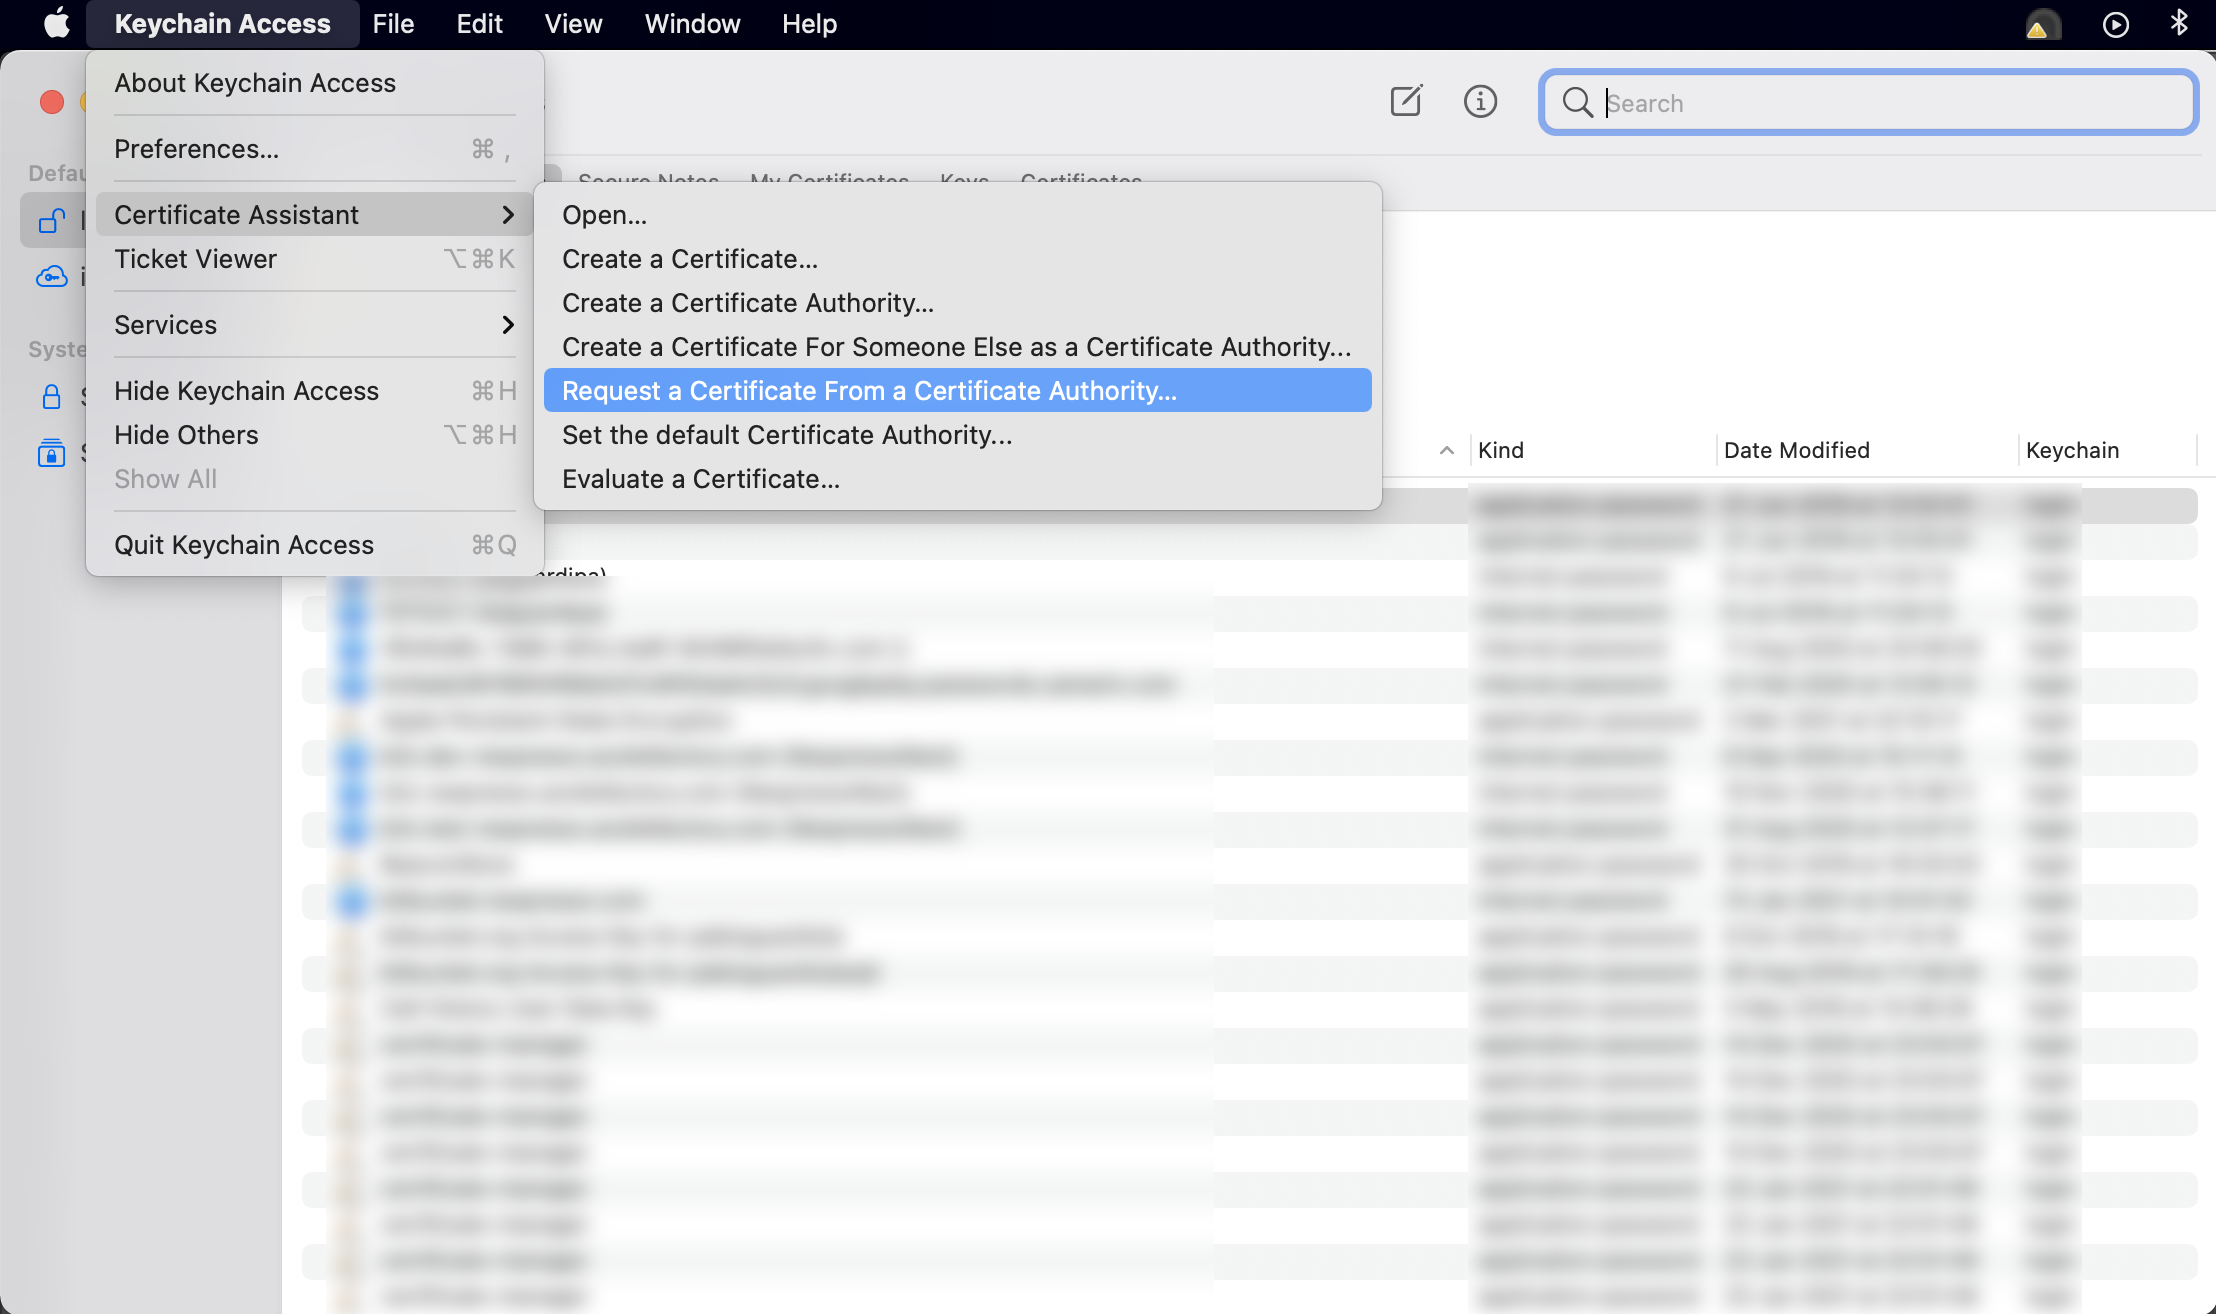
The next step is to create a Certificate Request from our Mac and use it to create a certificate from our account. Let’s go step by step.
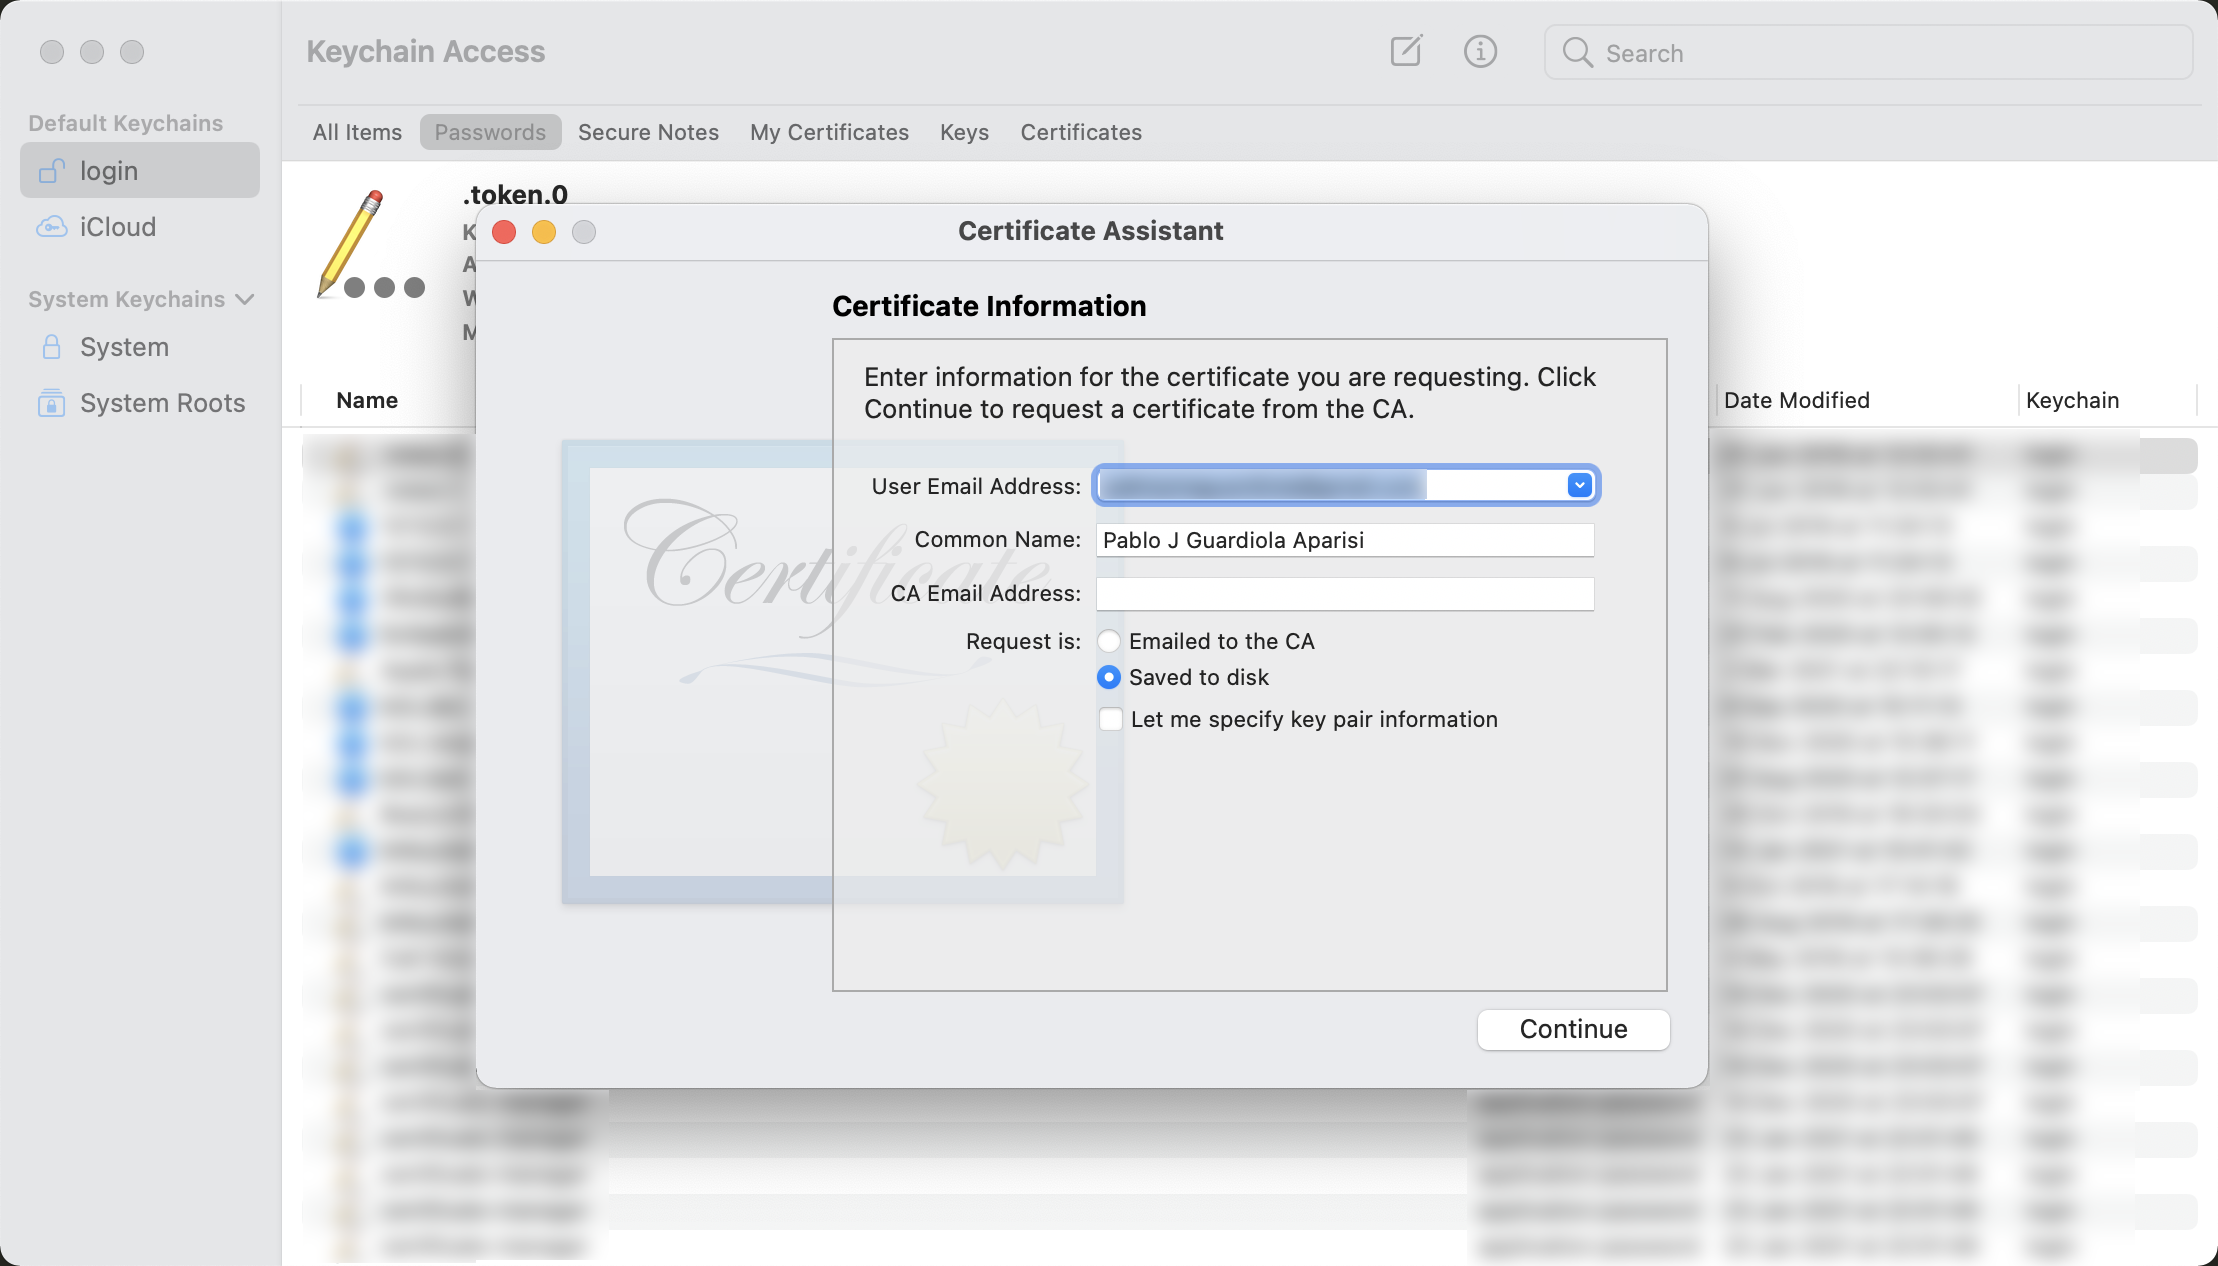
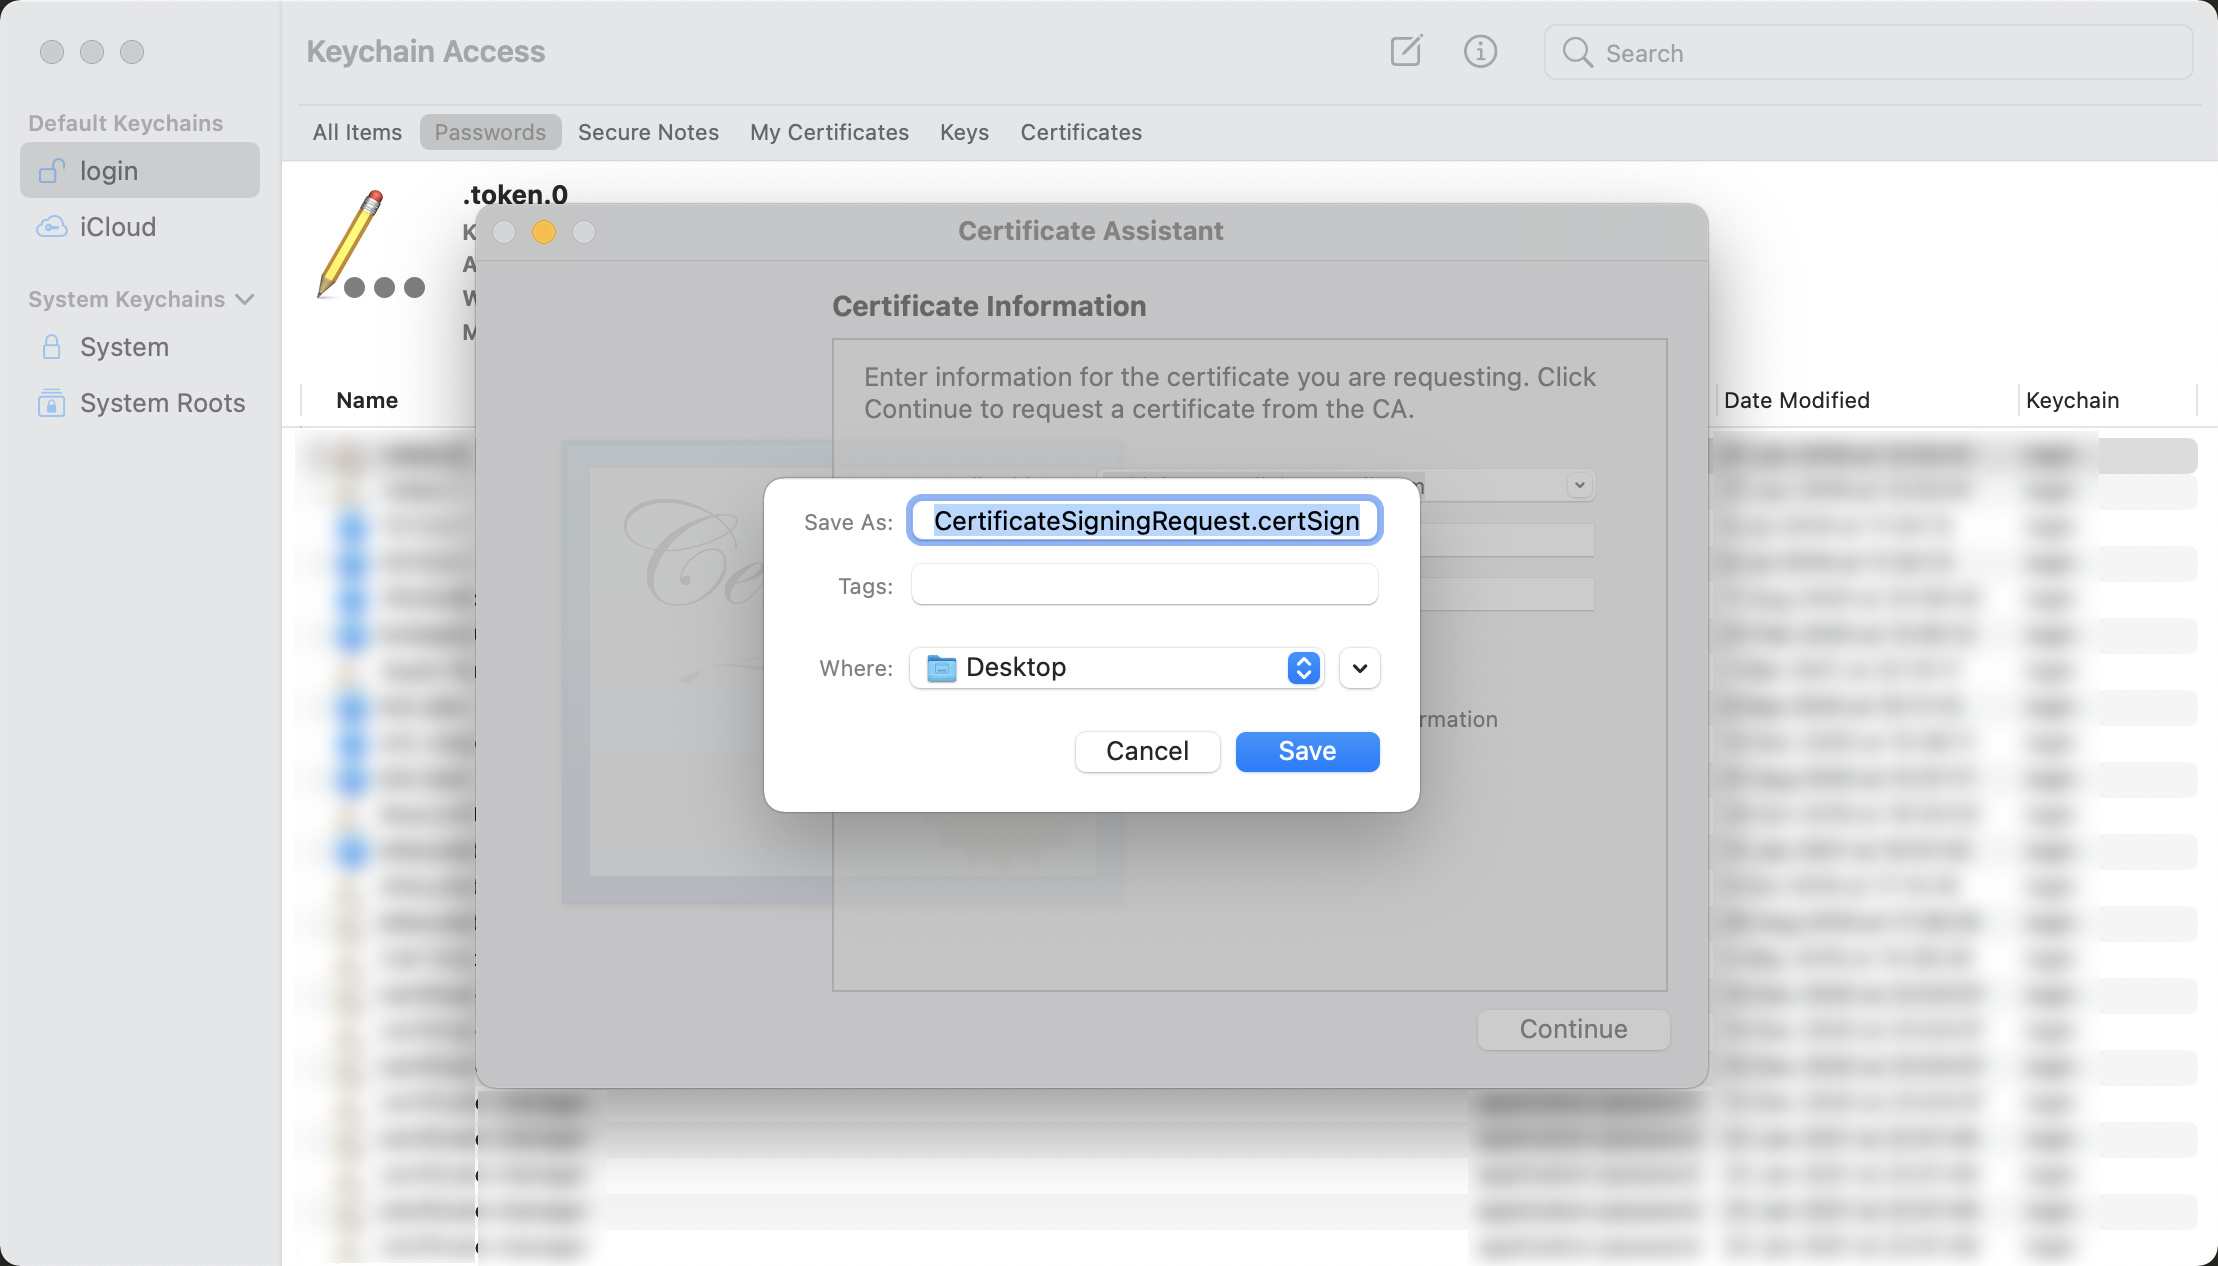
From the Mac app Keychain Access, we will create a Certificate Request by clicking Keychain Access -> Certificate Assistant -> Request a Certificate From a Certificate Authority.
Select Saved to disk and save it wherever you want.
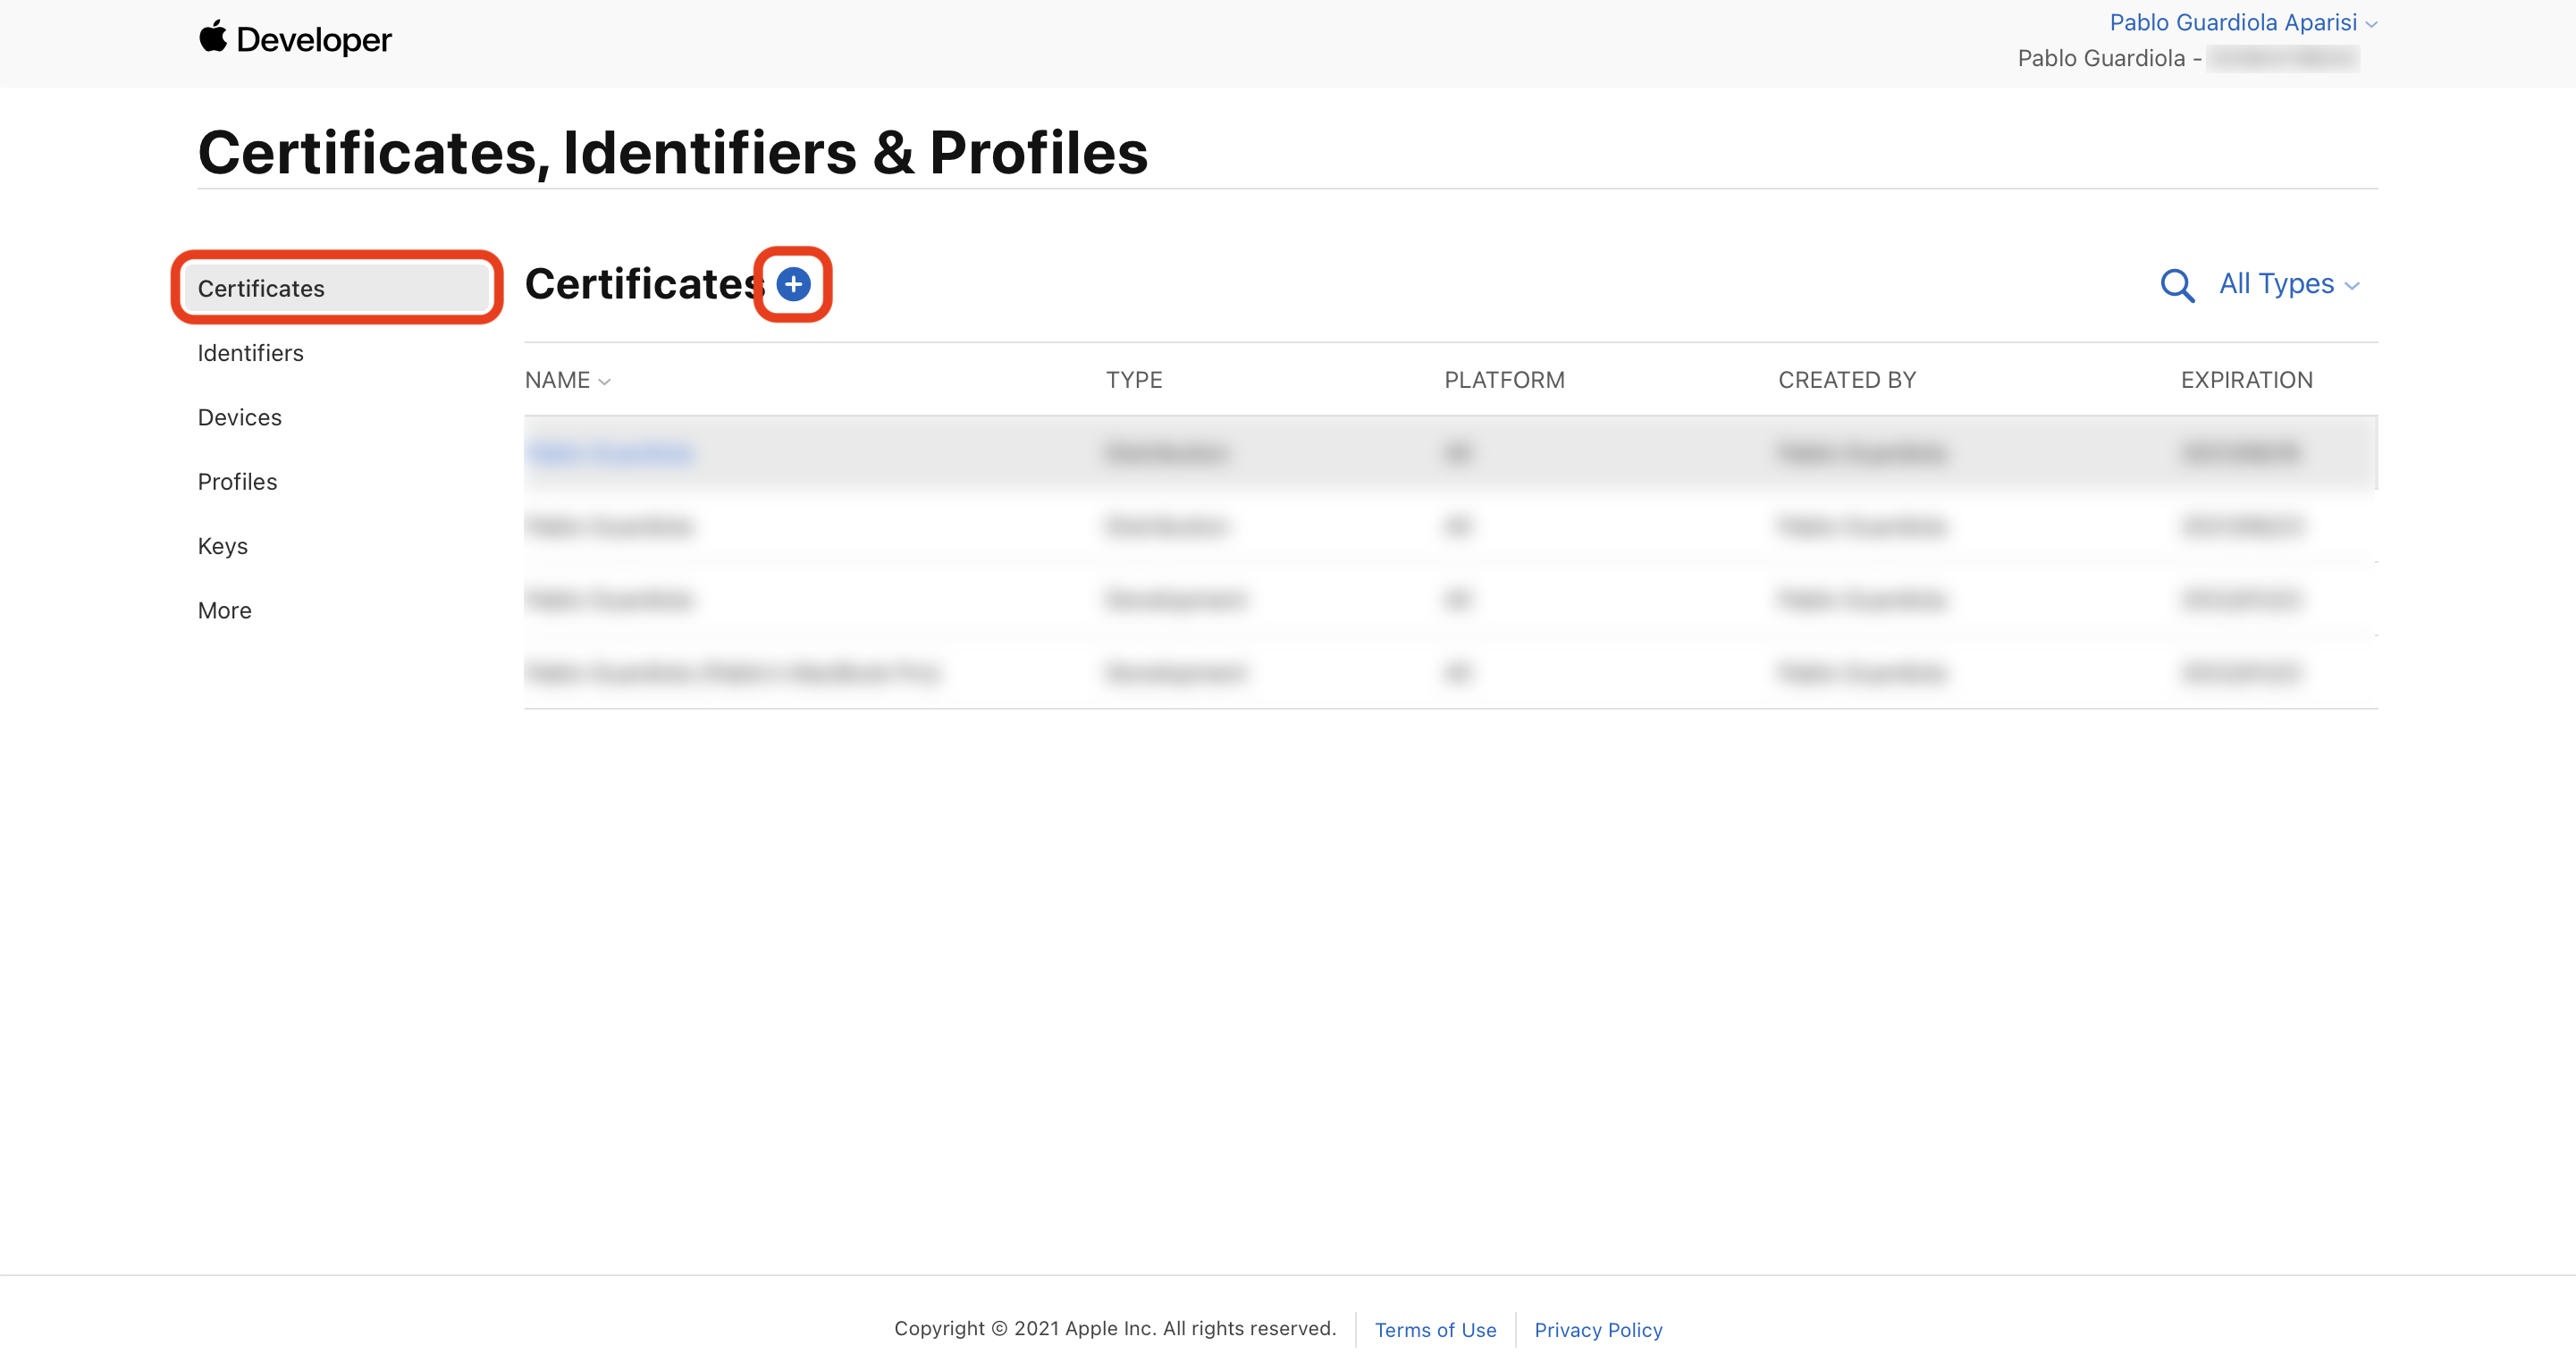
Once we have the Certificate Request, we will create a certificate from our developer account.
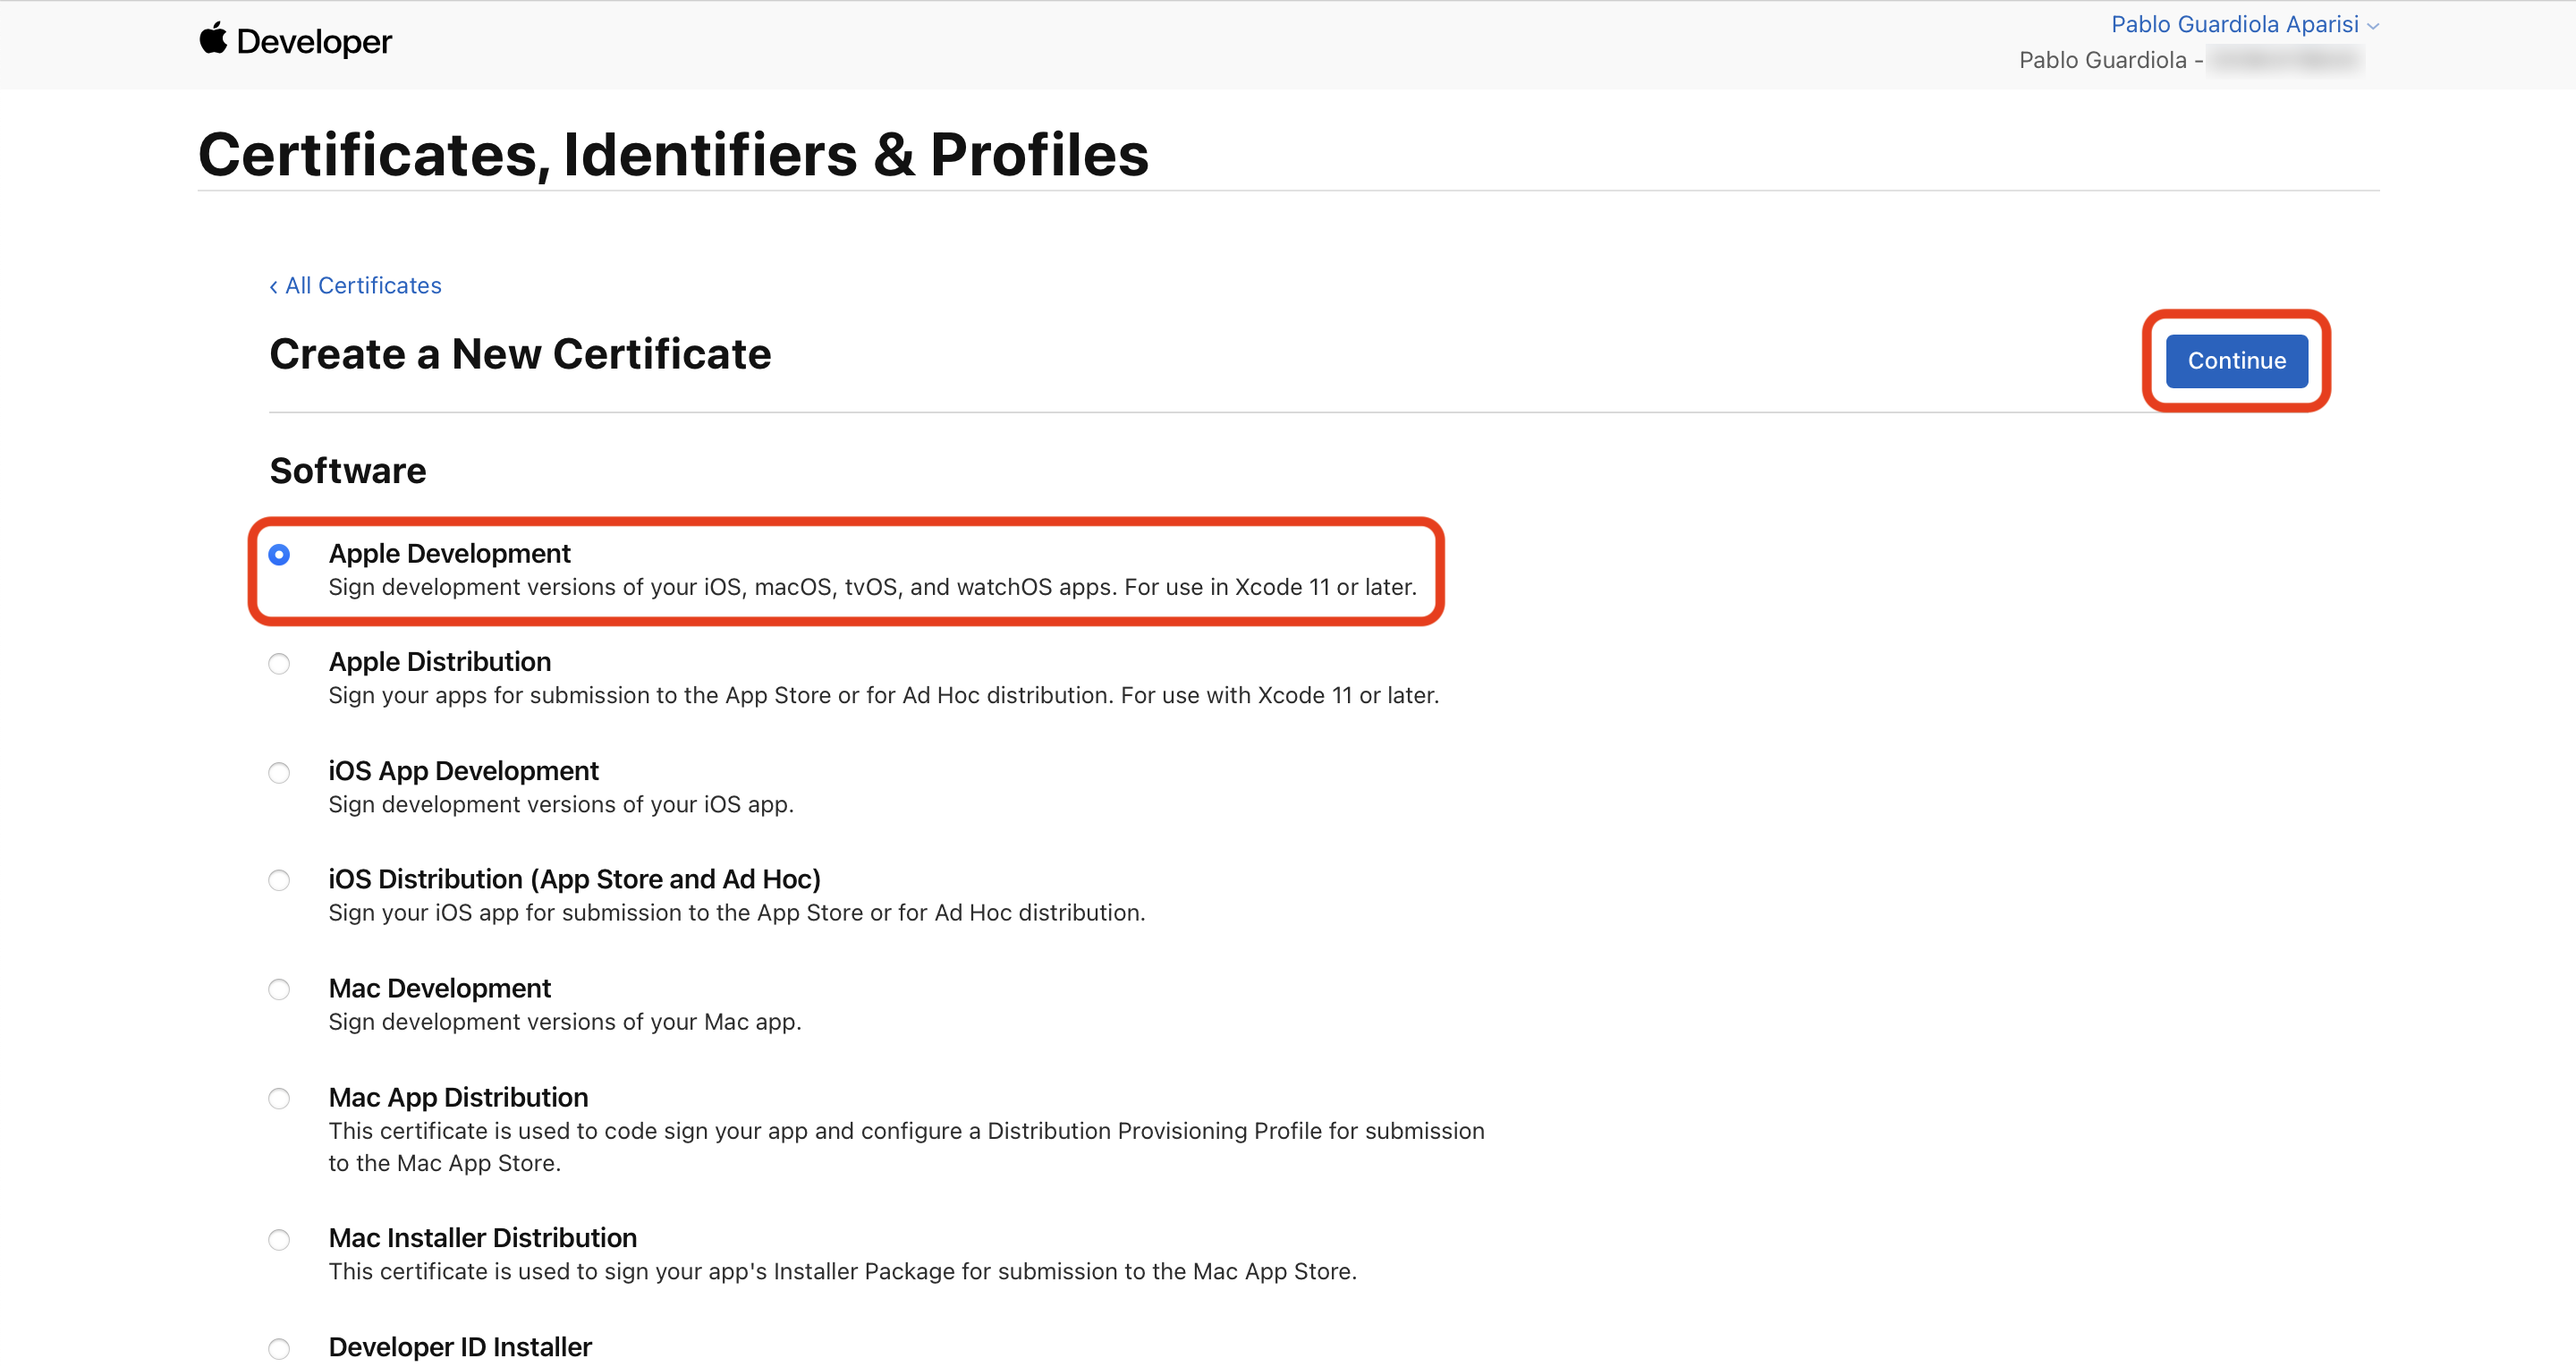
For this example we will select a development certificate. To create a distribution certificate, the only difference will be that we will select the second option (Apple Distribution).
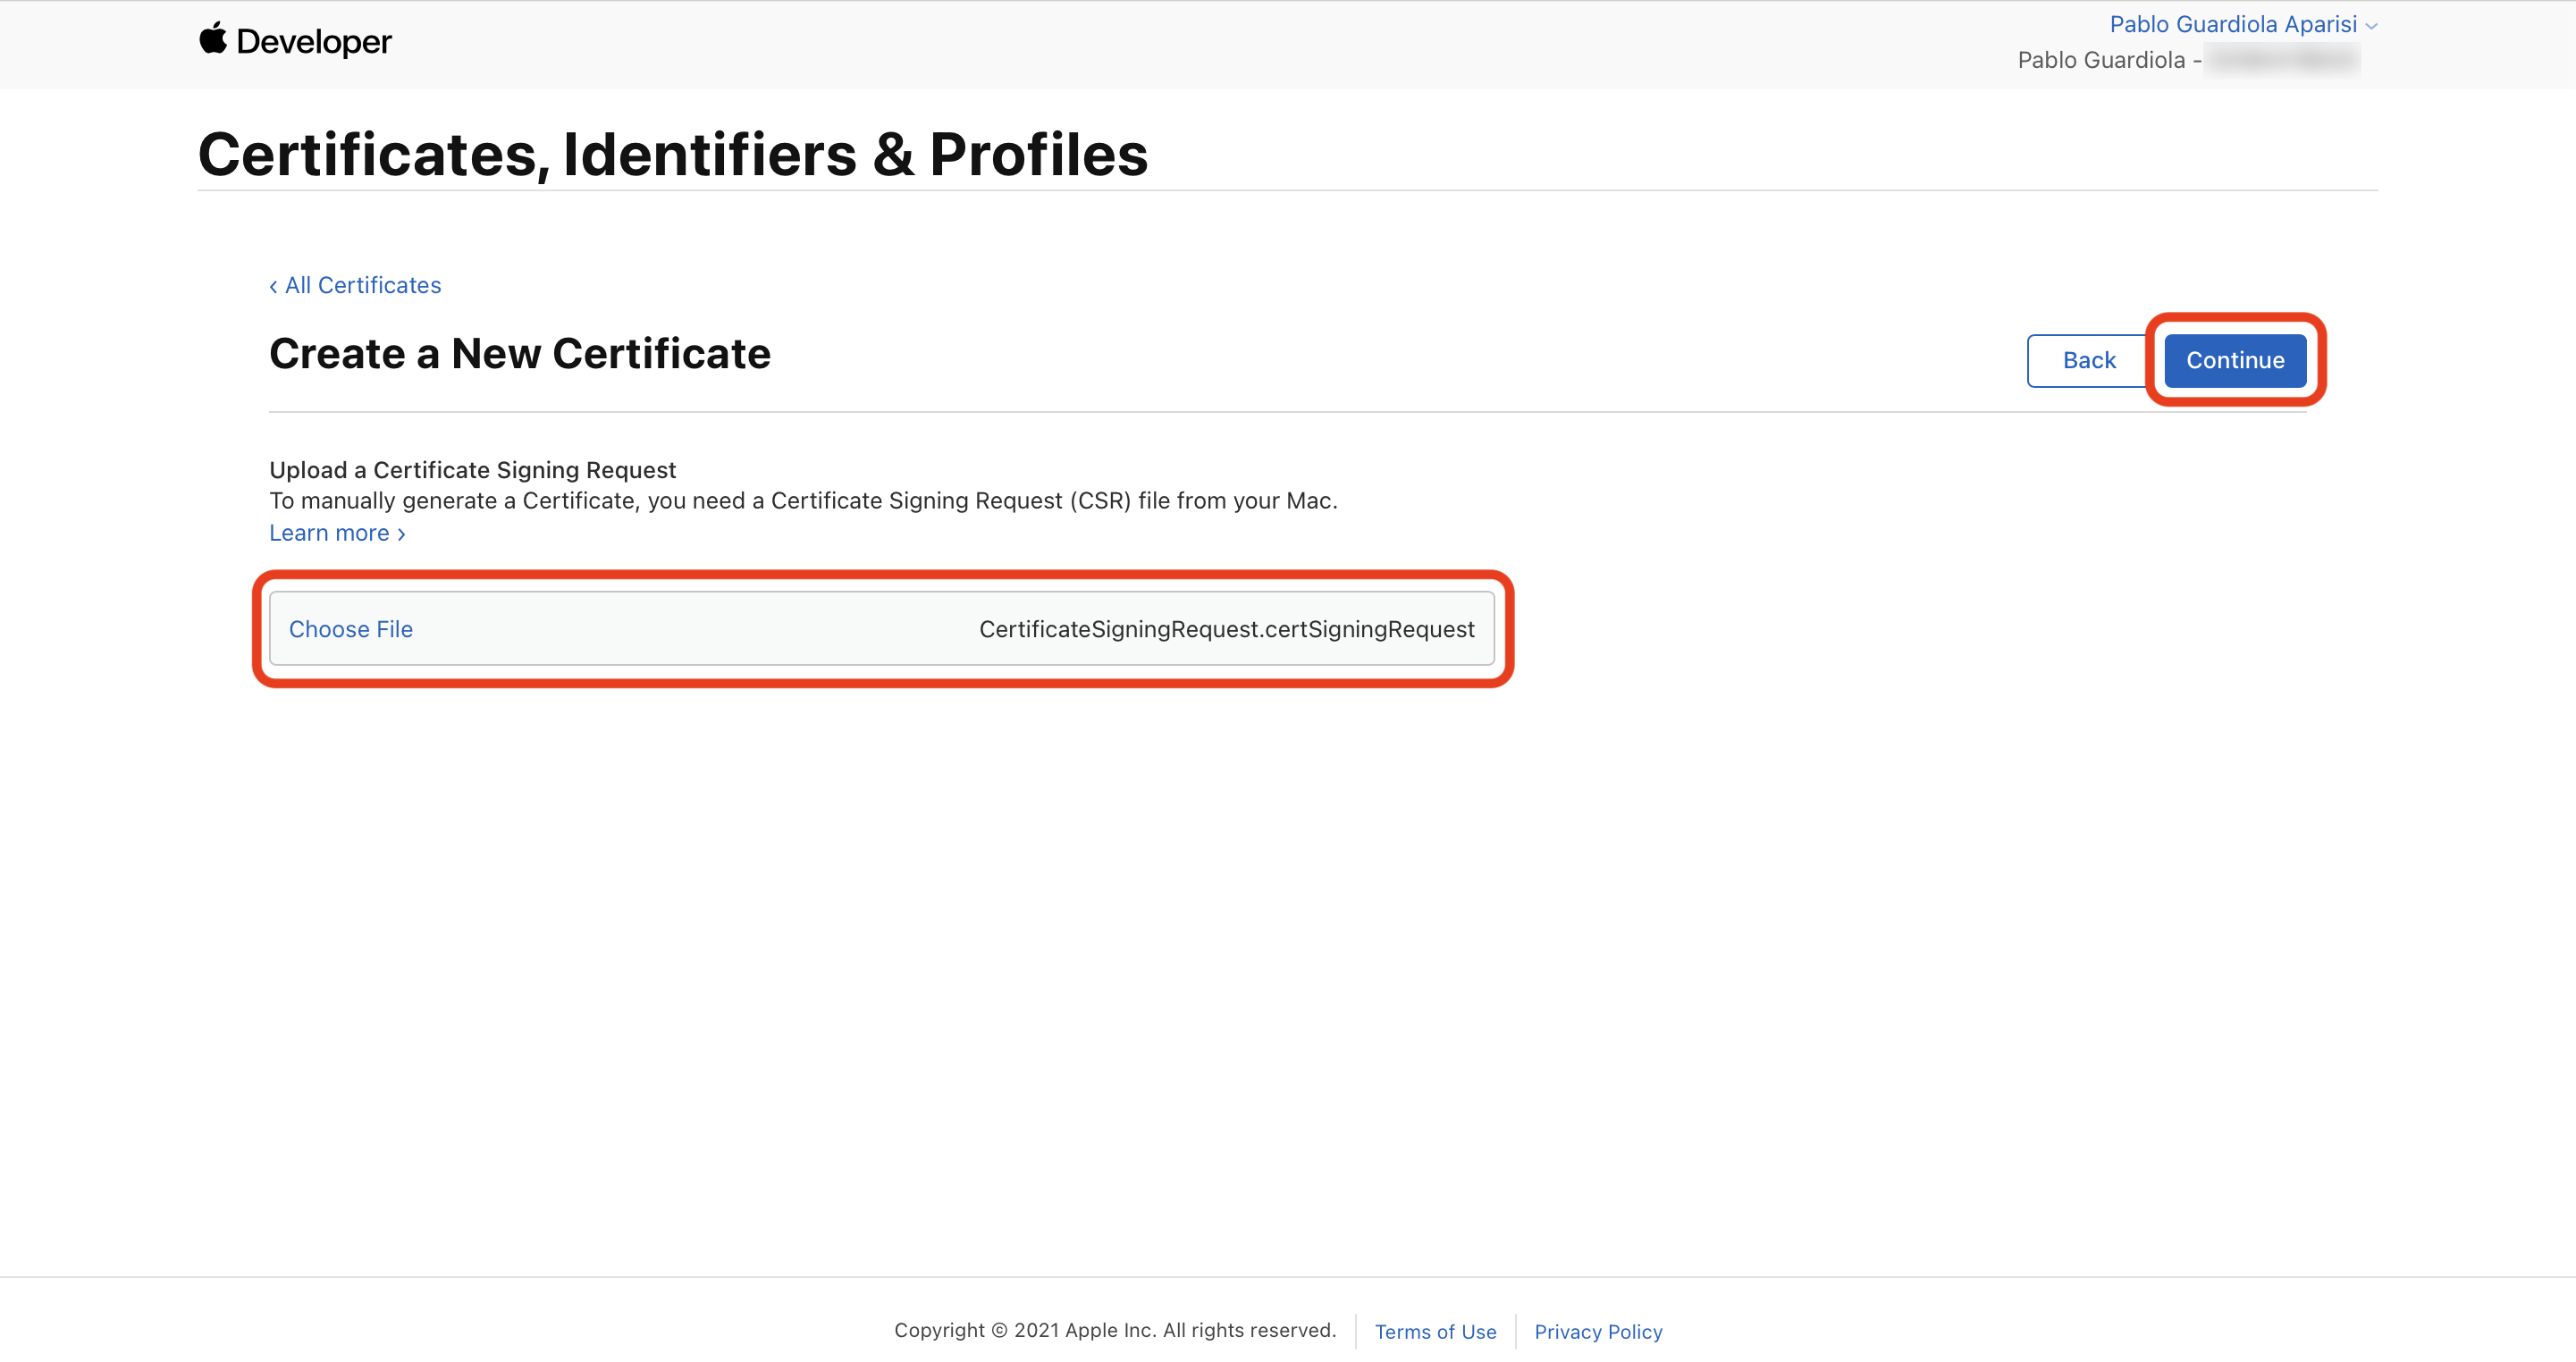
We will select the Certificate Request that we just created (this is used for development and distribution) and click on Continue.
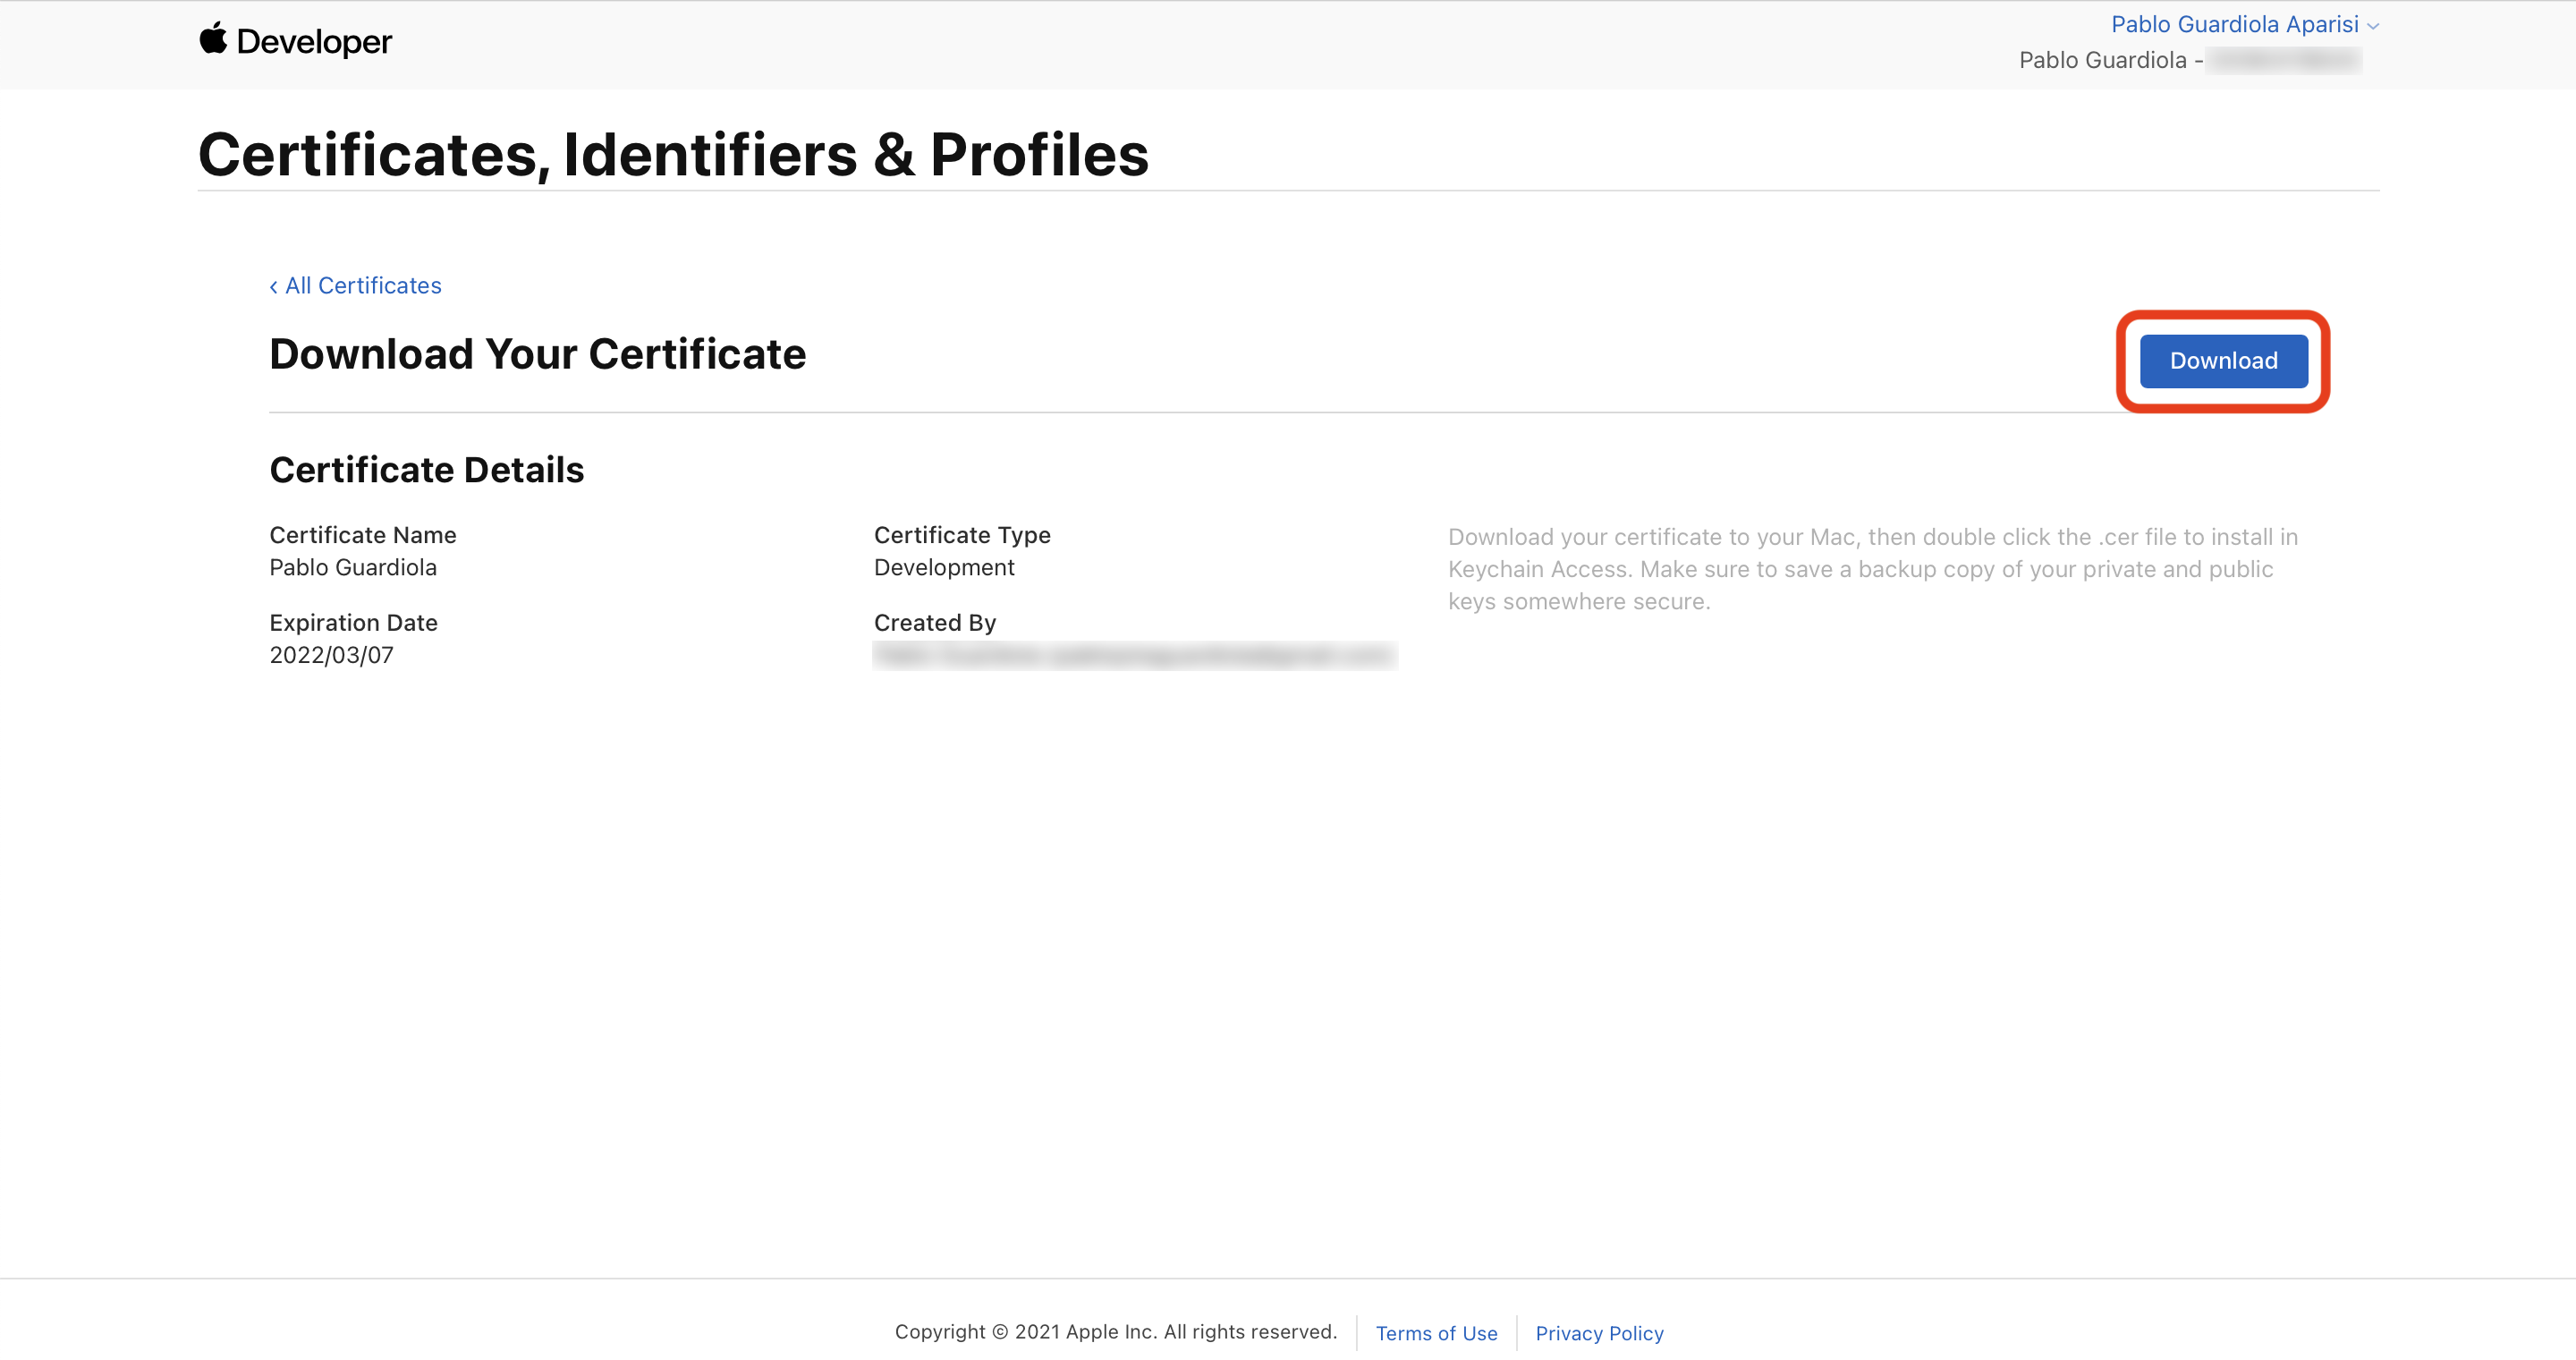
Once generated, we download it and install it on our Mac by double clicking.
3. Devices
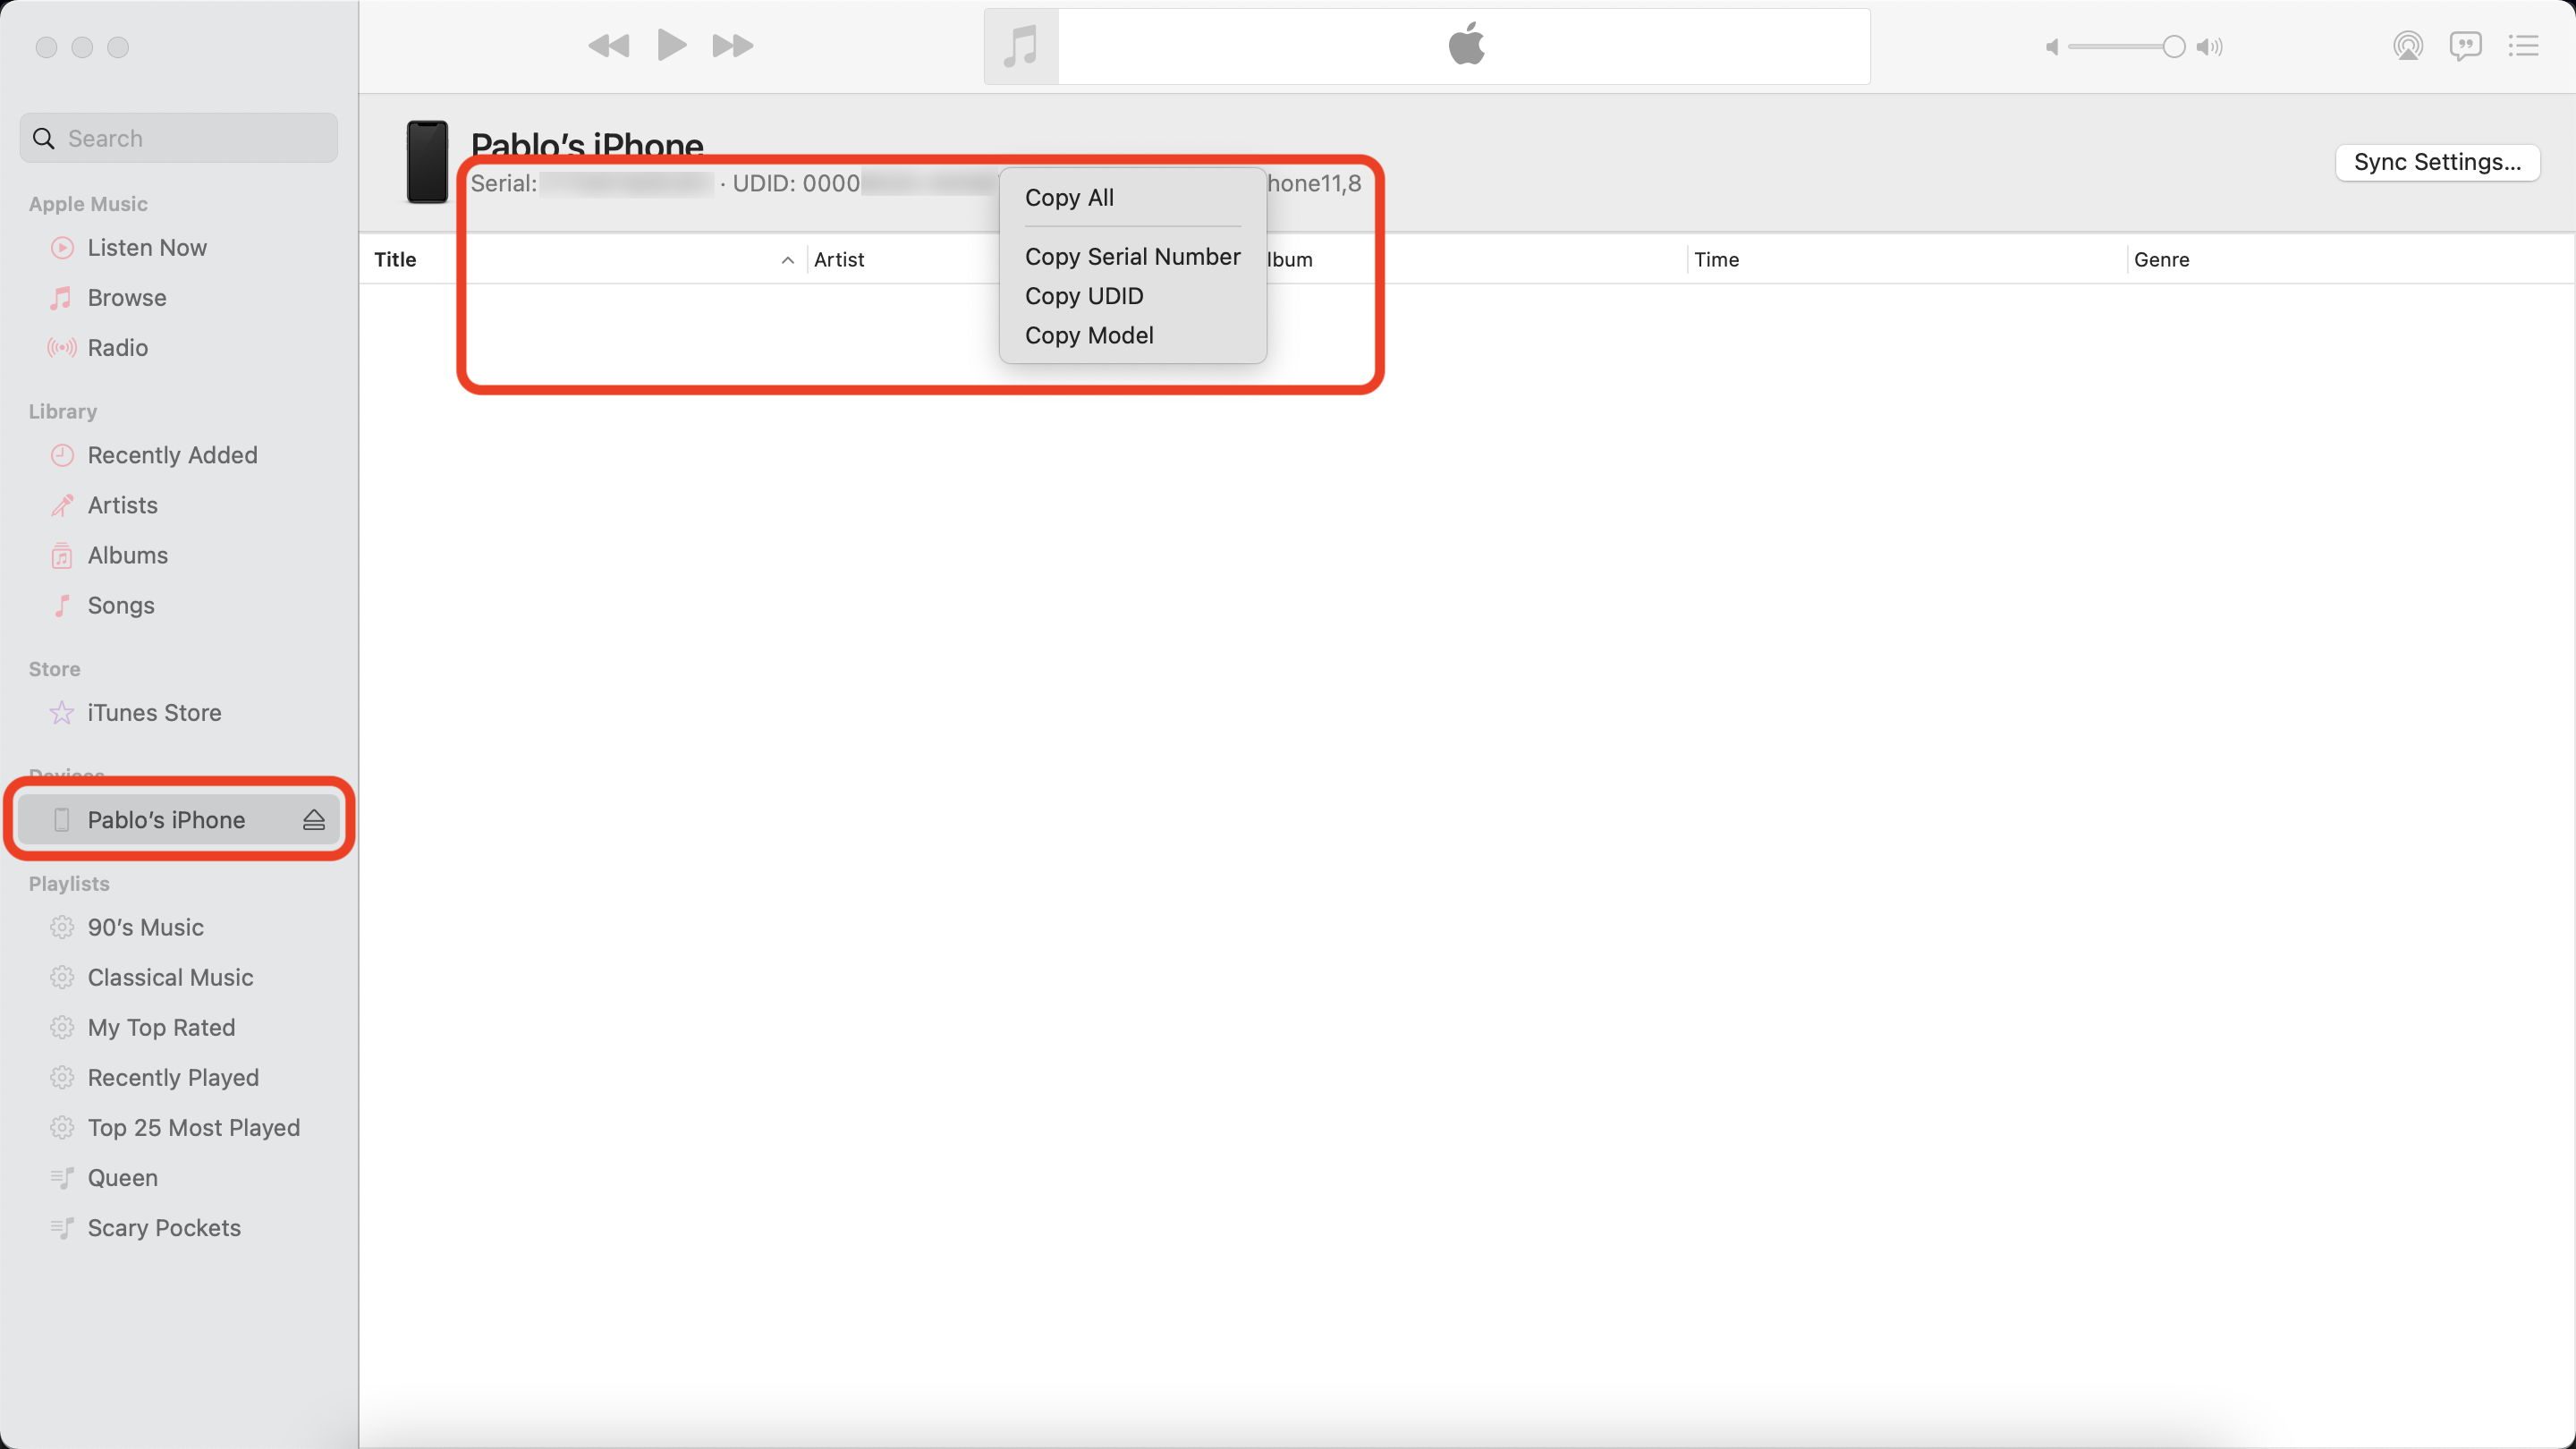
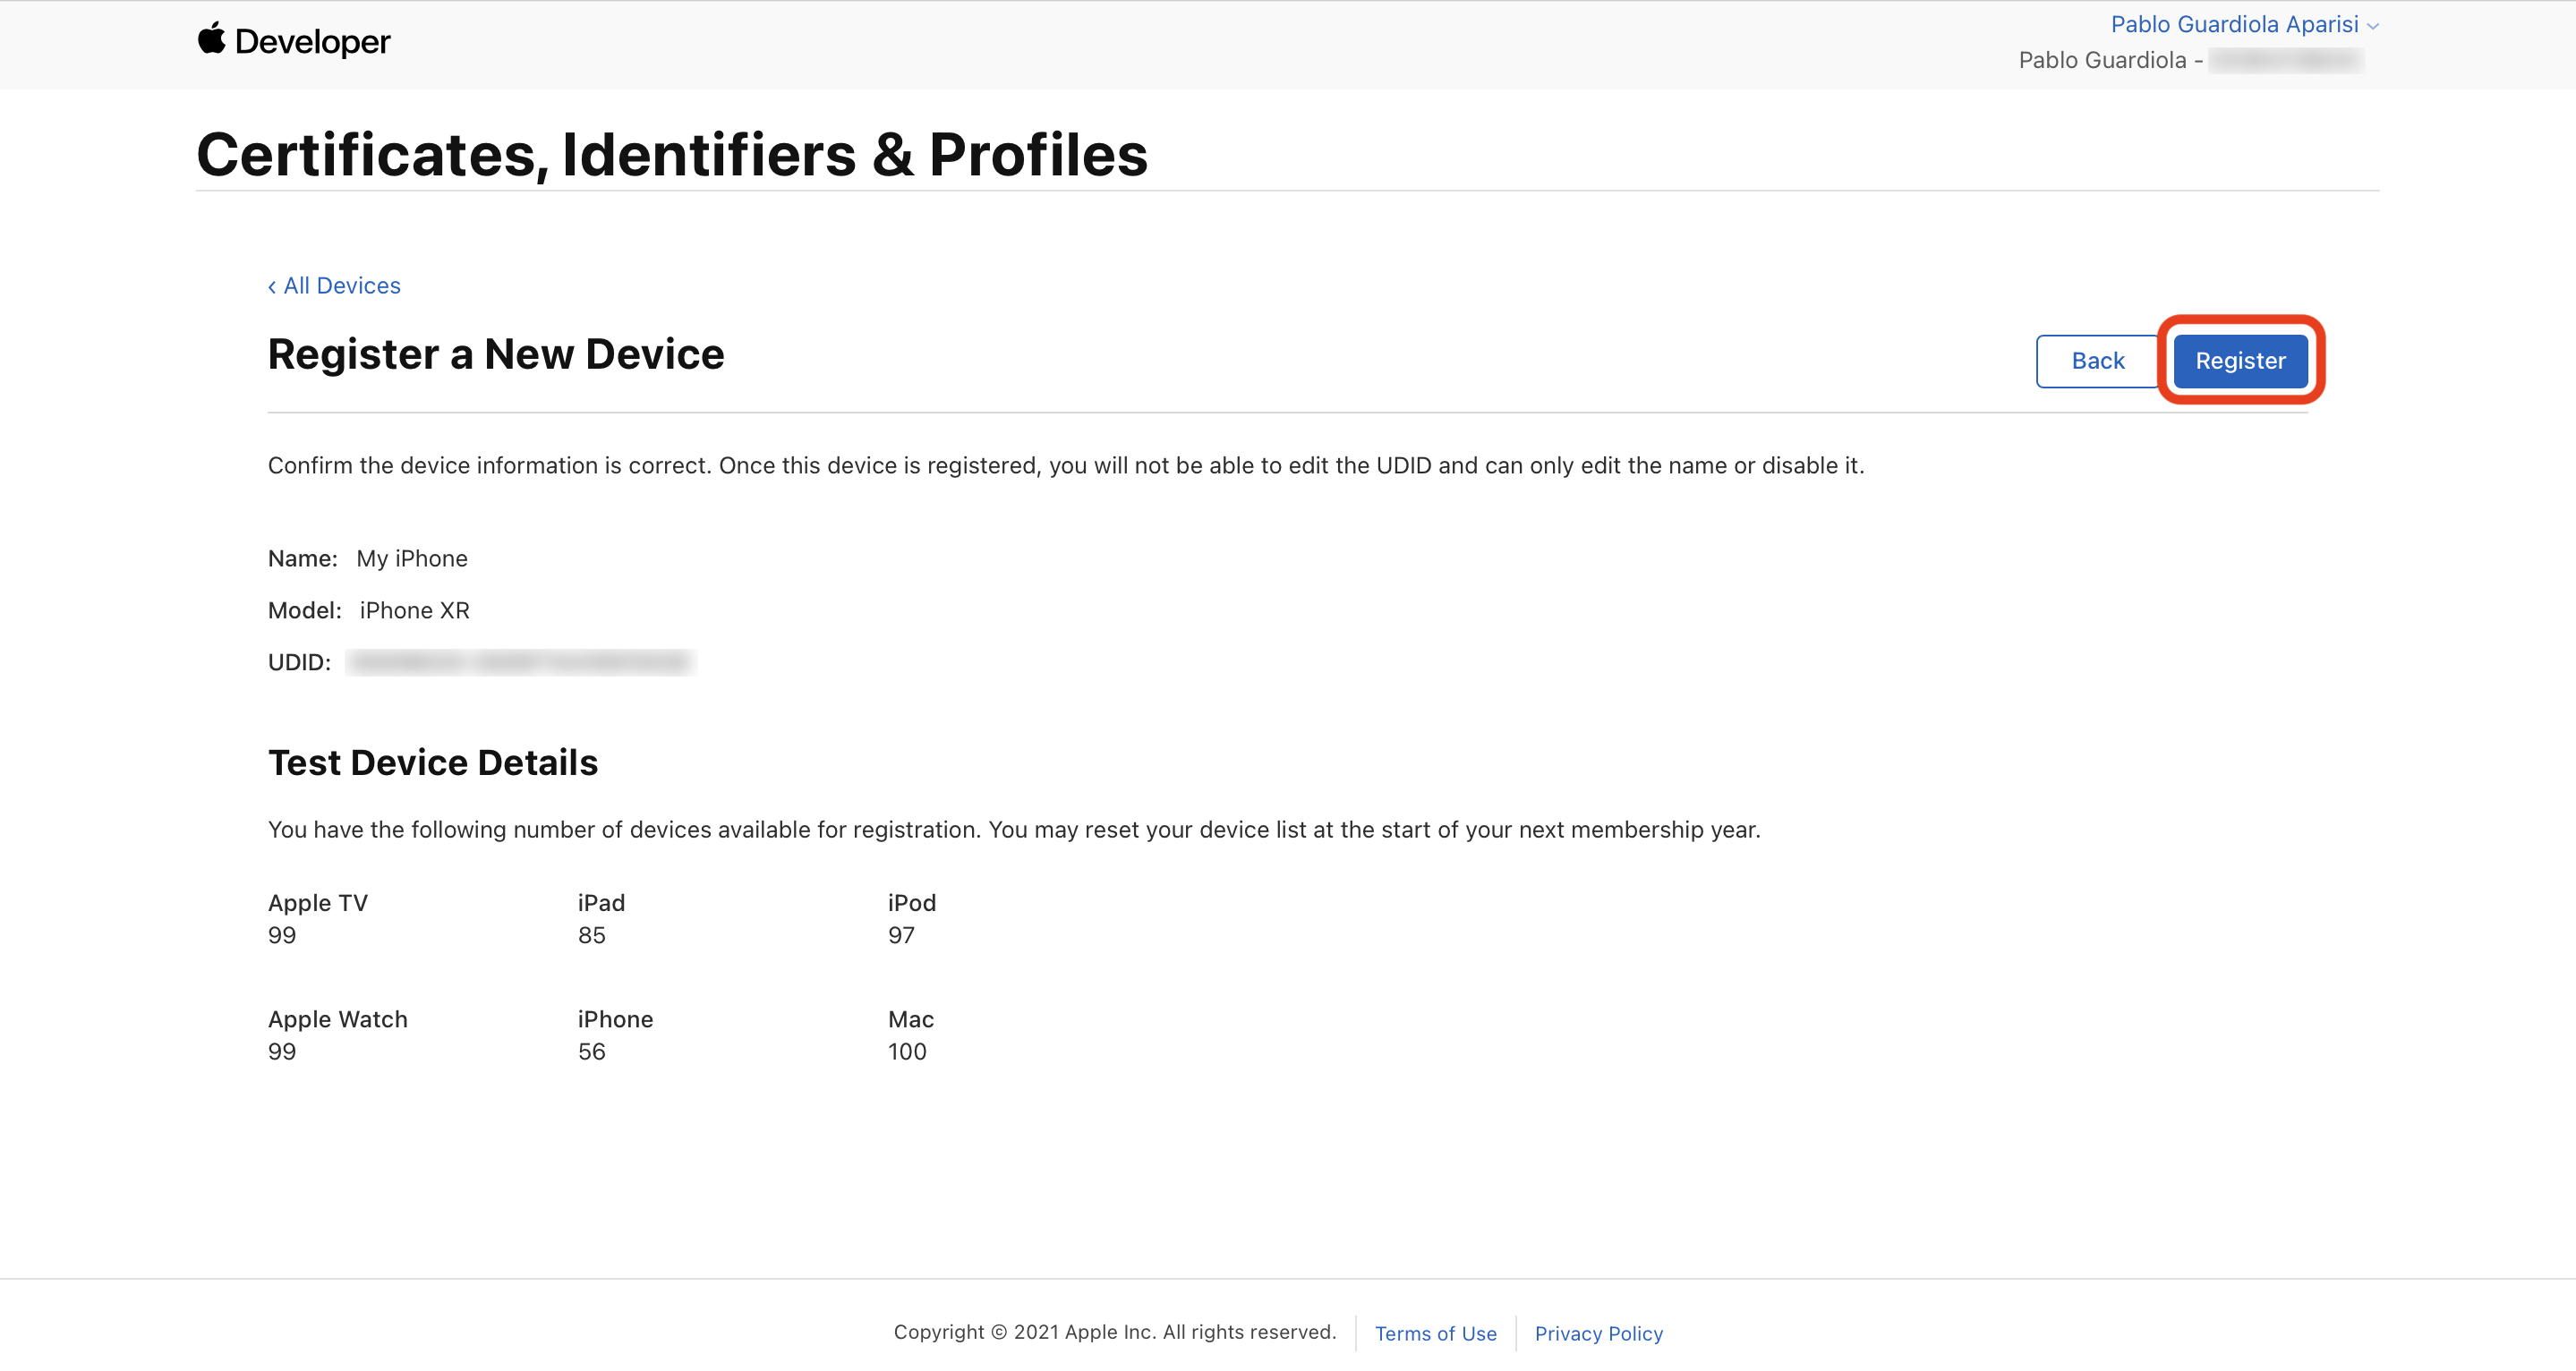
All devices on which we want to install our app must be registered. For this, we need the device’s UDID, which can be obtained by connecting it to our Mac with the Music app open. Select your device and click the text just below the name until you see the UDID, which you can copy by right-clicking.
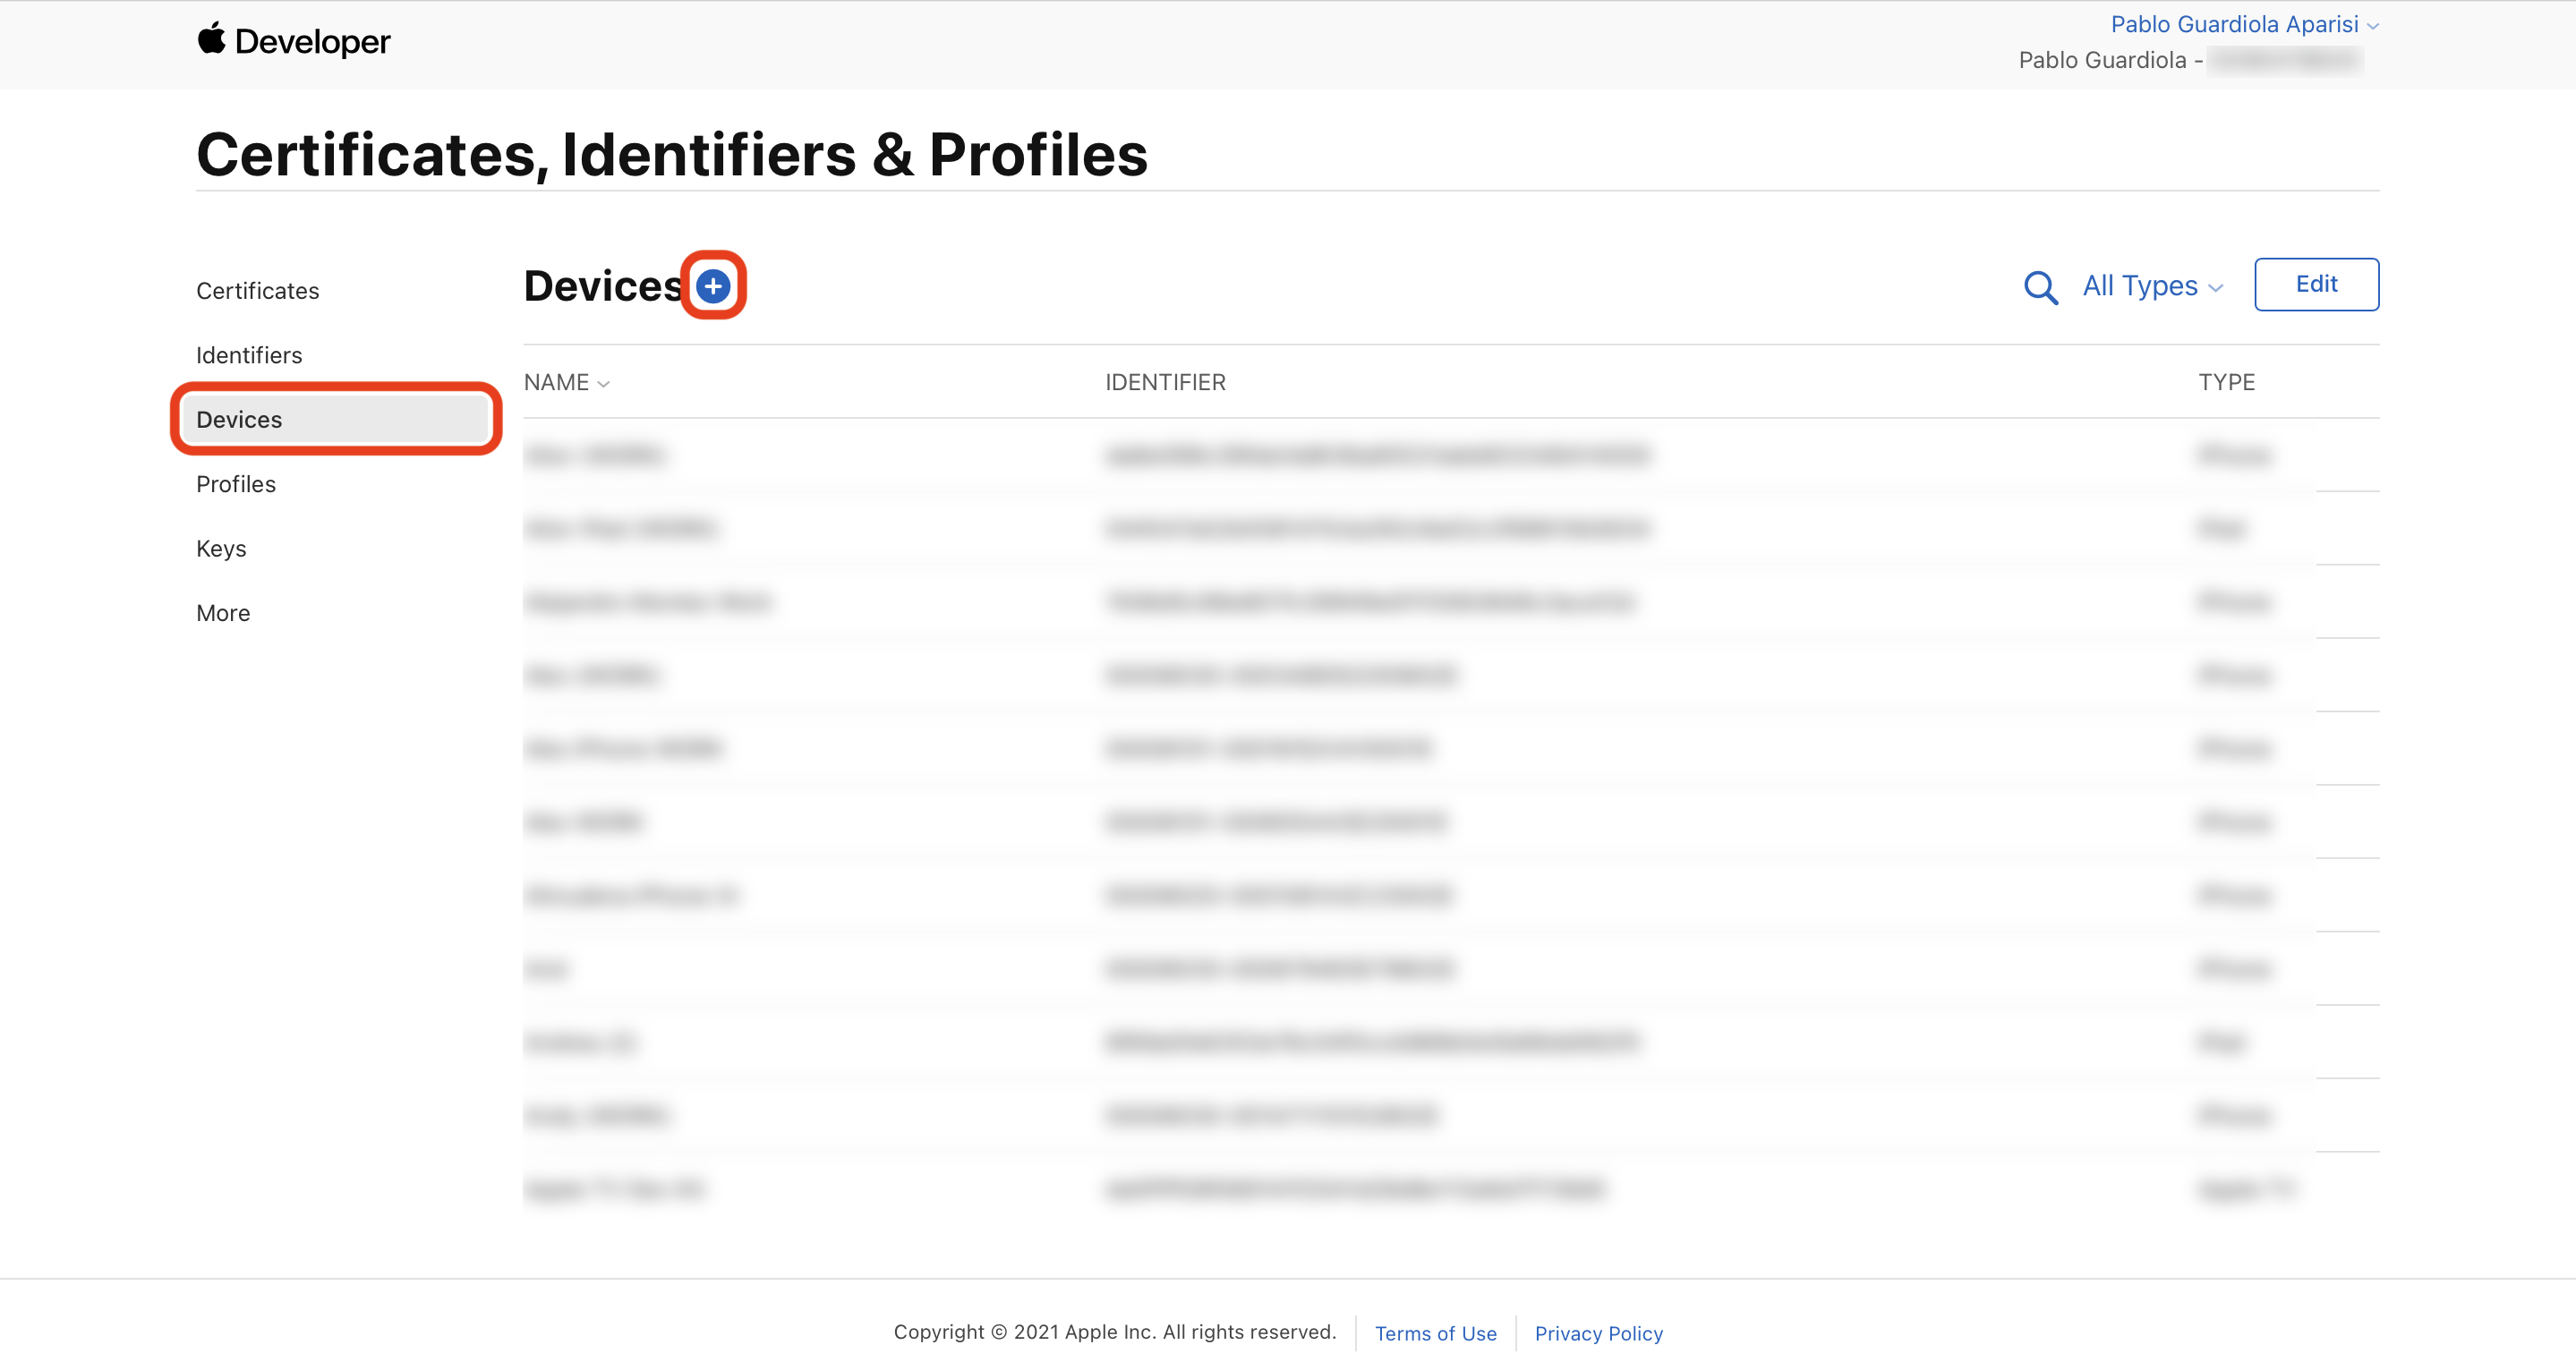
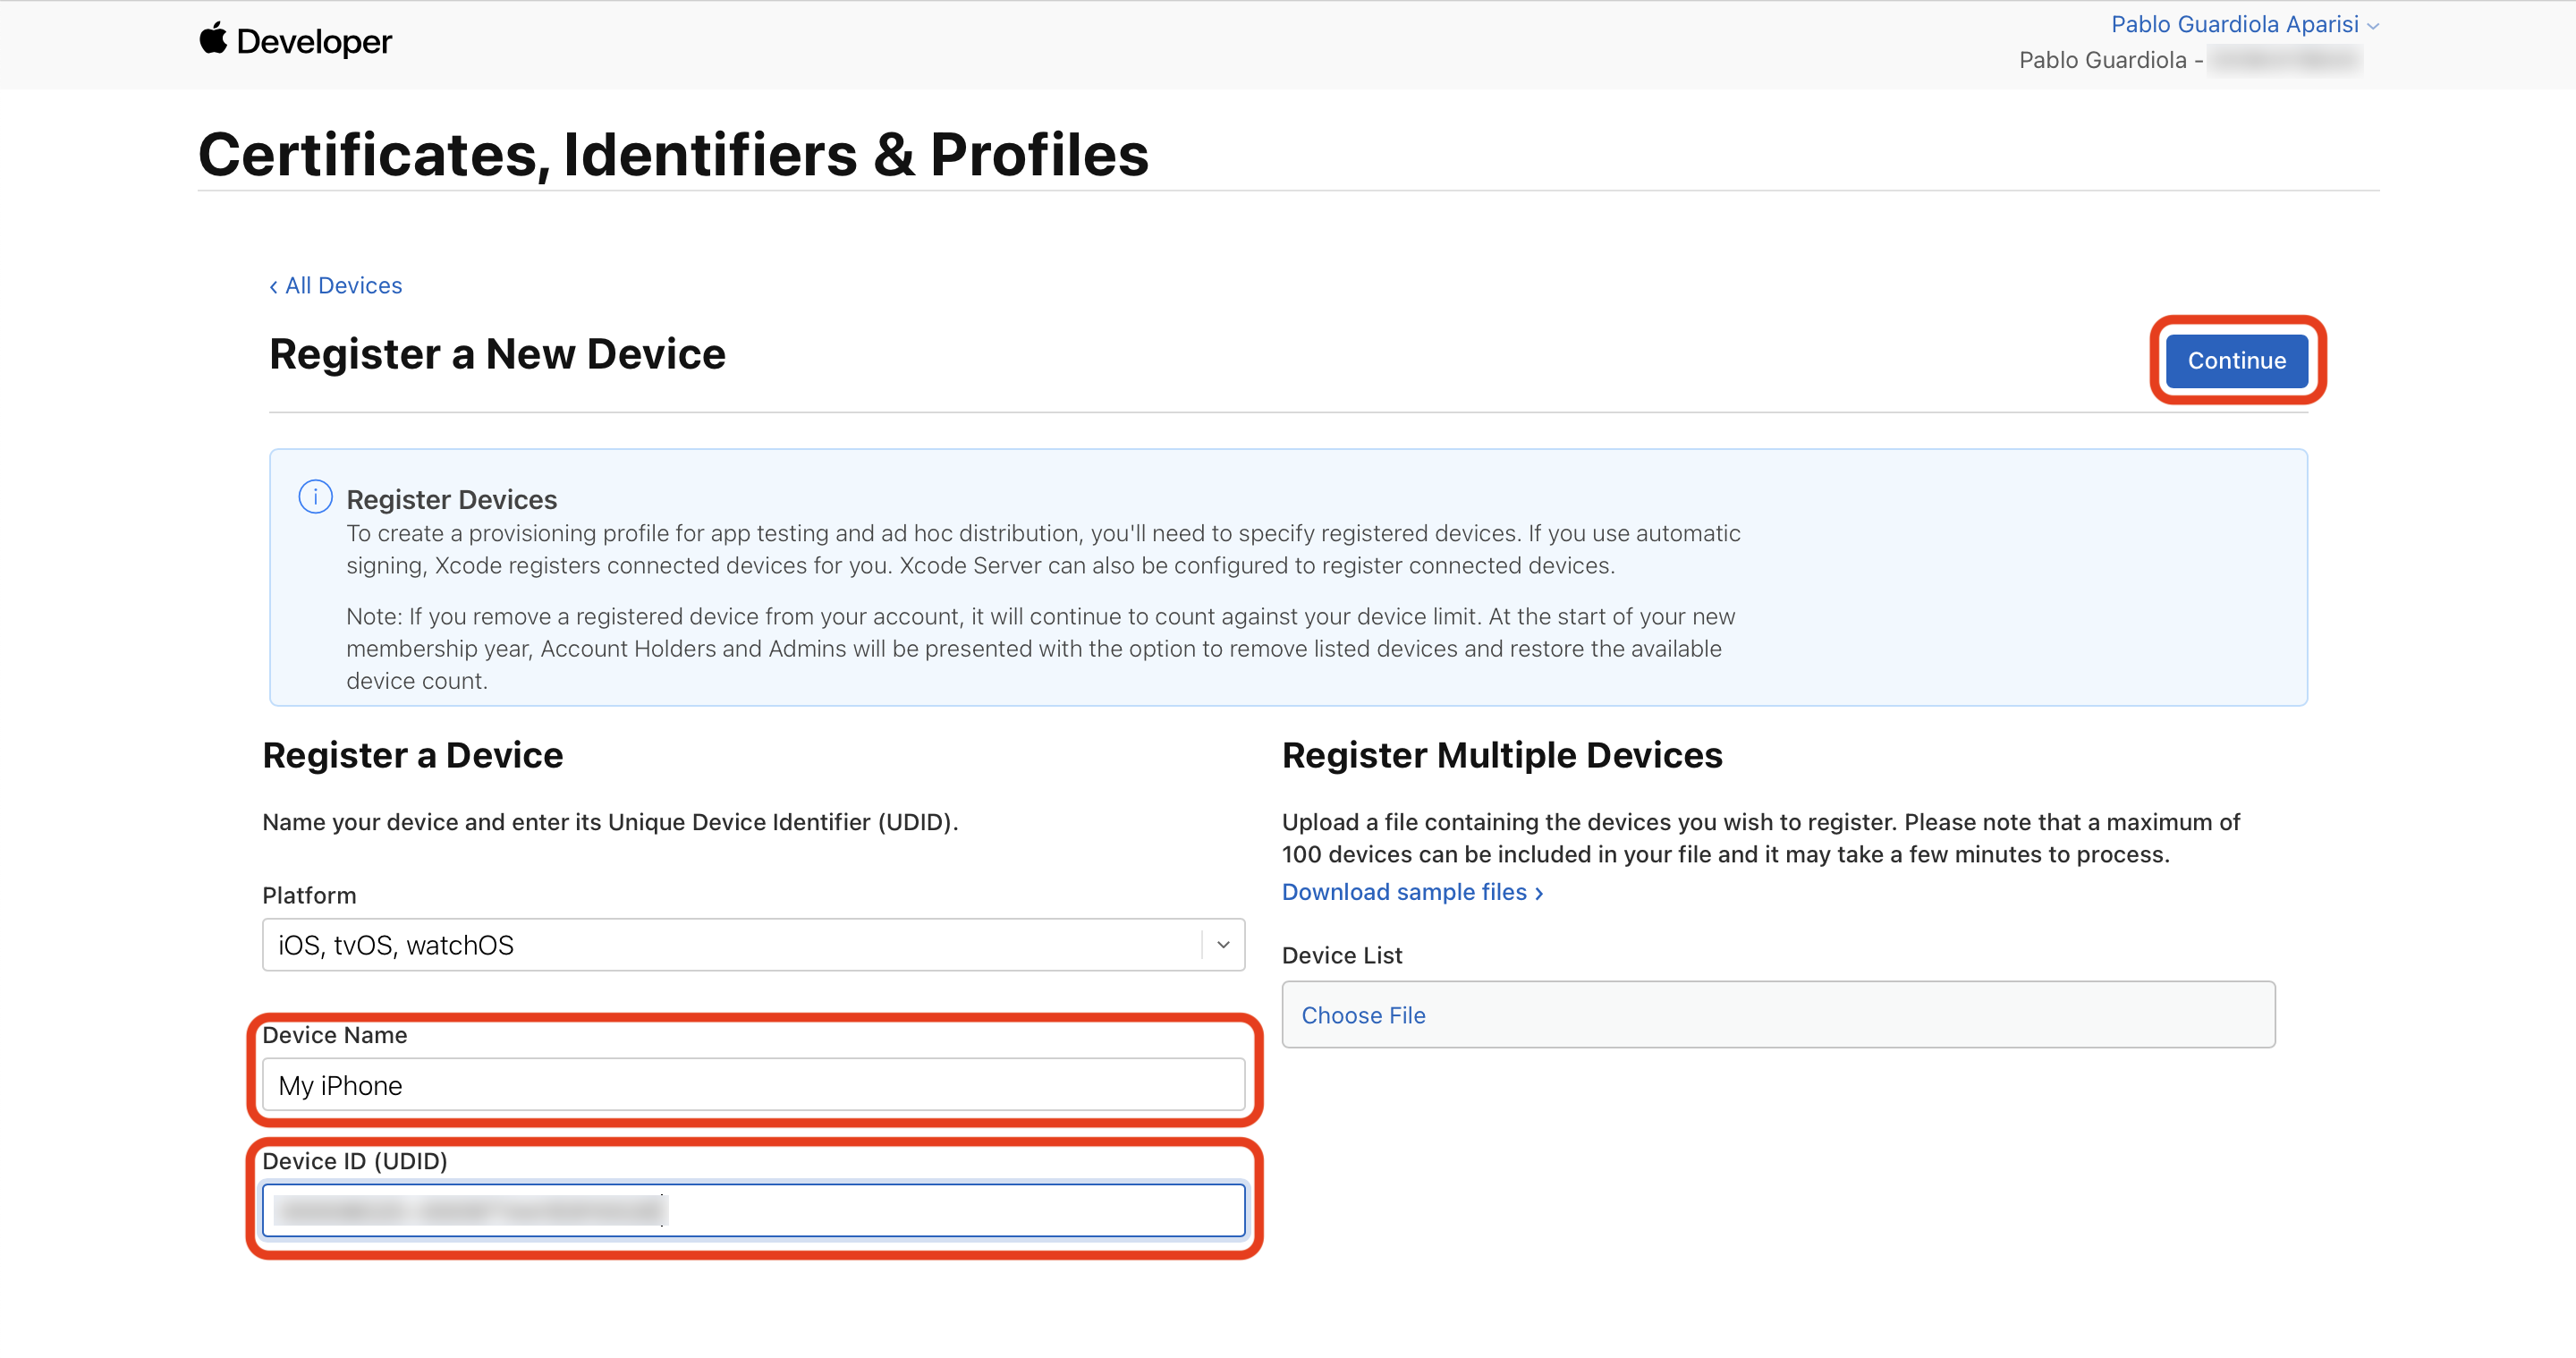
Once we have the UDID, we can add our device.
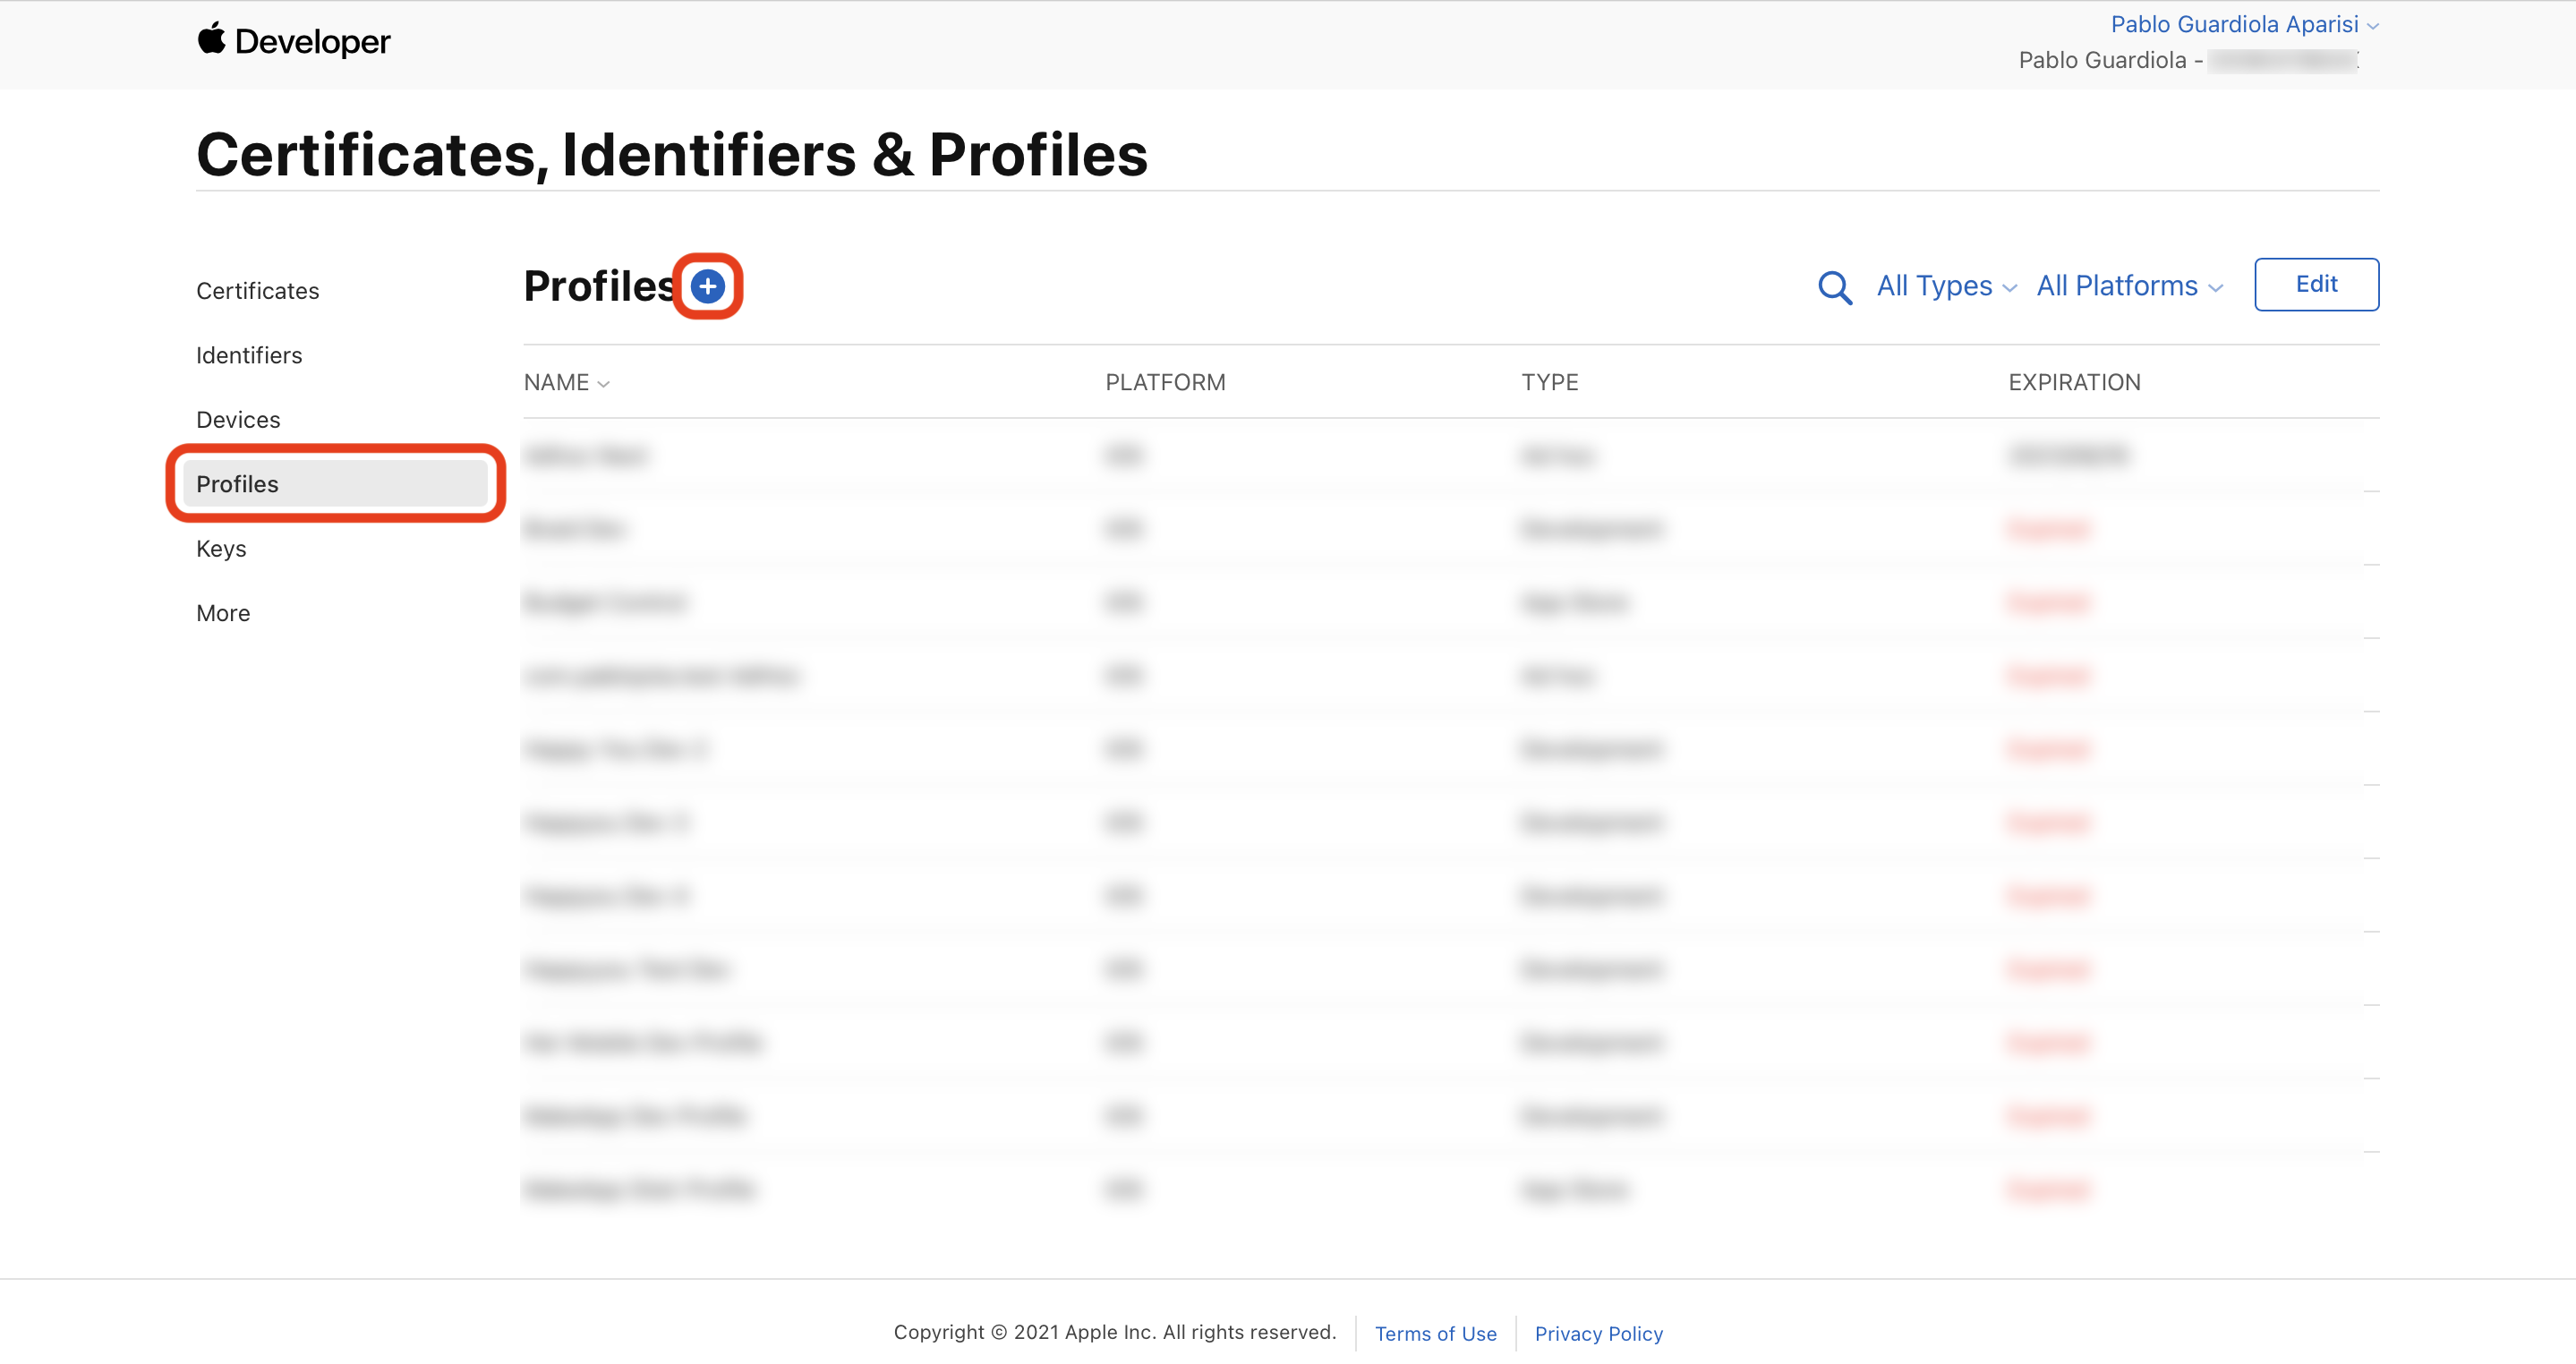
4. Provisioning Profile
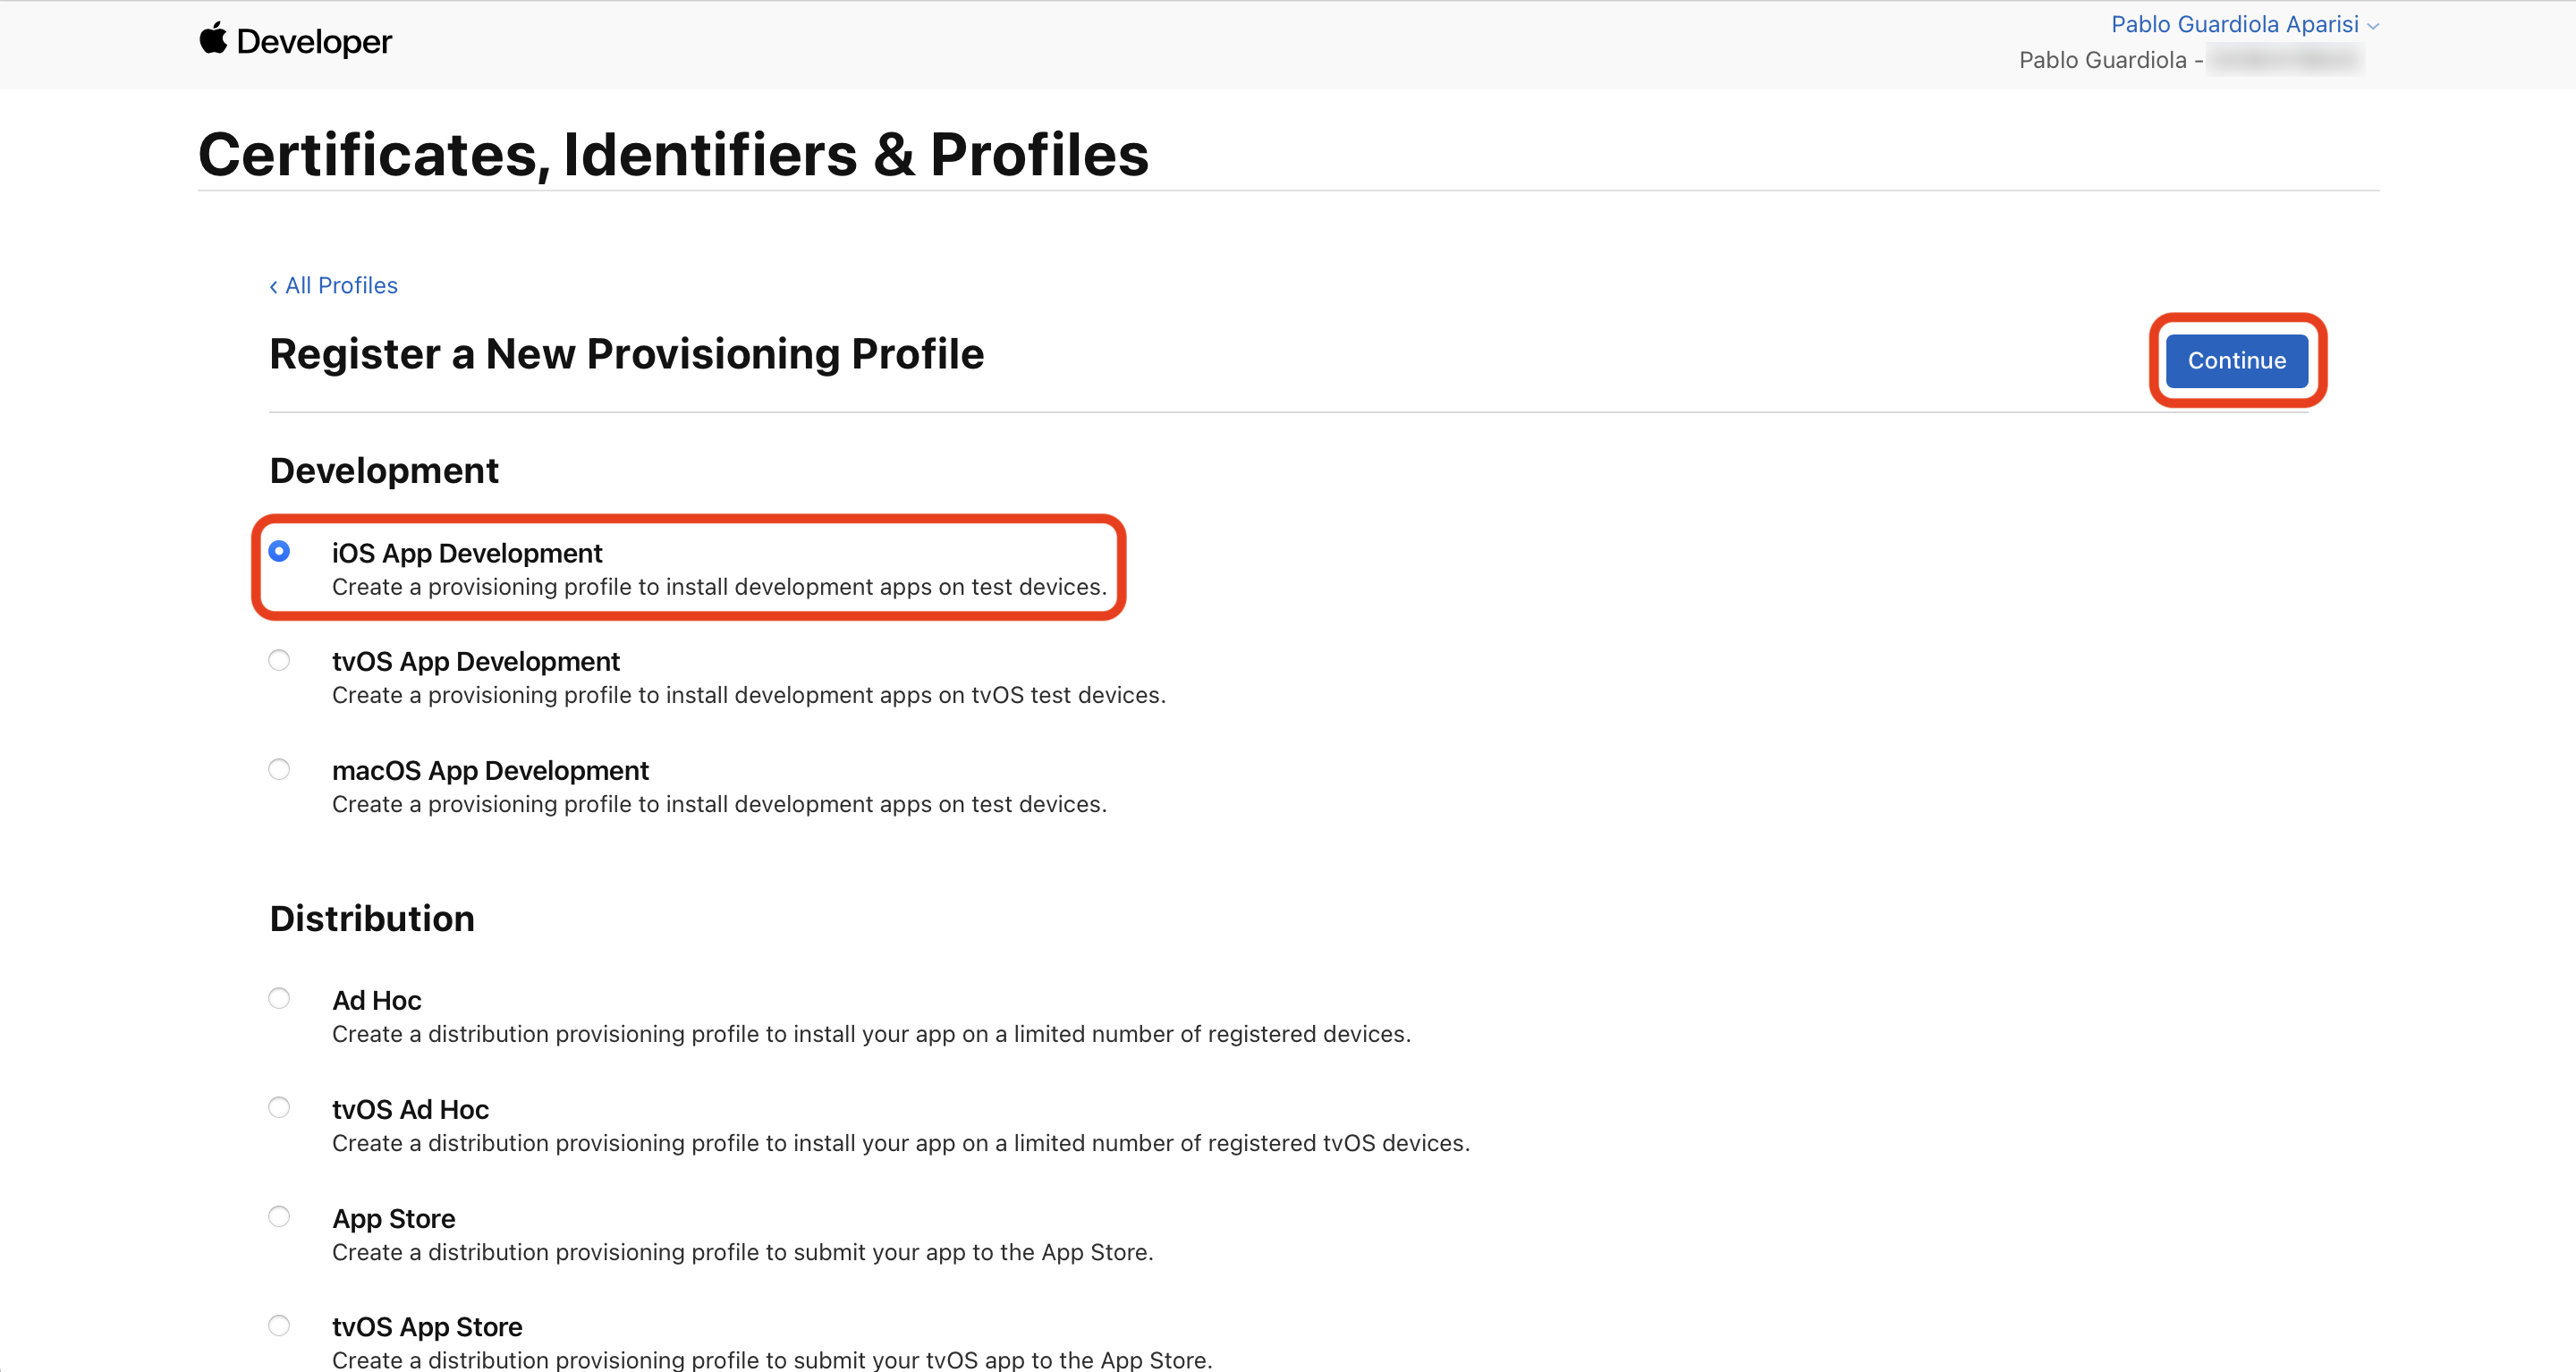
Lastly, we will create the Provisioning Profile, in this case for development.
For development, select the first option. If you want to distribute your app as an installable (e.g., via Firebase), select Ad Hoc, and to upload your app to the App Store, select App Store. Note that these last two options must be done with a distribution certificate.
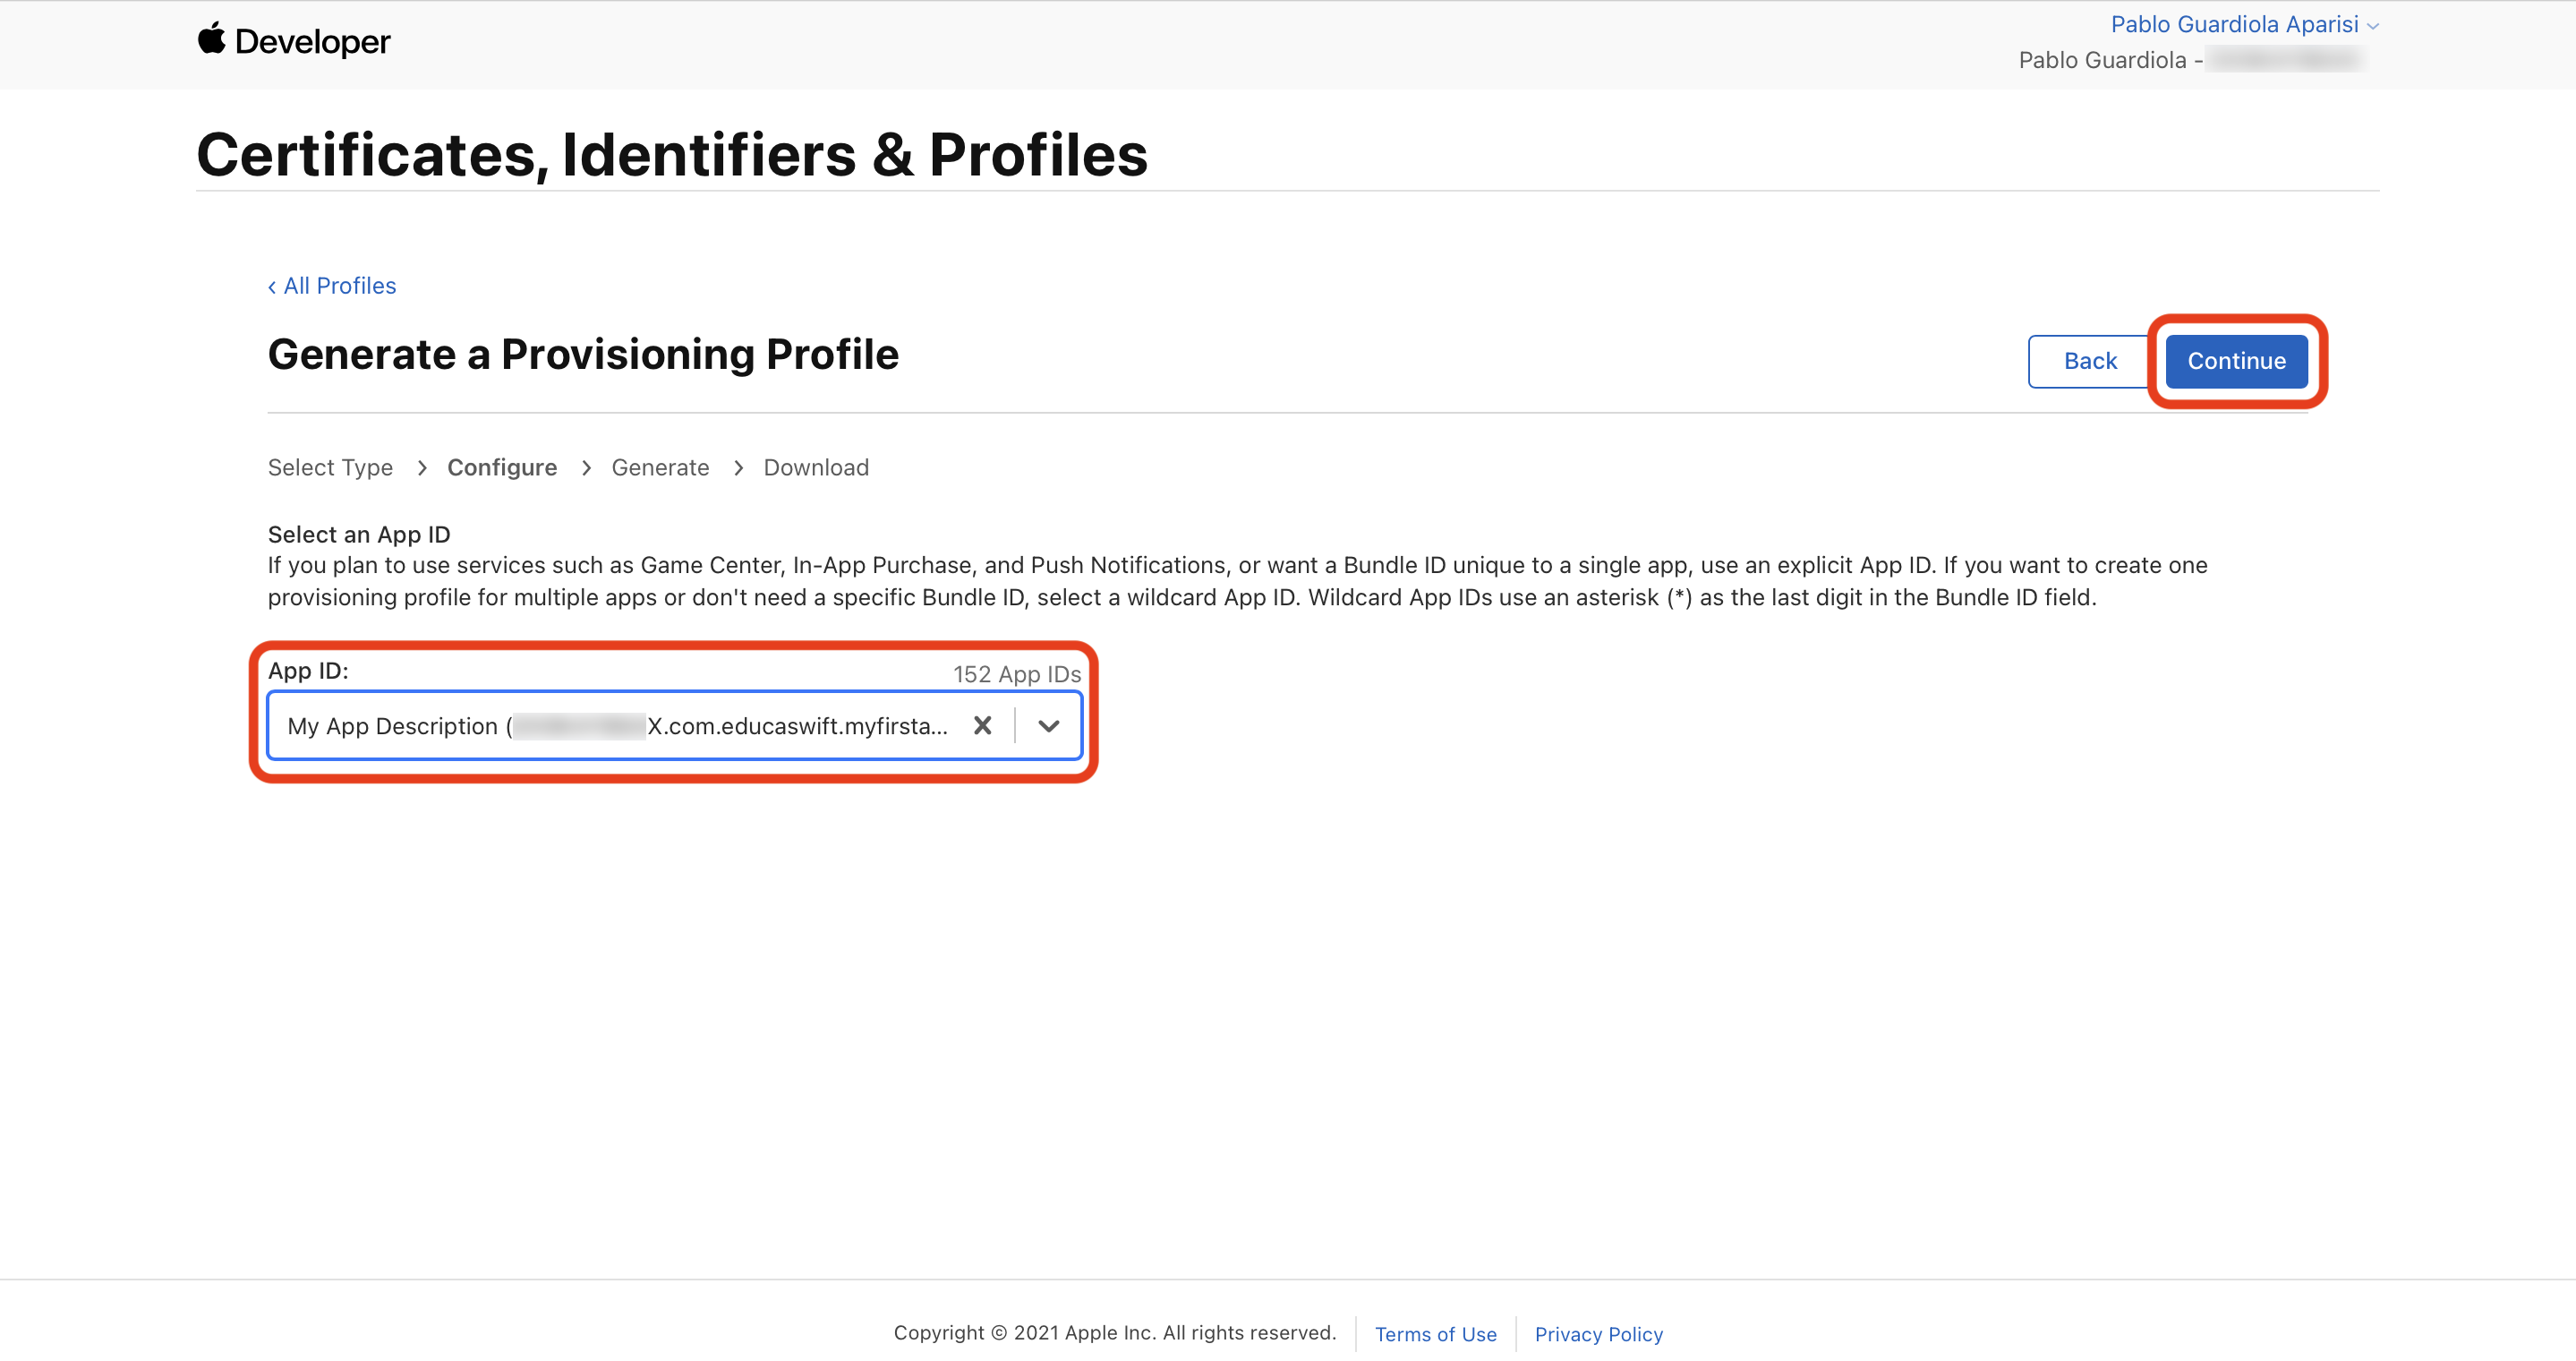
Select the Identifier we created.
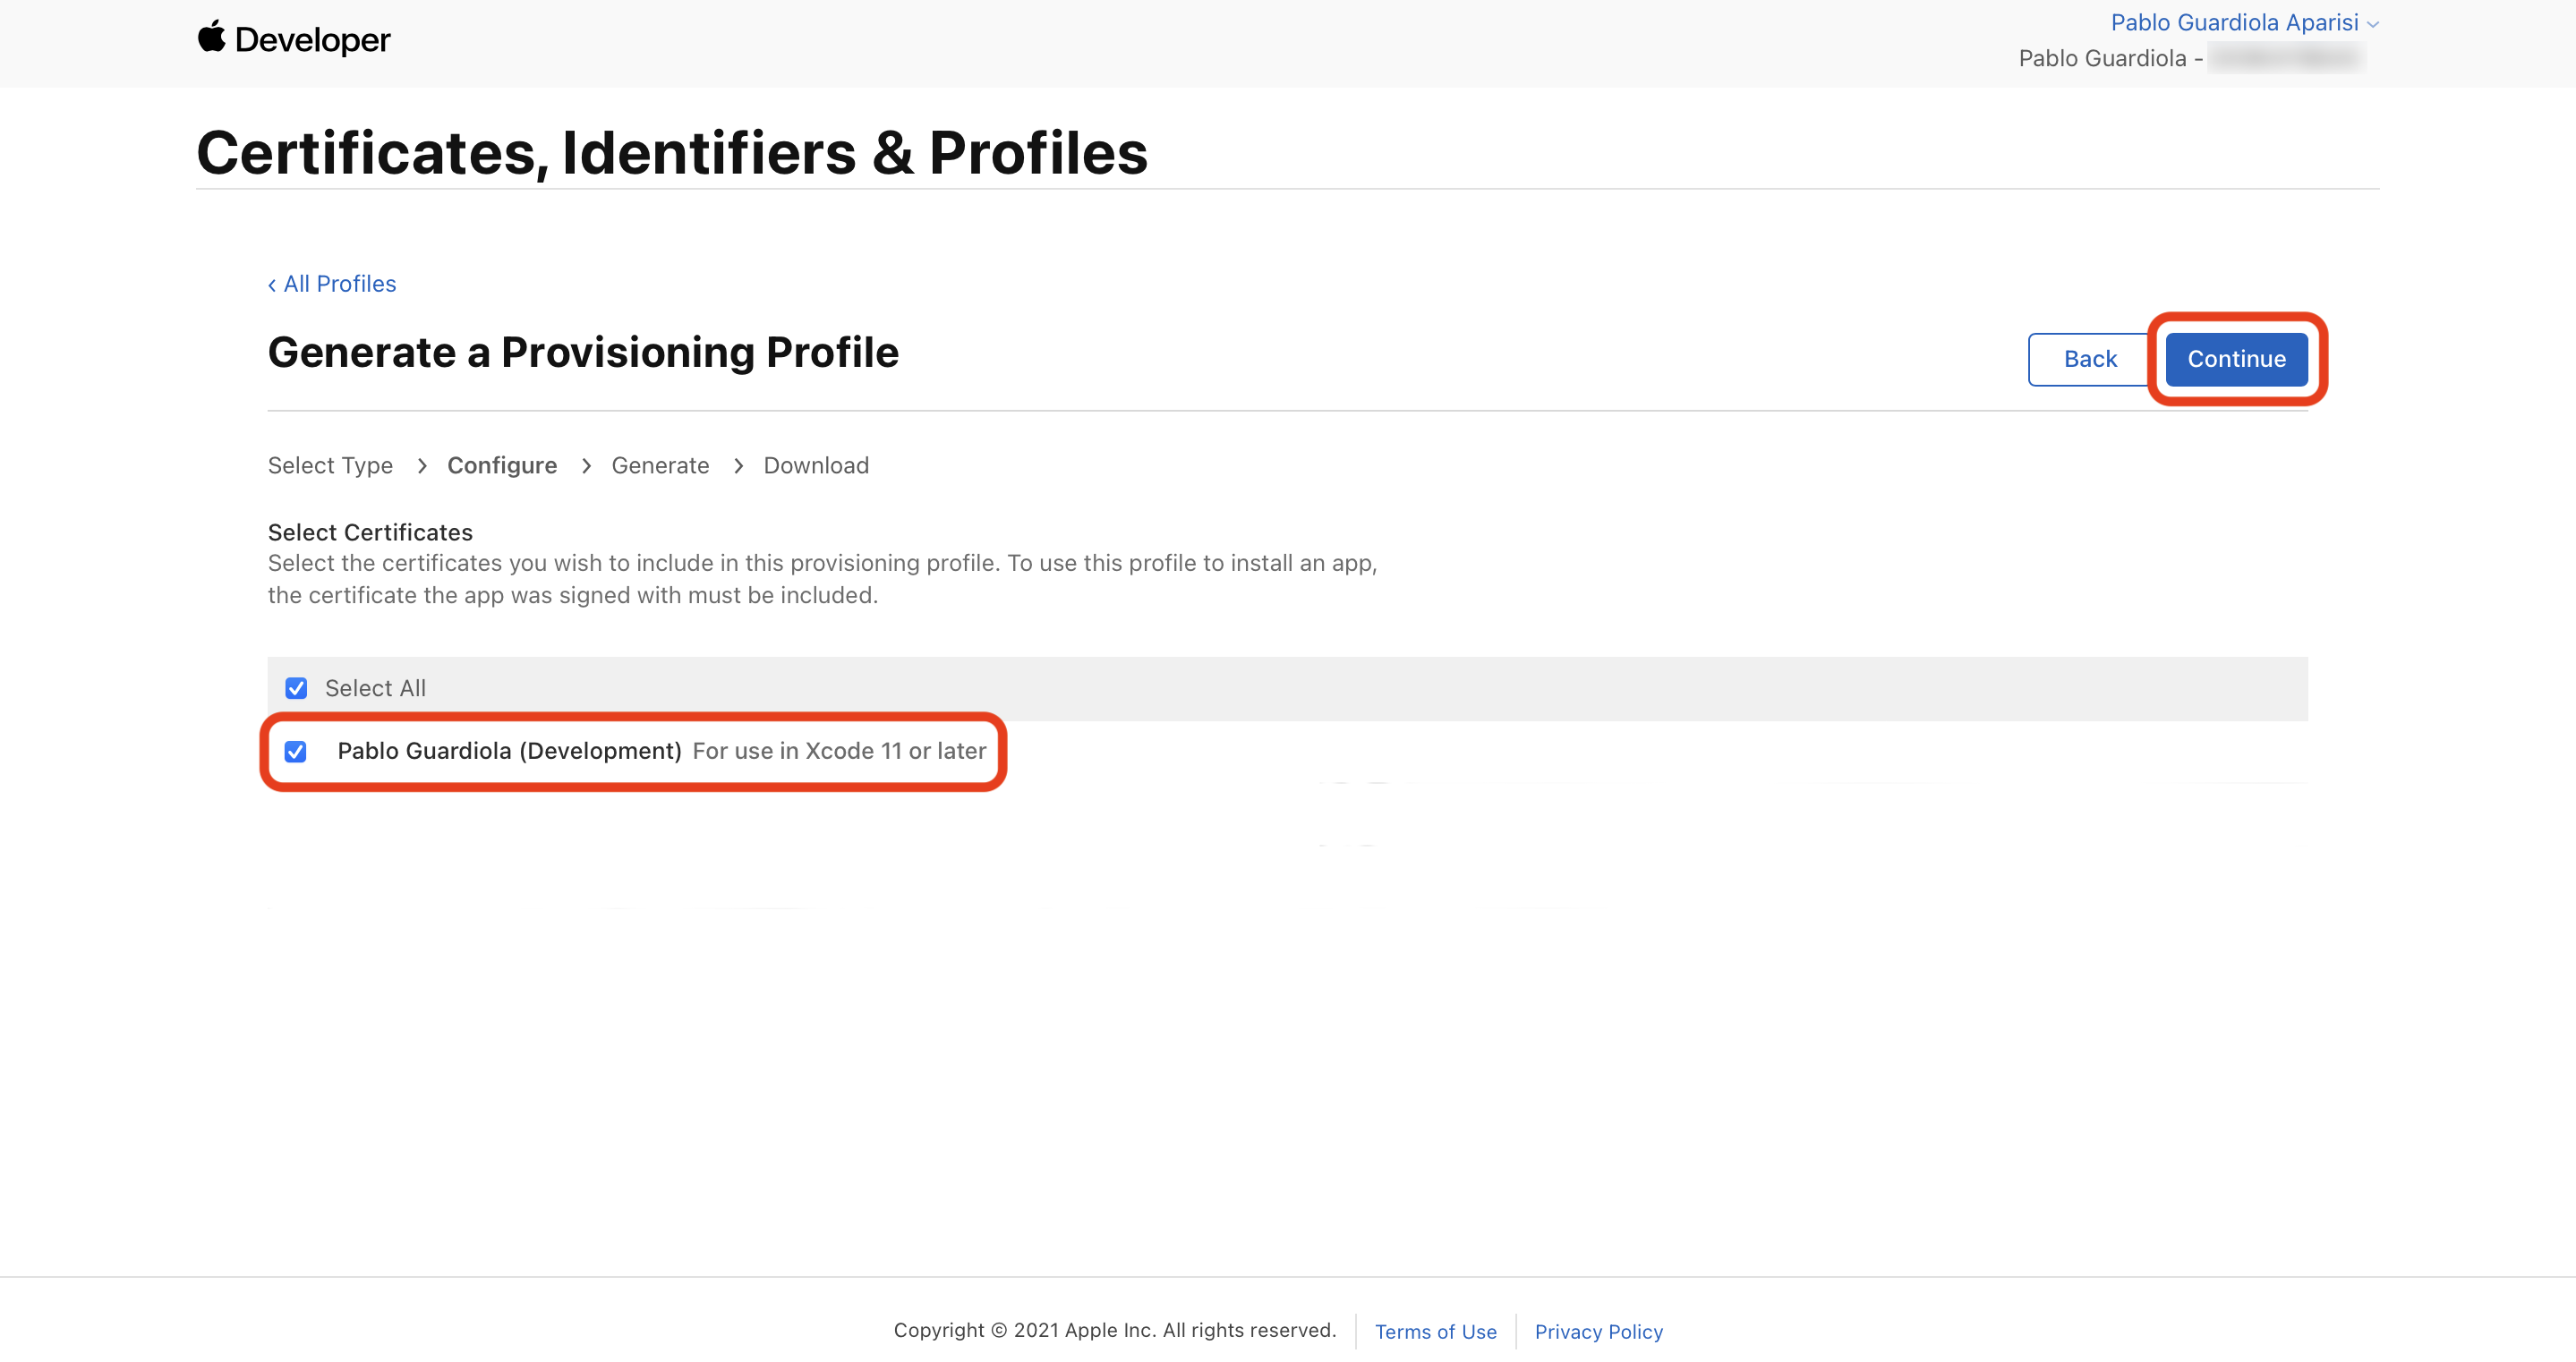
Select the certificate we created.
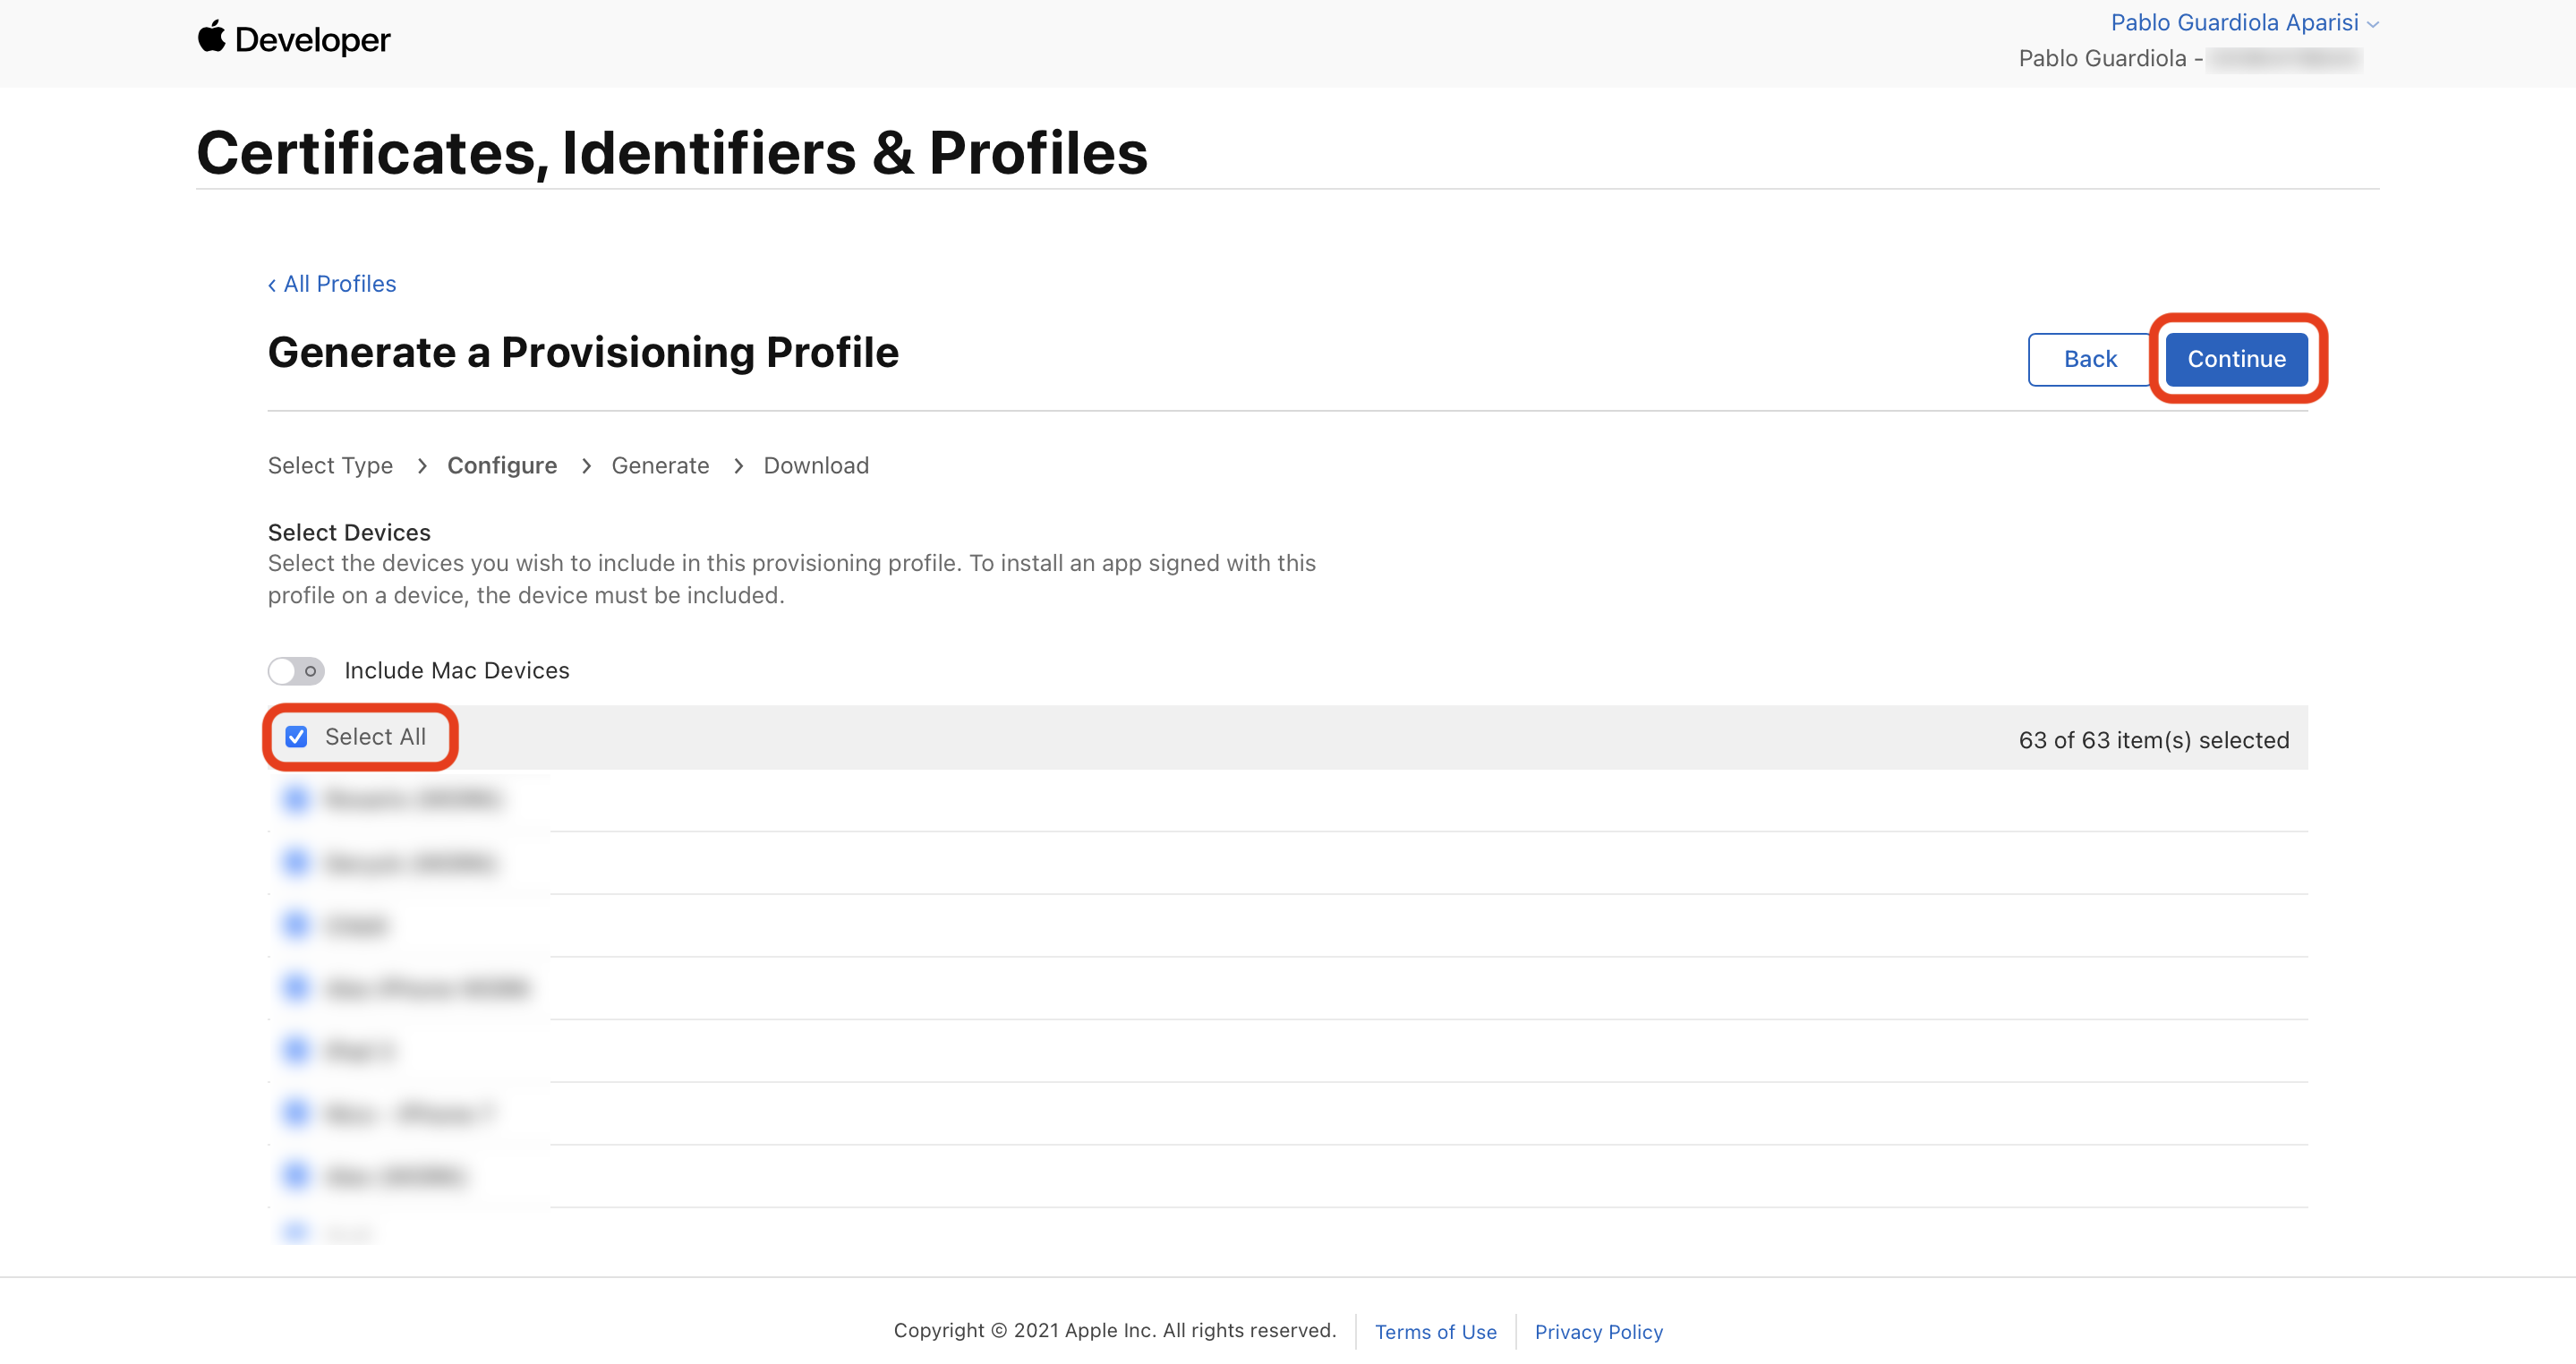
We will select the devices on which we want to install our app.
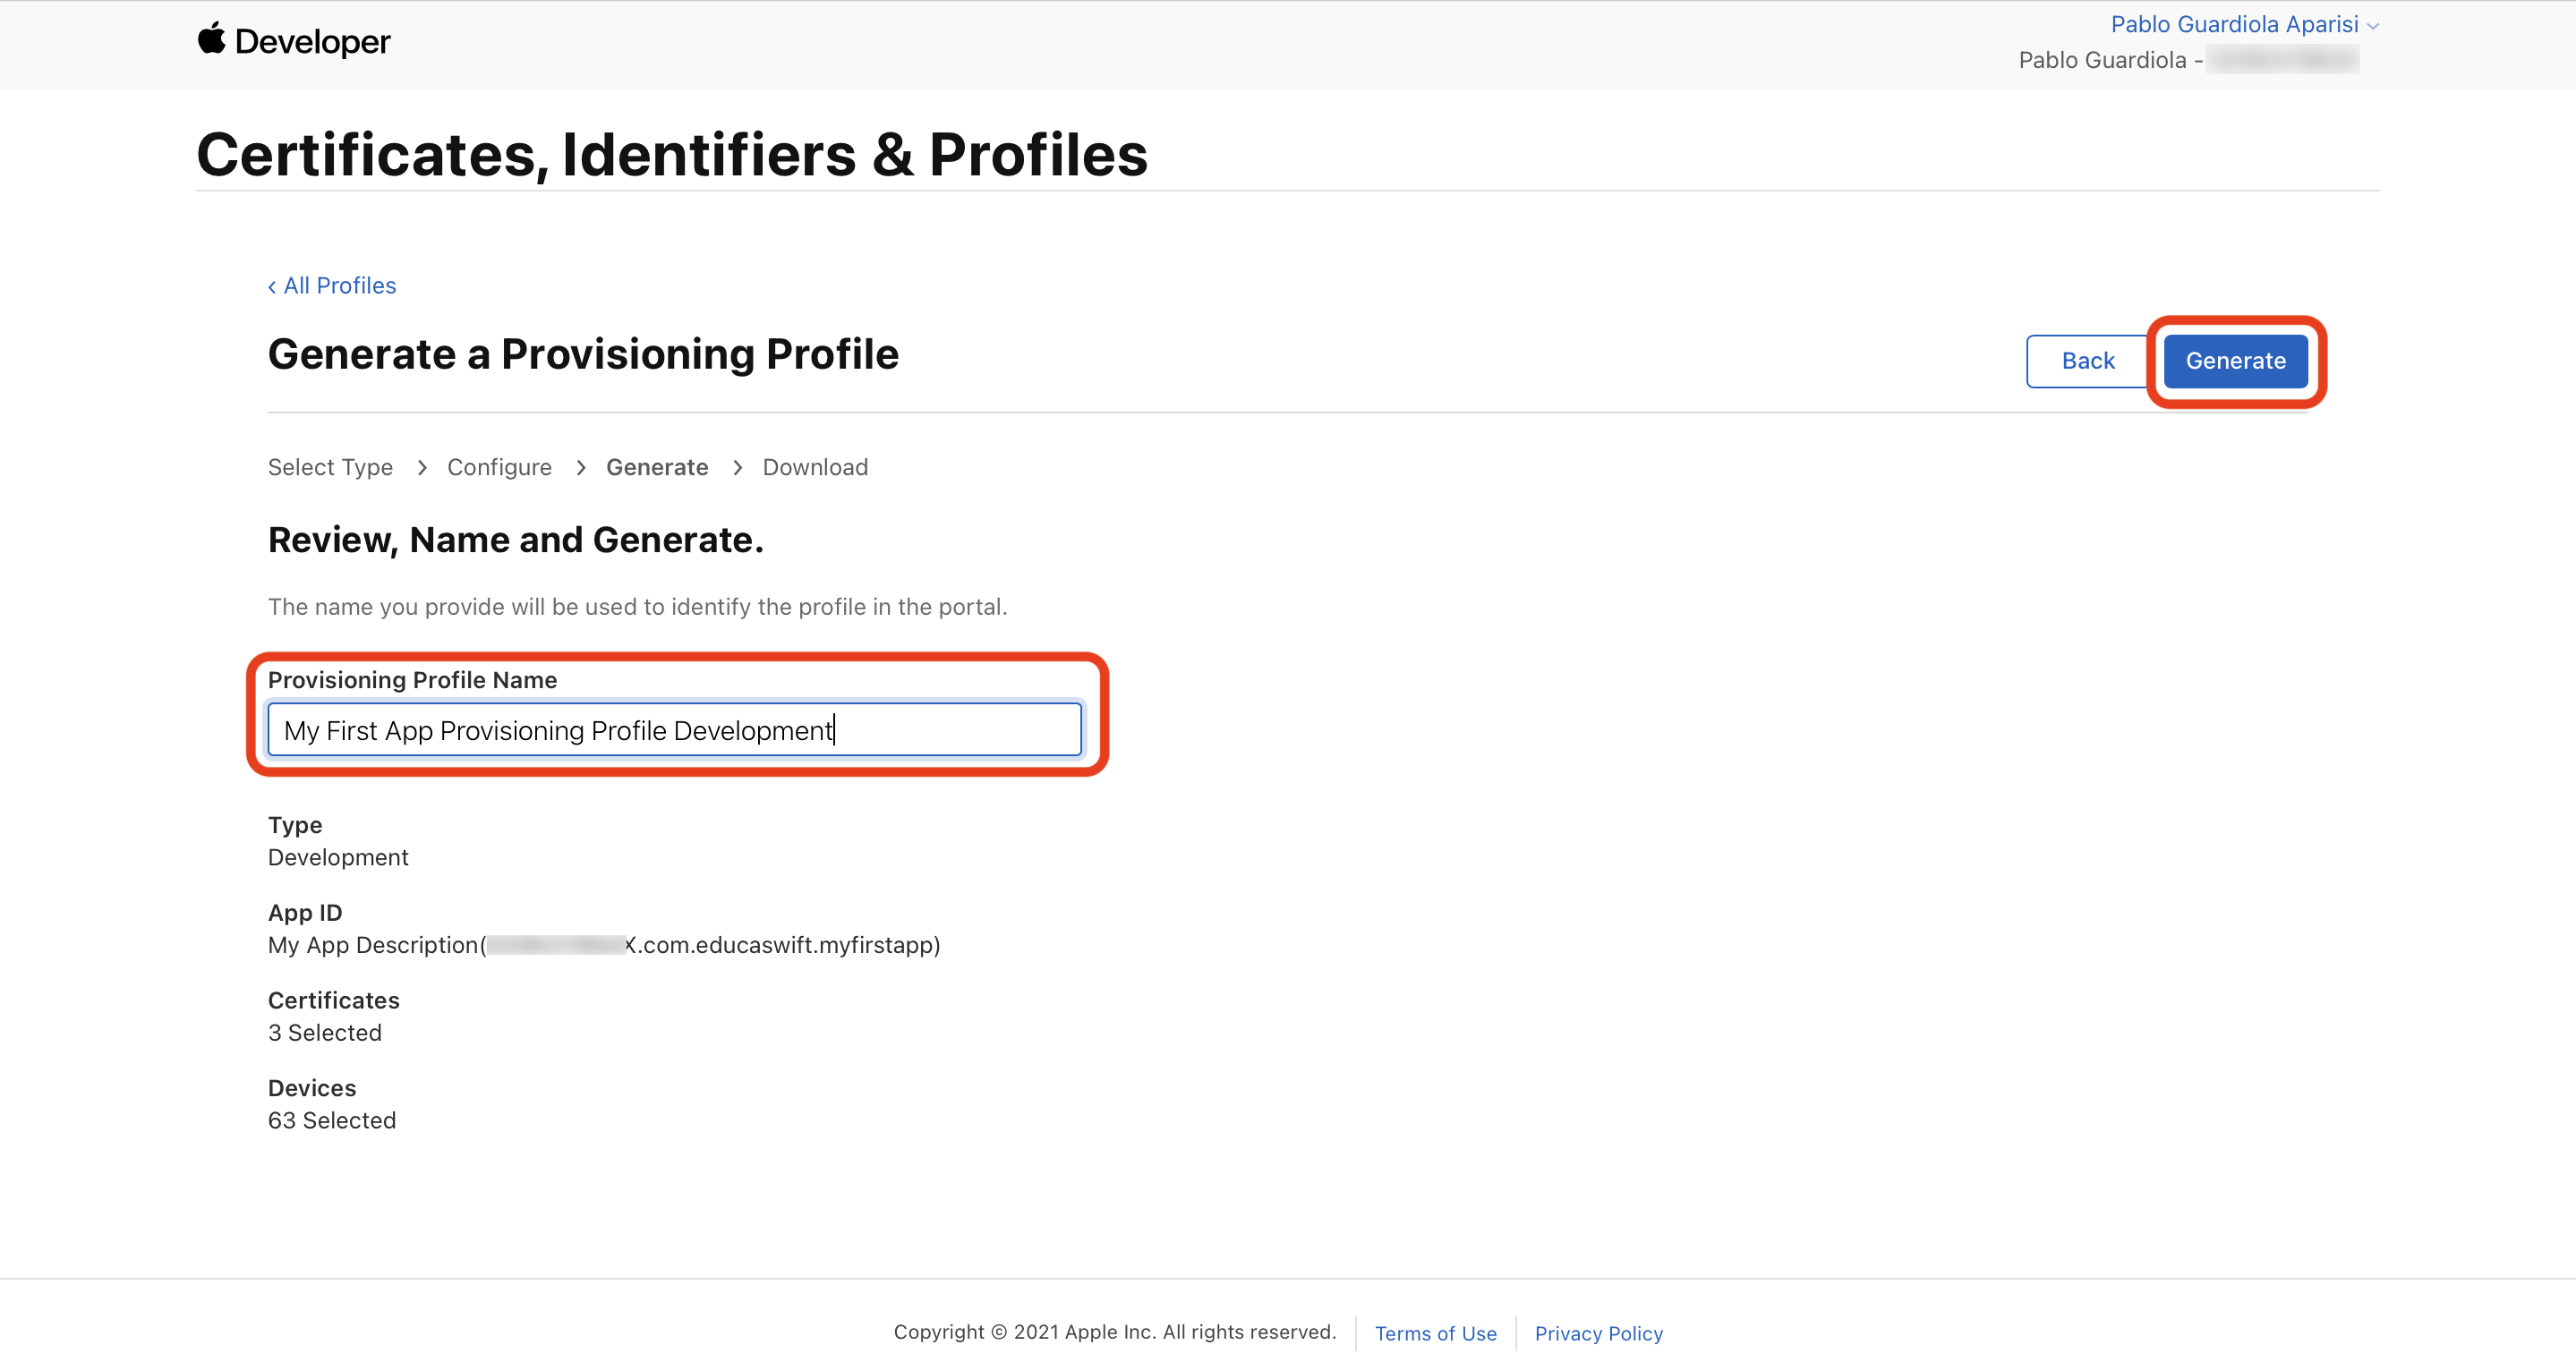
Give your Provisioning Profile a name.
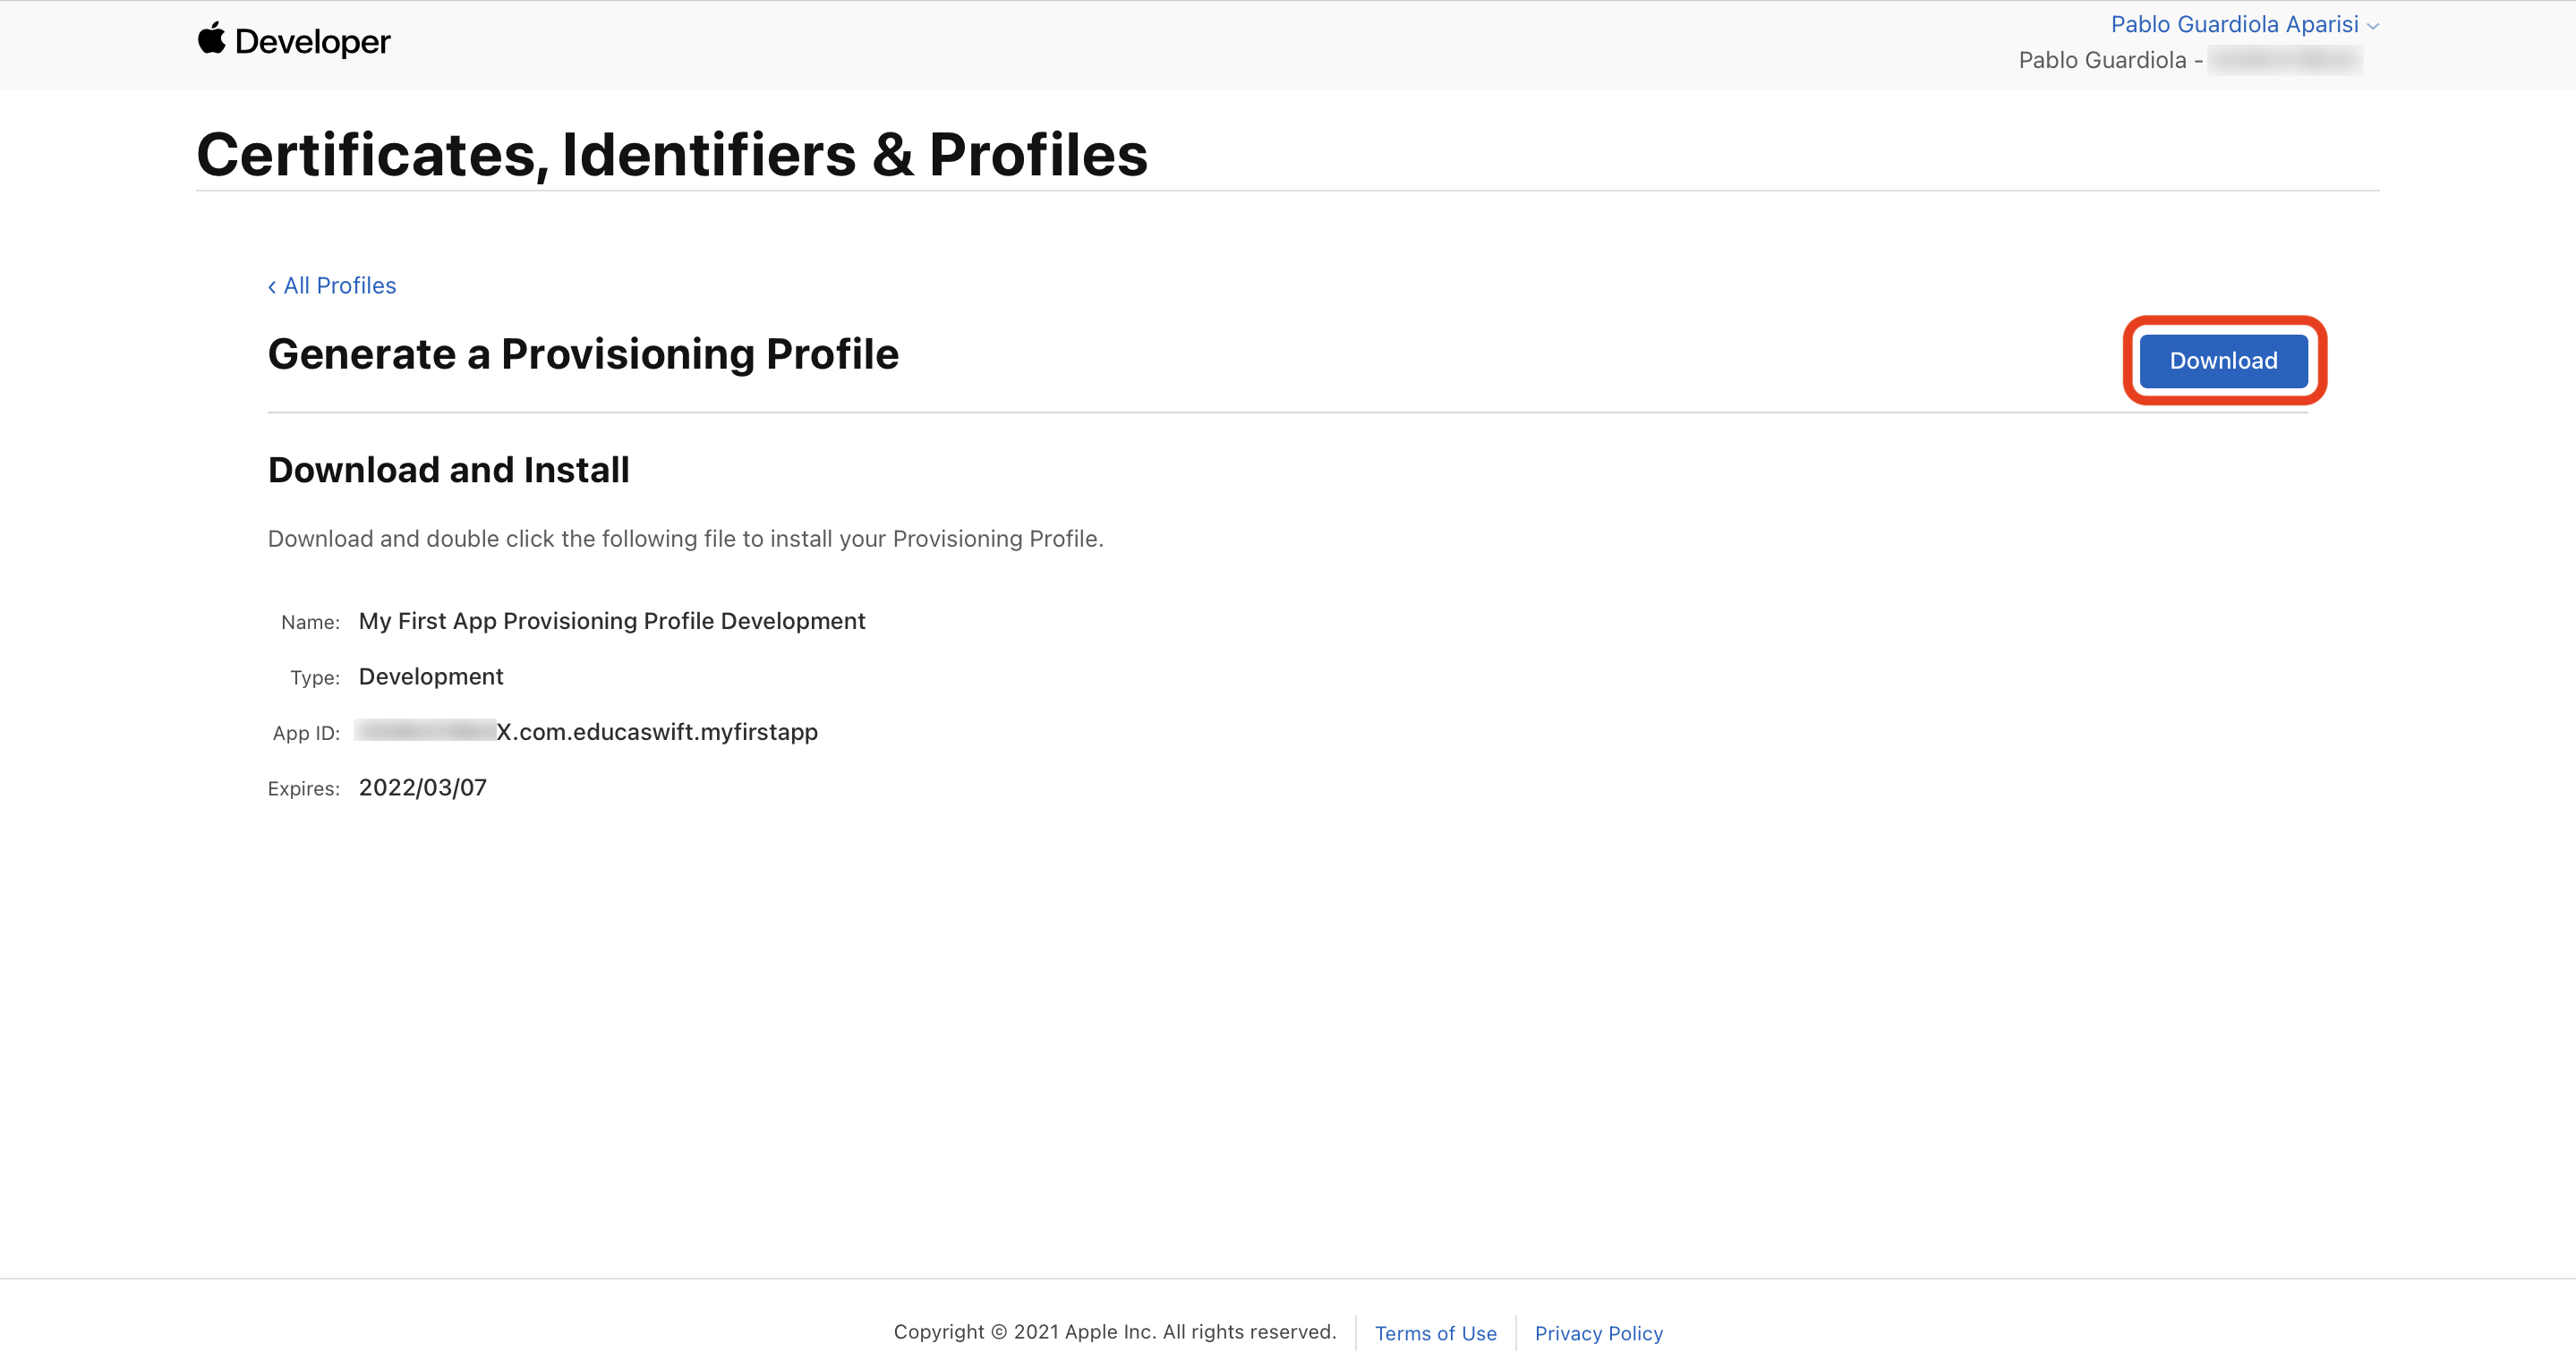
And finally, we download and install it on our Mac.
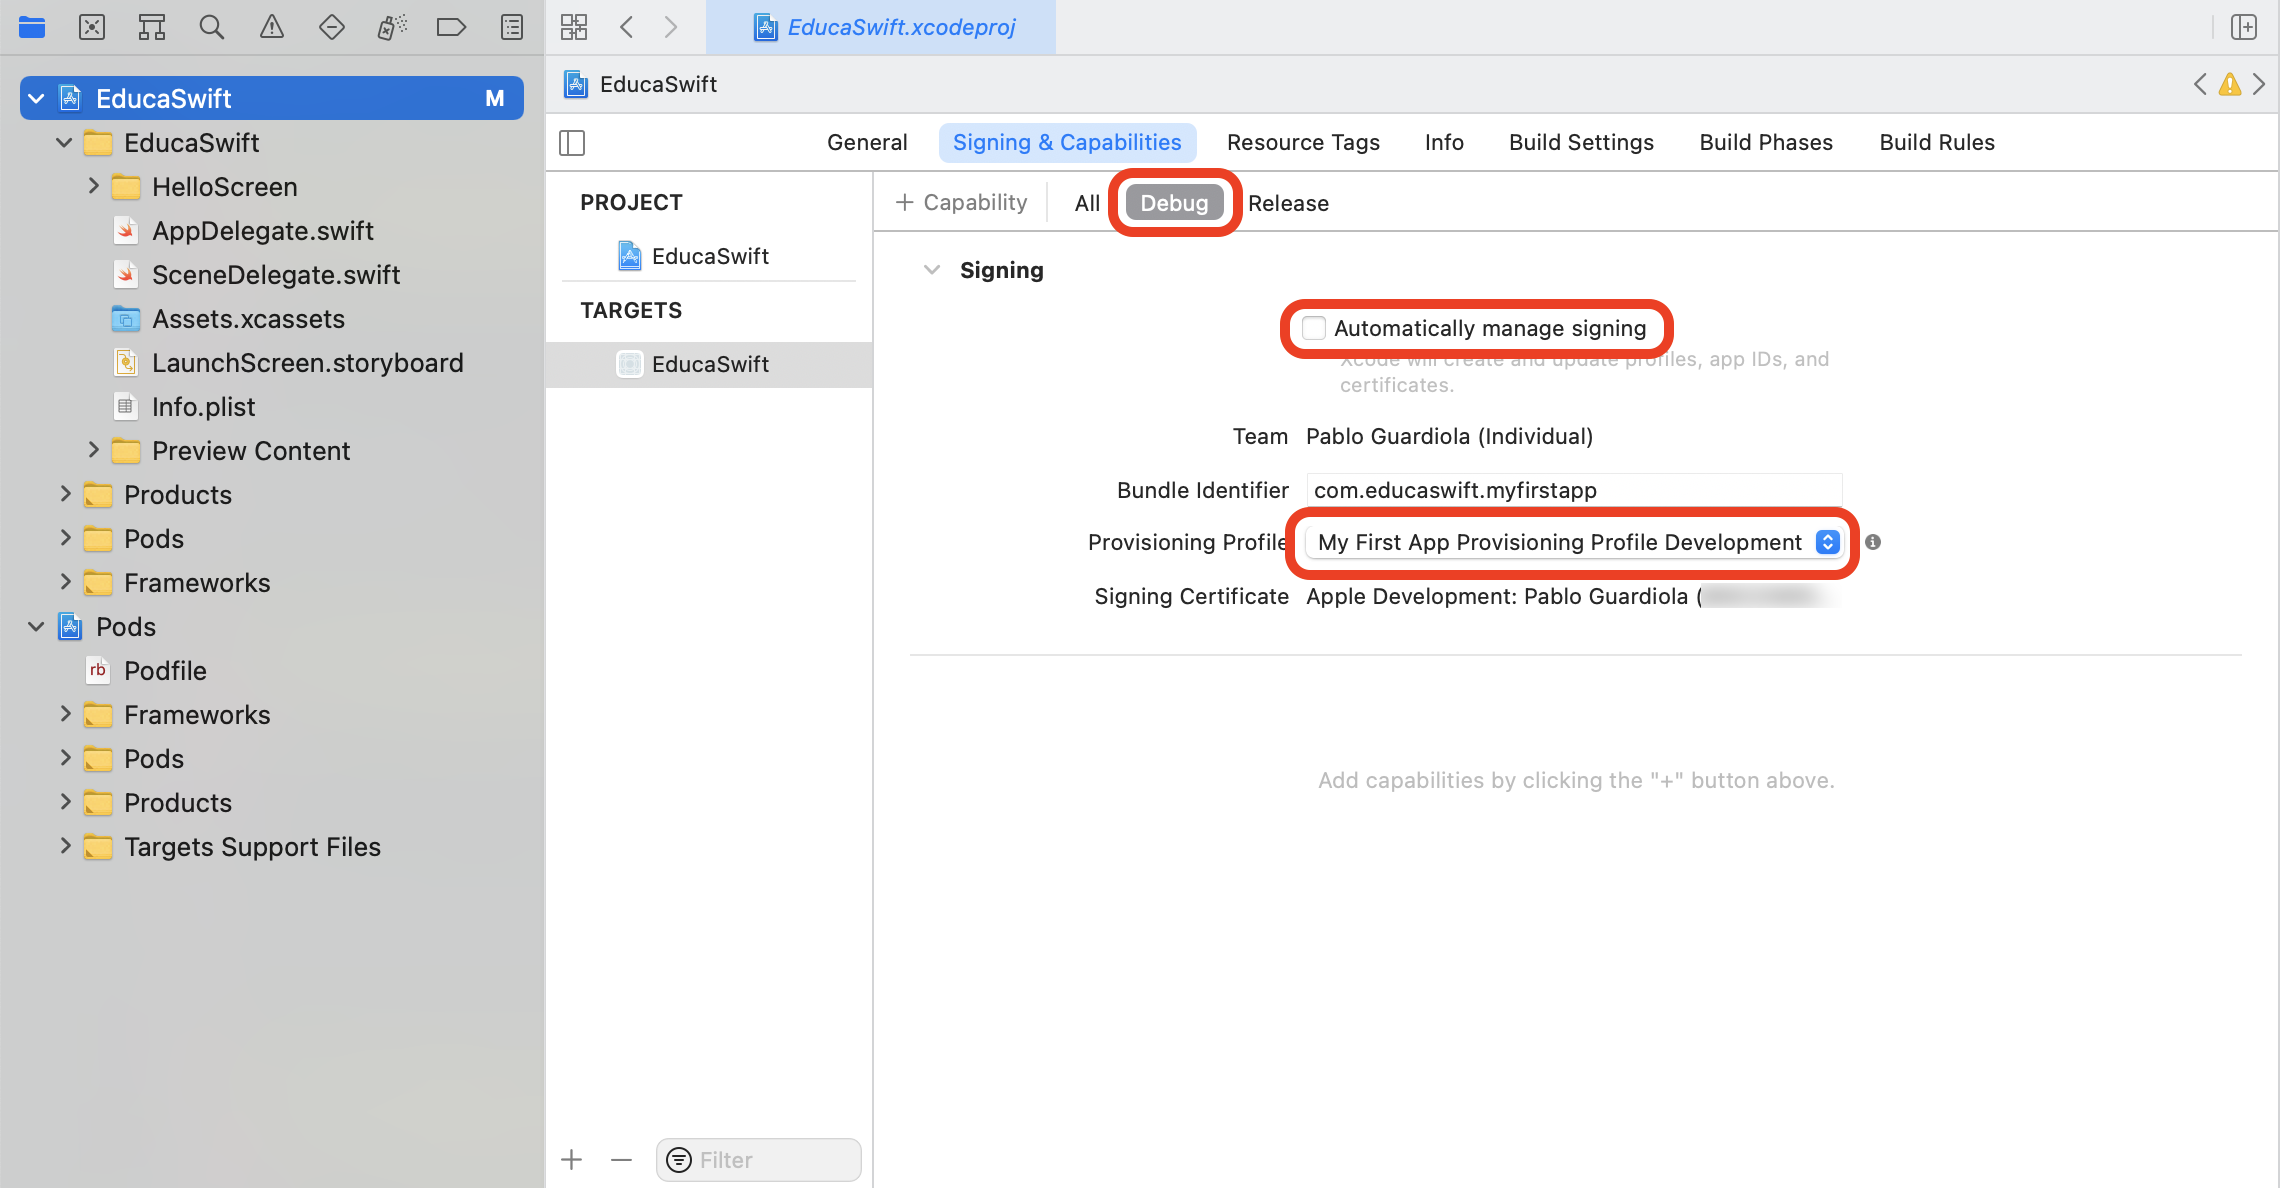
Once downloaded, open Xcode and sign your app without selecting Automatically manage signing, using the Provisioning Profile we created.
We will configure this setting in the Debug section since our Provisioning Profile is for development. We can also configure the Release section with a distribution Provisioning Profile.
Be the first to comment