Swift macros are a recent addition to the Swift language, designed to simplify repetitive code patterns and reduce boilerplate in Swift codebases. With macros, developers can define reusable code snippets that are expanded at compile time, leading to more readable and maintainable code. This feature draws inspiration from metaprogramming techniques and helps streamline common tasks, such as code generation, logging, and more.
Unlike traditional functions or methods that are invoked at runtime, macros operate at the level of code generation, making them highly efficient for repetitive tasks. In Swift, macros are used to automate repetitive patterns by generating code for developers, keeping codebases cleaner and more concise.
Swift macros are part of the Swift compiler’s metaprogramming capabilities, which allow developers to define and reuse patterns without needing complex, error-prone manual coding. They can perform actions such as automatic property synthesis, error checking, and even custom logging.
Benefits of Using Swift Macros
Swift macros offer several key advantages that help improve both code readability and developer productivity:
- Reduce Boilerplate Code: Swift macros help remove repetitive code patterns by generating code automatically, allowing developers to focus on logic rather than setup.
- Improve Code Consistency: Since macros generate uniform code across various parts of a codebase, they help enforce coding standards and maintain consistency.
- Optimize Performance: Since macros are expanded at compile time, there is no runtime overhead, making them efficient and fast.
- Encourage Code Reusability: Macros allow developers to encapsulate complex patterns in reusable snippets, which can be invoked with a simple command.
How to Define a Macro in Swift
Macros must be defined in an external package, then we can import this package in our project. Let's see how to setup our own Macros package project:
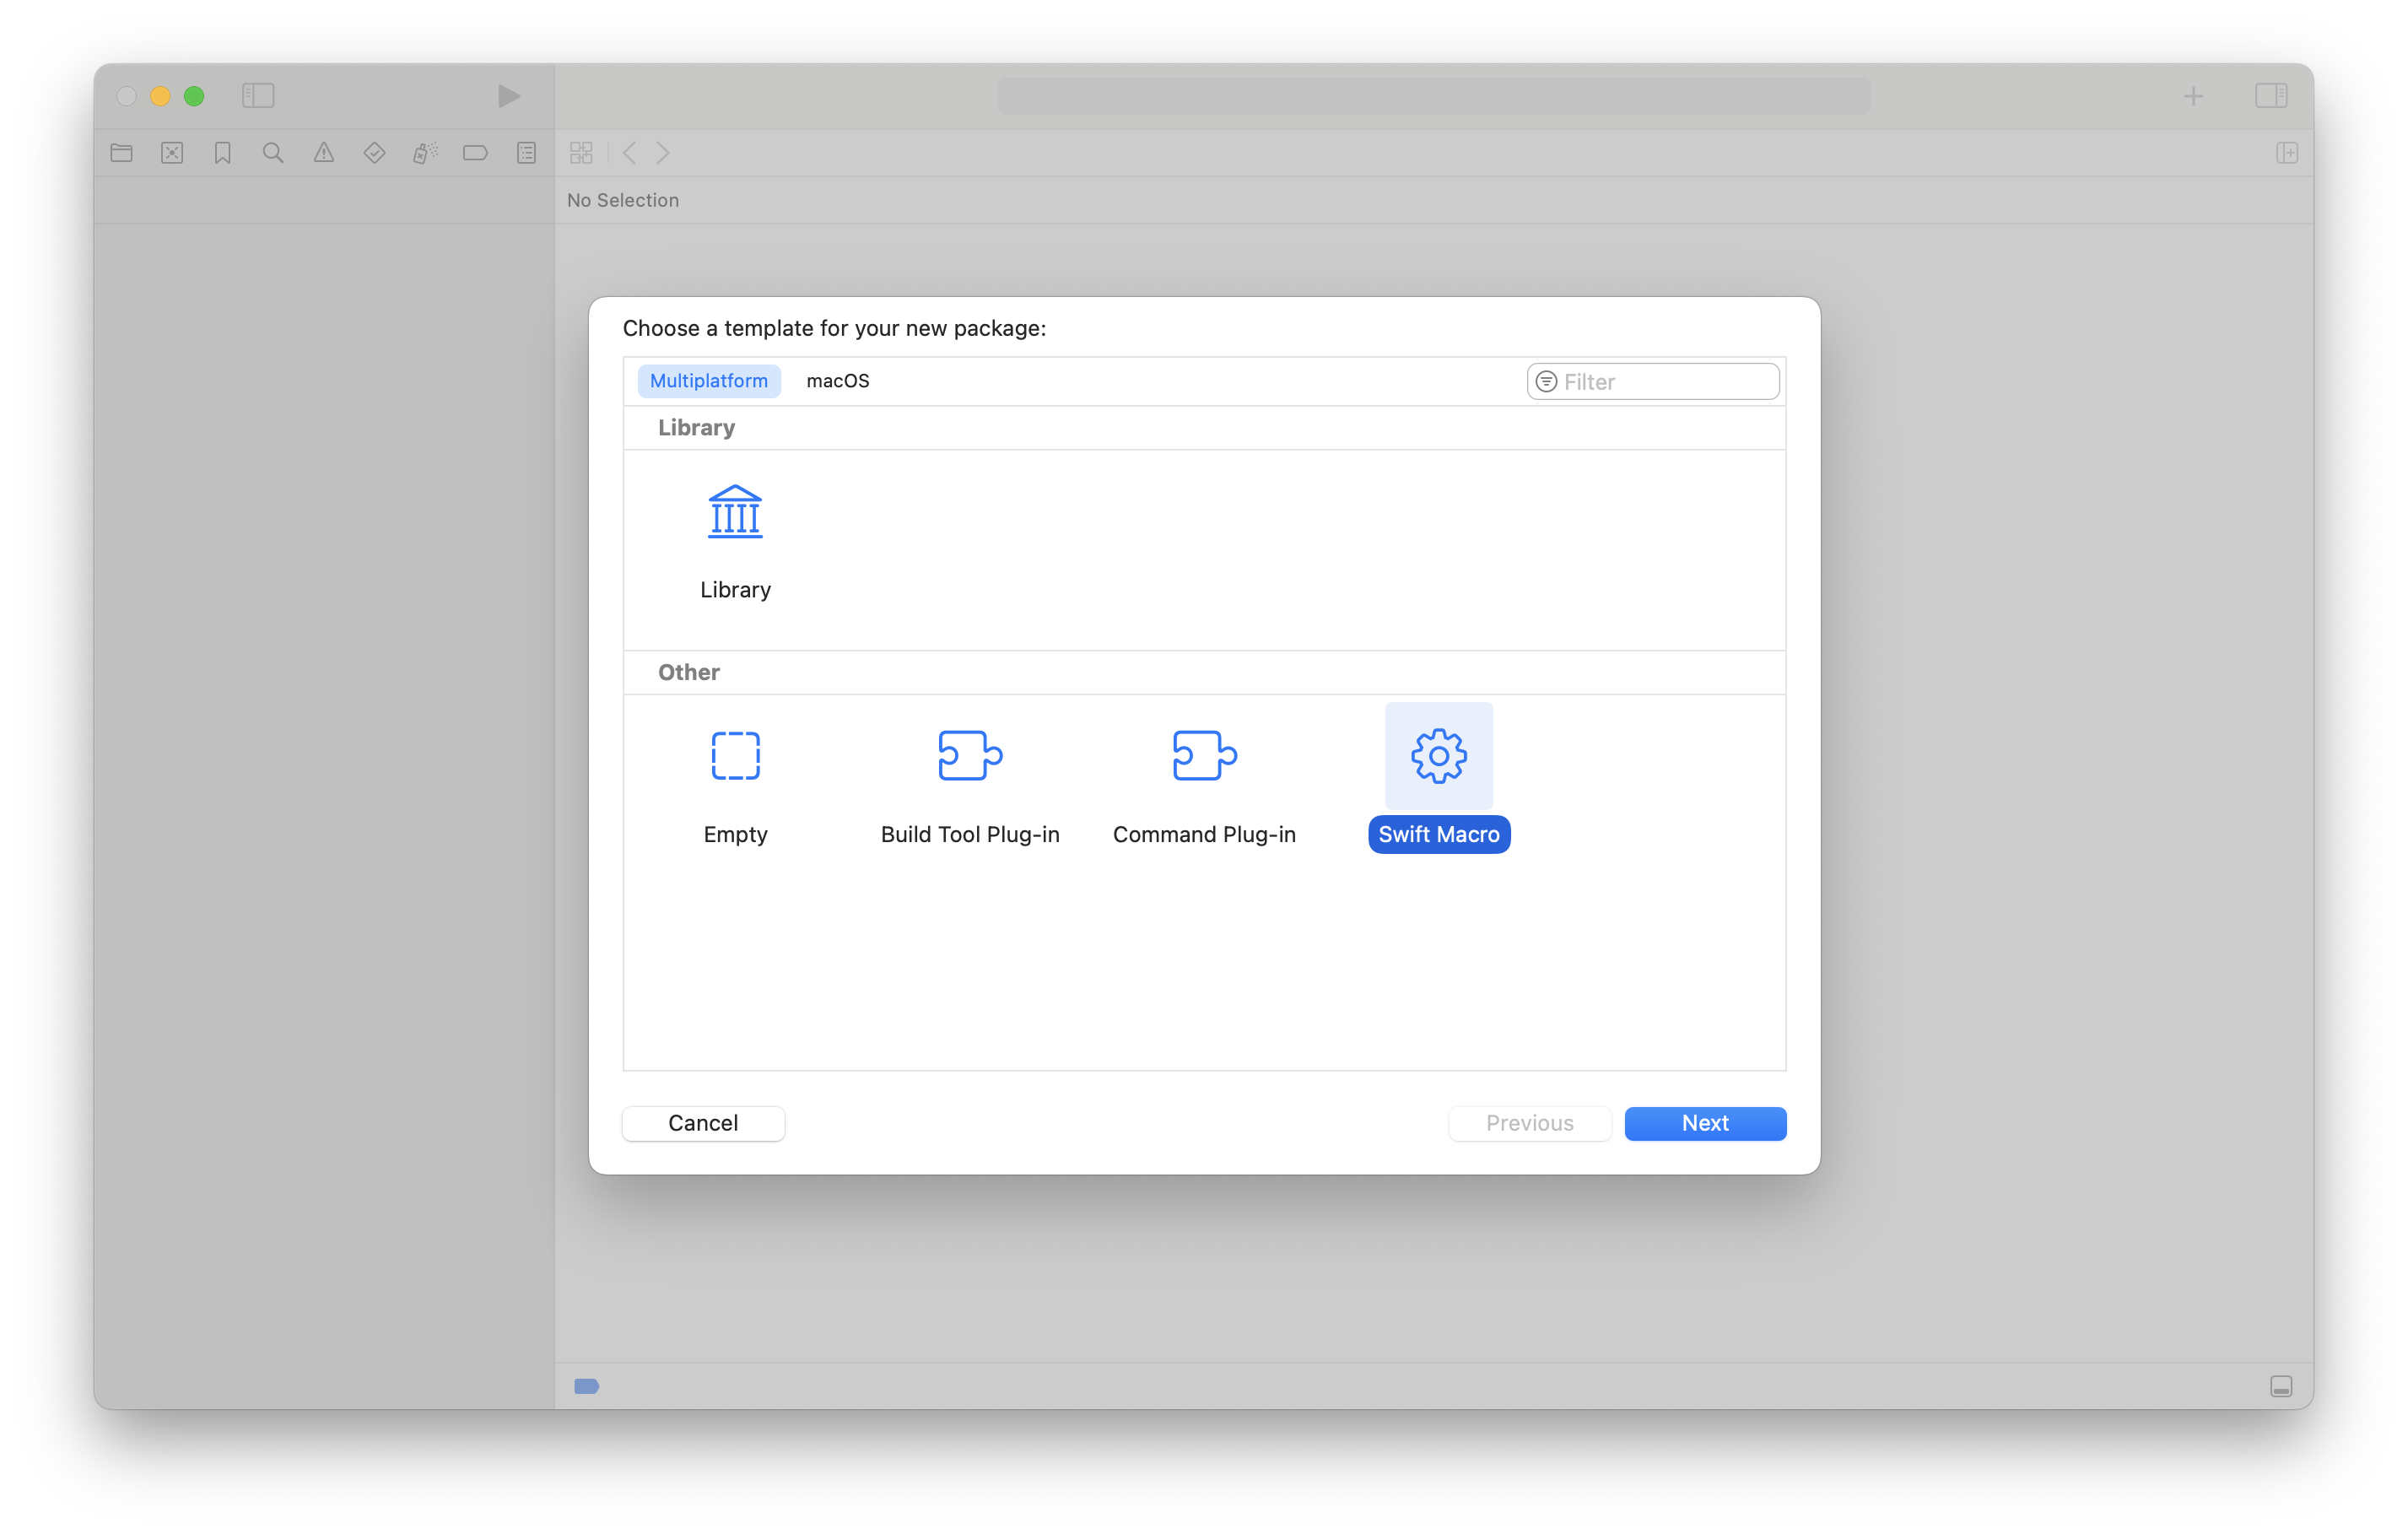
- Open Xcode and select File > New > Package.
- Select Package.
- Select the test system you'd like.
- Give your package a name. This will be the name others will use to import it, so choose a name that reflects its functionality.
-
Choose a location to save your package, then click Create. Xcode will create a new folder containing the package’s structure, including the
Package.swiftfile.
Apart from Package.swift file, which defines our Macro structure and inludes all the dependencies, we can see that 4 other files has been generated with an example in them:
- EducaSwiftHexMacroPackage.swift includes the interface of our macro.
- main.swift uses our macro as a client as an example.
- EducaSwiftHexMacroPackageMacro.swift contains the implementation of our macro.
- EducaSwiftHexMacroPackageTests tests our macro.
Creating our own Macro
We'll replace the auto-generated sample with our own code, a Macro that will take a hexadecimal color as String and it will return a Color if the hex code is correct, otherwise Xcode will a compilation error that won't let us continue until we solve it.
Let's analyse each file individually:
EducaSwiftHexMacroPackage.swift contains the hexColor function that will take our Macro implementation as a value.
import SwiftUI

// The Swift Programming Language
// https://docs.swift.org/swift-book

/// A macro that produces a Color from an hex value. For example,
///
///     #hexColor("FF00FF") // or FFFF00FF to include alpha value
///
/// produces a `Color`.
@freestanding(expression)
public macro hexColor(_ hex: String) -> Color = #externalMacro(module: "EducaSwiftHexMacroPackageMacros", type: "HexColorMacro")
main.swift will execute our Macro as an example, we can use this to validate our Macro until we import it and test in our iOS project.
import EducaSwiftHexMacroPackage
import SwiftUI

let color = #hexColor("FFFF00FF")

print("The value FFFF00FF was produced by the code \"\(color)\"")
EducaSwiftHexMacroPackageMacro.swift defines:
- The
HexColorMacroErrorthat we'll return when the inputStringis not valid. - Our Macro implementation named
HexColorMacrothat conformsExpressionMacroprotocol implementing - And finally,
EducaSwiftHexMacroPackagePluginexposes our Macro.
expansion() function.
As you can see, we'll made our color conversion in the expansion() function in 4 steps:
- Get the input string from the node.
- Check the length of the input. This is just to show that we can send any error we want.
- Make the color conversion with Swift syntax.
- Return the color as
ExprSyntax. Since our Macros replaces code, we'll actually send back the code we want as replacement.
import SwiftCompilerPlugin
import SwiftSyntax
import SwiftSyntaxBuilder
import SwiftSyntaxMacros
import SwiftUI

public enum HexColorMacroError: Error {

    case inputNotValid
    case lengthNotValid

    var description: String {
        switch self {
        case .inputNotValid:
            return "Input is not valid."
        case .lengthNotValid:
            return "Length not valid."
        }
    }
}

/// Implementation of the `hexColor` macro, which takes an String
/// and produces a Color with rgba values. For example
///
///     #hexColor("FFFF00FF") // a-r-g-b
///
///  will expand to
///
///     Color(
///         .sRGB,
///         red: 1.0,
///         green: 0.0,
///         blue:  1.0,
///         opacity: 1.0
///     )
public struct HexColorMacro: ExpressionMacro {
    public static func expansion(
        of node: some FreestandingMacroExpansionSyntax,
        in context: some MacroExpansionContext
    ) throws -> ExprSyntax {

        // Get and check input parameter
        guard let argument = node.arguments.first?.expression,
              let segments = argument.as(StringLiteralExprSyntax.self)?.segments,
              segments.count == 1,
              case .stringSegment(let literalSegment)? = segments.first
        else {
            throw HexColorMacroError.inputNotValid
        }

        // Check the length of the input String
        guard literalSegment.content.text.count == 6 || literalSegment.content.text.count == 8 else {
            throw HexColorMacroError.lengthNotValid
        }

        // Convert hex String to Color
        let hex = literalSegment.content.text.trimmingCharacters(in: CharacterSet.alphanumerics.inverted)
        var int: UInt64 = 0
        Scanner(string: hex).scanHexInt64(&int)
        let a, r, g, b: UInt64
        switch hex.count {
        case 3: // RGB (12-bit)
            (a, r, g, b) = (255, (int >> 8) * 17, (int >> 4 & 0xF) * 17, (int & 0xF) * 17)
        case 6: // RGB (24-bit)
            (a, r, g, b) = (255, int >> 16, int >> 8 & 0xFF, int & 0xFF)
        case 8: // ARGB (32-bit)
            (a, r, g, b) = (int >> 24, int >> 16 & 0xFF, int >> 8 & 0xFF, int & 0xFF)
        default:
            (a, r, g, b) = (1, 1, 1, 0)
        }

        // Return Color as an expression.
        return """
            Color(
                .sRGB,
                red: \(raw: Double(r) / 255),
                green: \(raw: Double(g) / 255),
                blue:  \(raw: Double(b) / 255),
                opacity: \(raw: Double(a) / 255)
            )
        """
    }
}

@main
struct EducaSwiftHexMacroPackagePlugin: CompilerPlugin {
    let providingMacros: [Macro.Type] = [
        HexColorMacro.self,
    ]
}
EducaSwiftHexMacroPackageTests.swift includes a test that checks if the result expression is what we expected. Again, a Macro doesn't return a value type as we are used to, but an expression (a piece of code).
import SwiftSyntax
import SwiftSyntaxBuilder
import SwiftSyntaxMacros
import SwiftSyntaxMacrosTestSupport
import XCTest

// Macro implementations build for the host, so the corresponding module is not available when cross-compiling. Cross-compiled tests may still make use of the macro itself in end-to-end tests.
#if canImport(EducaSwiftHexMacroPackageMacros)
import EducaSwiftHexMacroPackageMacros

let testMacros: [String: Macro.Type] = [
    "hexColor": HexColorMacro.self,
]
#endif

final class EducaSwiftHexMacroPackageTests: XCTestCase {
    func testMacro() throws {
        #if canImport(EducaSwiftHexMacroPackageMacros)
        assertMacroExpansion(
            """
            #hexColor("FFFF00FF")
            """,
            expandedSource: """
                Color(
                    .sRGB,
                    red: 1.0,
                    green: 1.0,
                    blue:  1.0,
                    opacity: 1.0
                )
            """,
            macros: testMacros
        )
        #else
        throw XCTSkip("macros are only supported when running tests for the host platform")
        #endif
    }
}
Using our macro
To use our new Macro first we need to import the package we just created. It's recommended to have this package on remote, like on GitHub or BitBucket, but for this example we'll import it locally. In any case, we'll use Swift Package Manager, that can be used also for local packages:
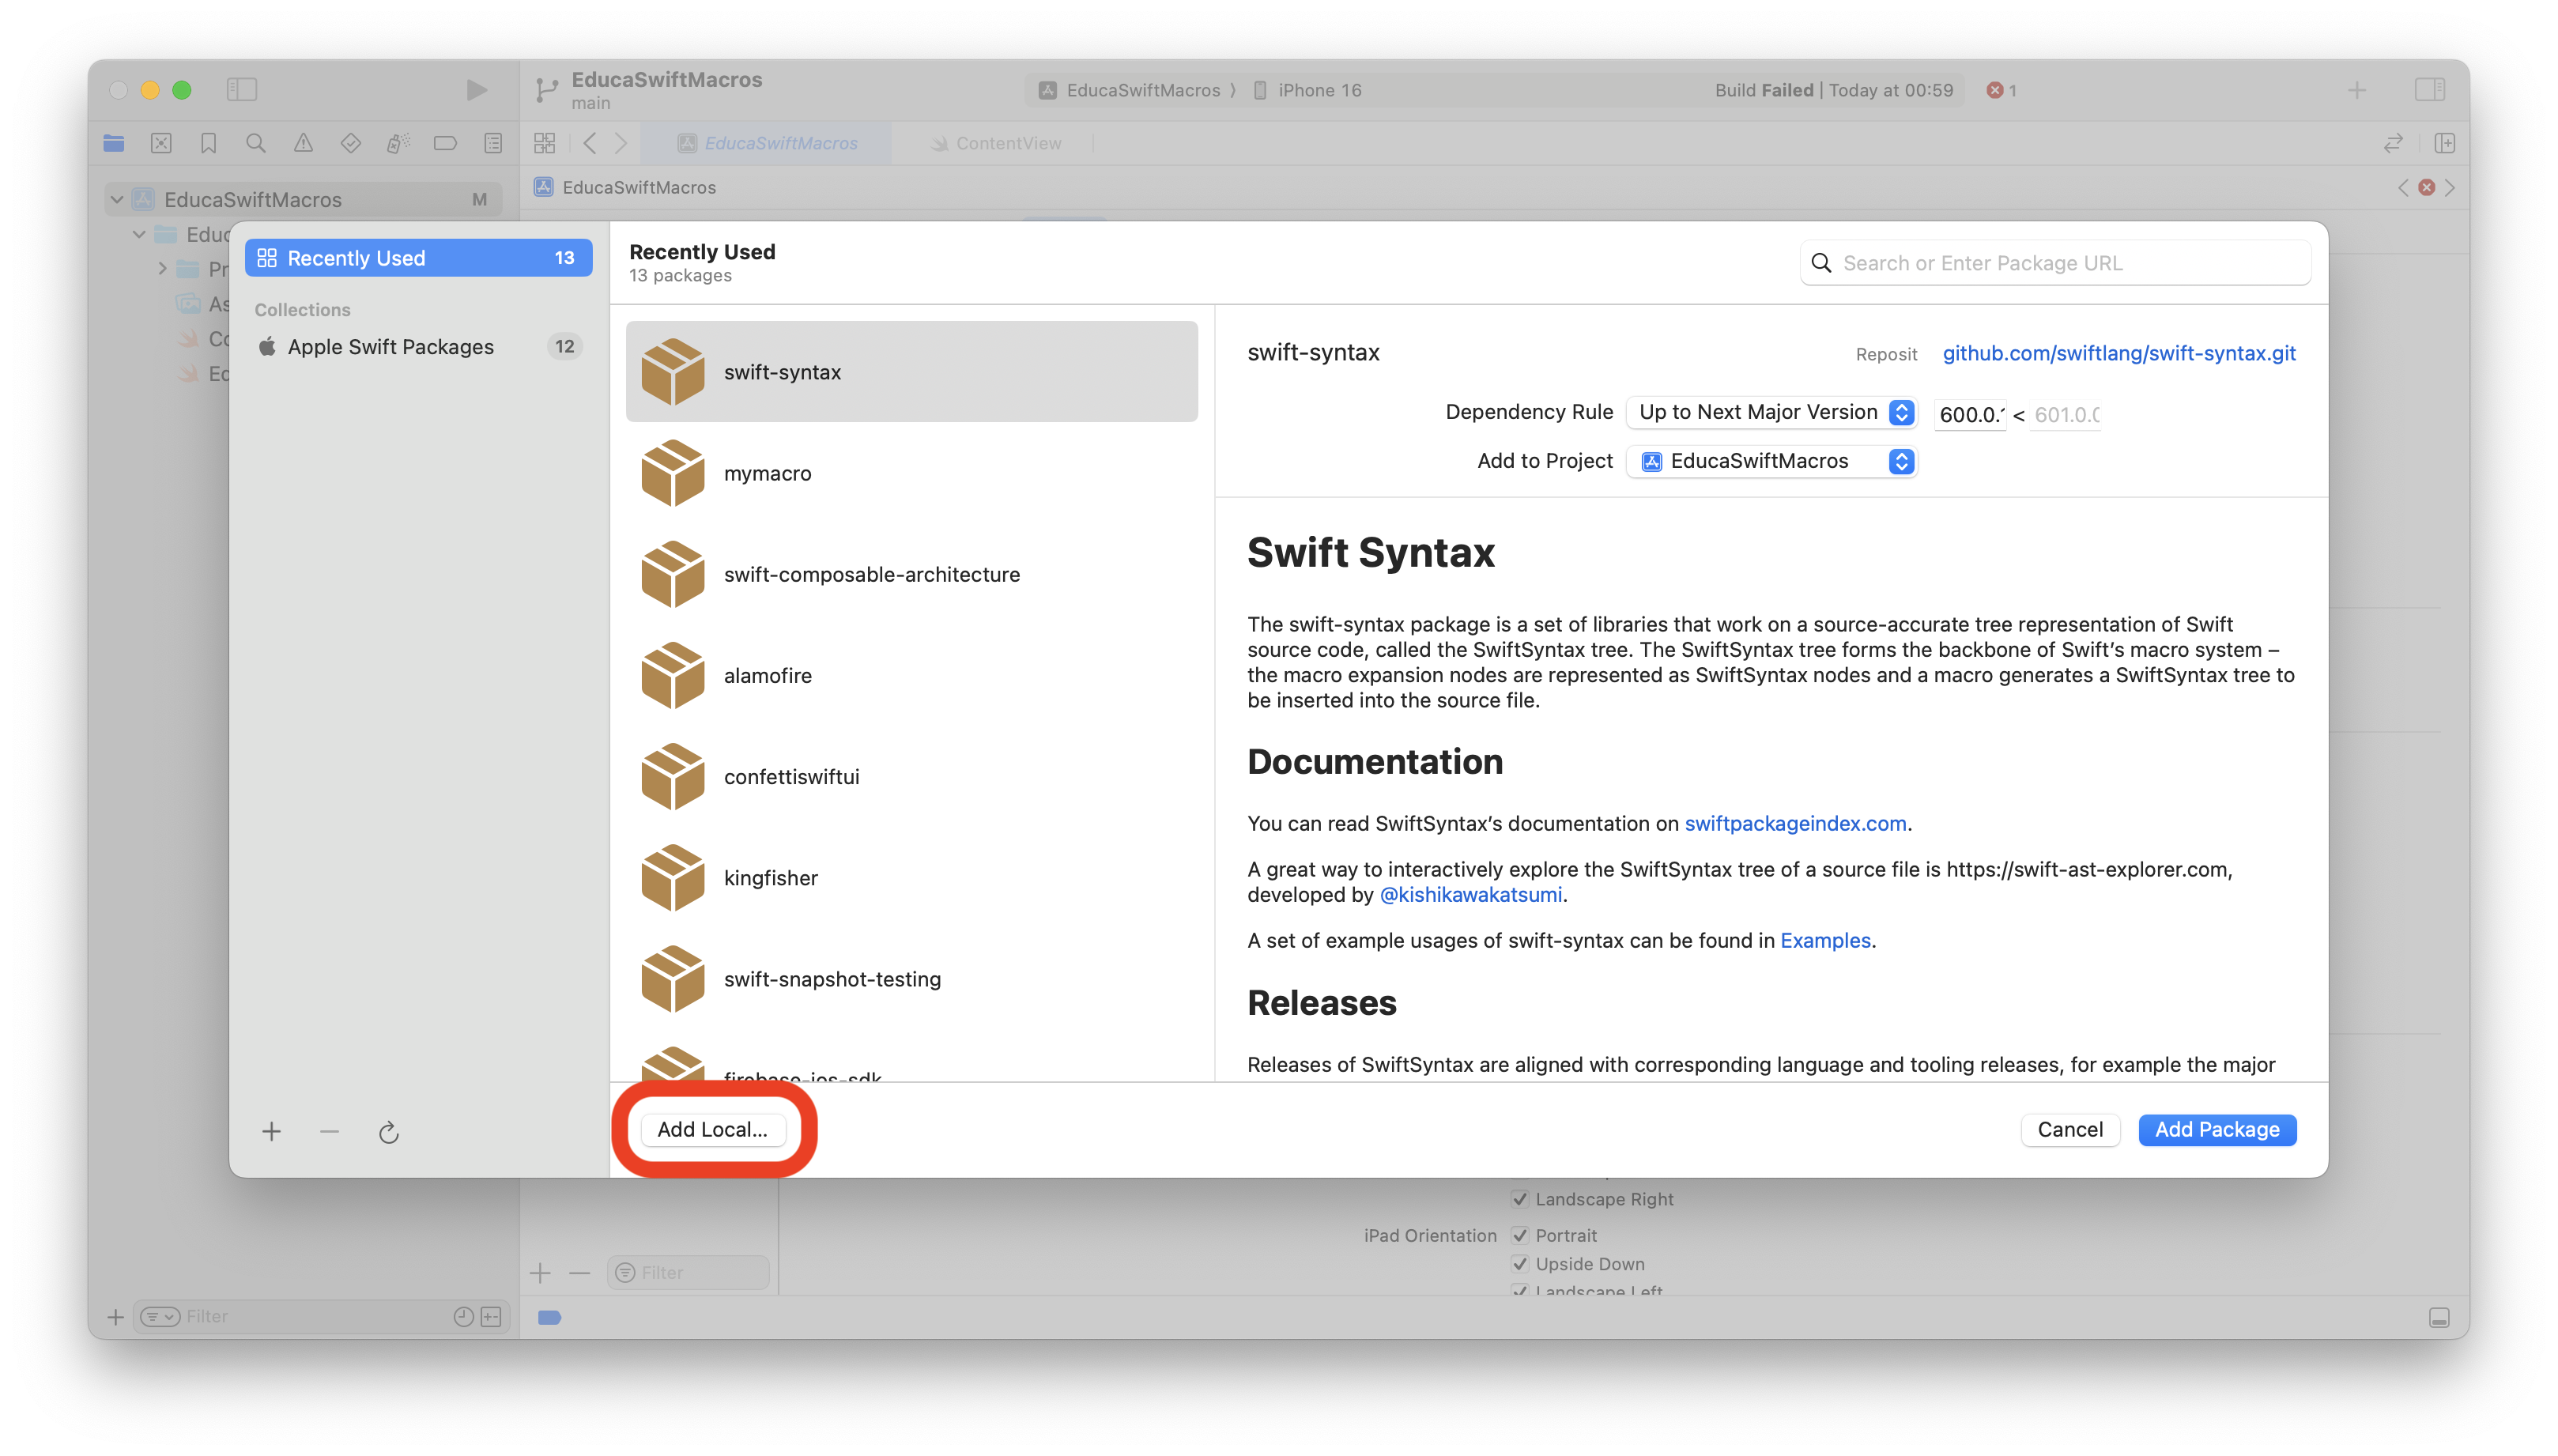
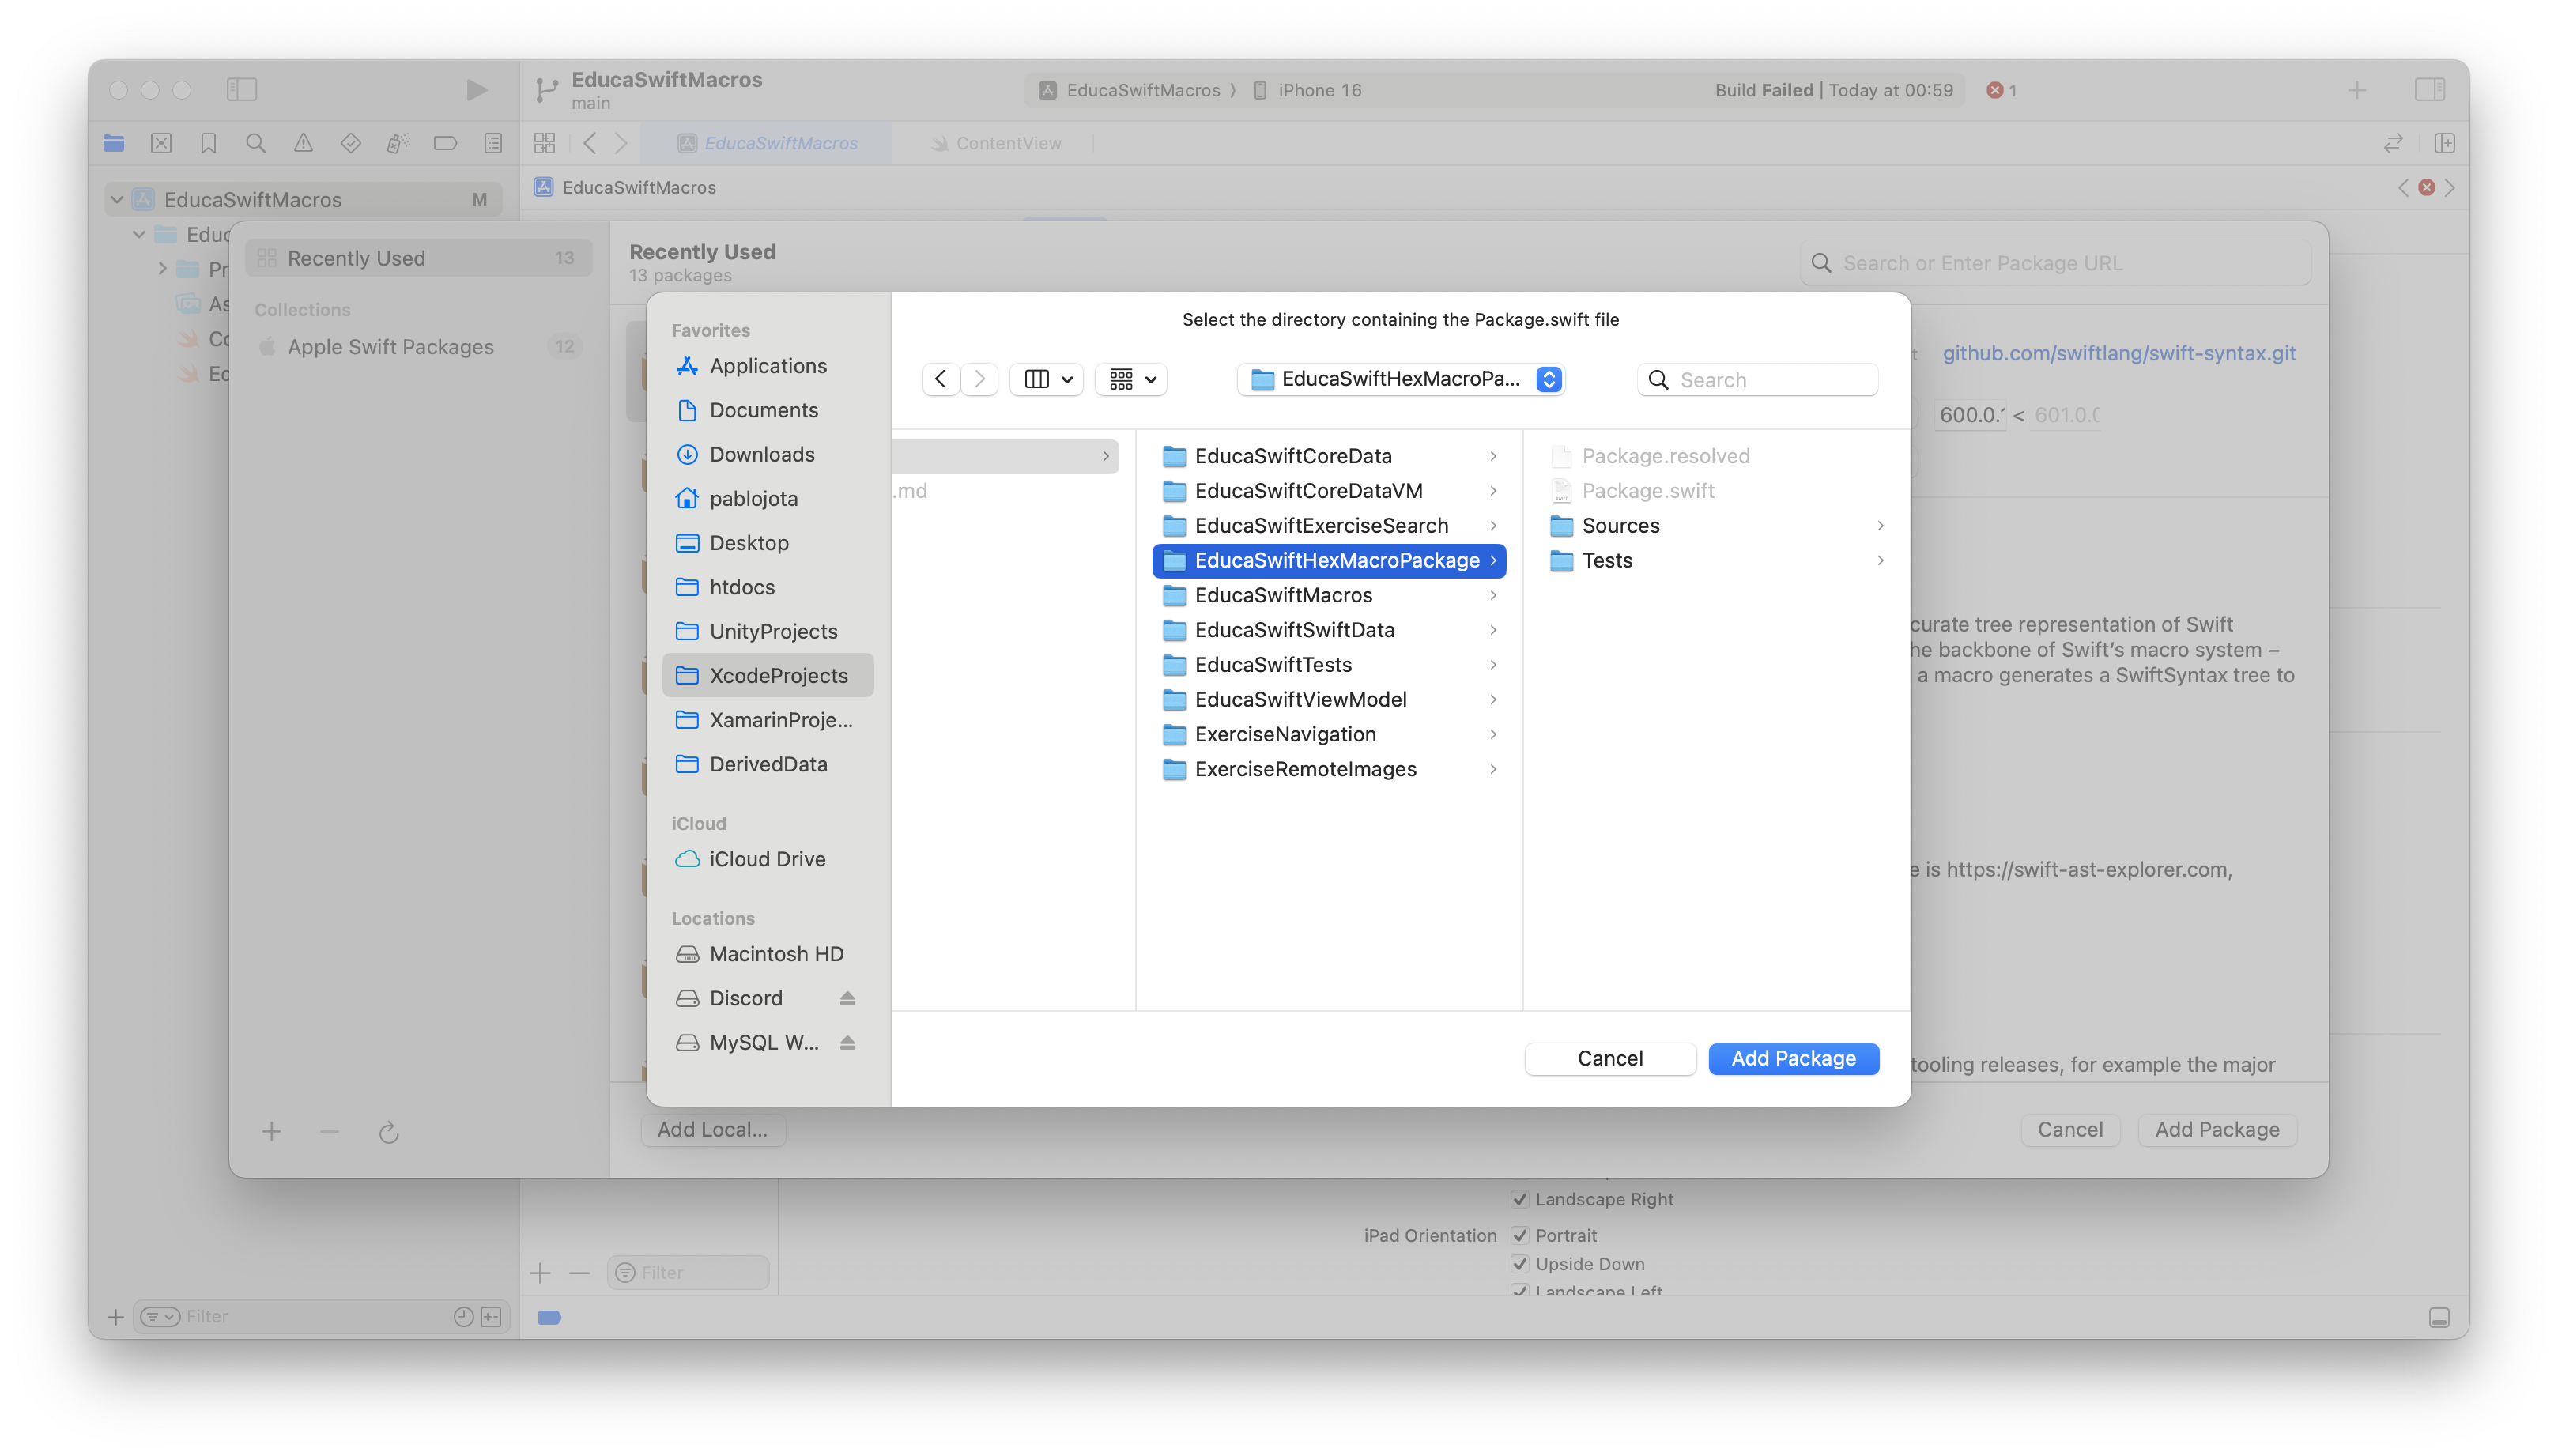
Press "Add Local" and then select the root folder of your package.
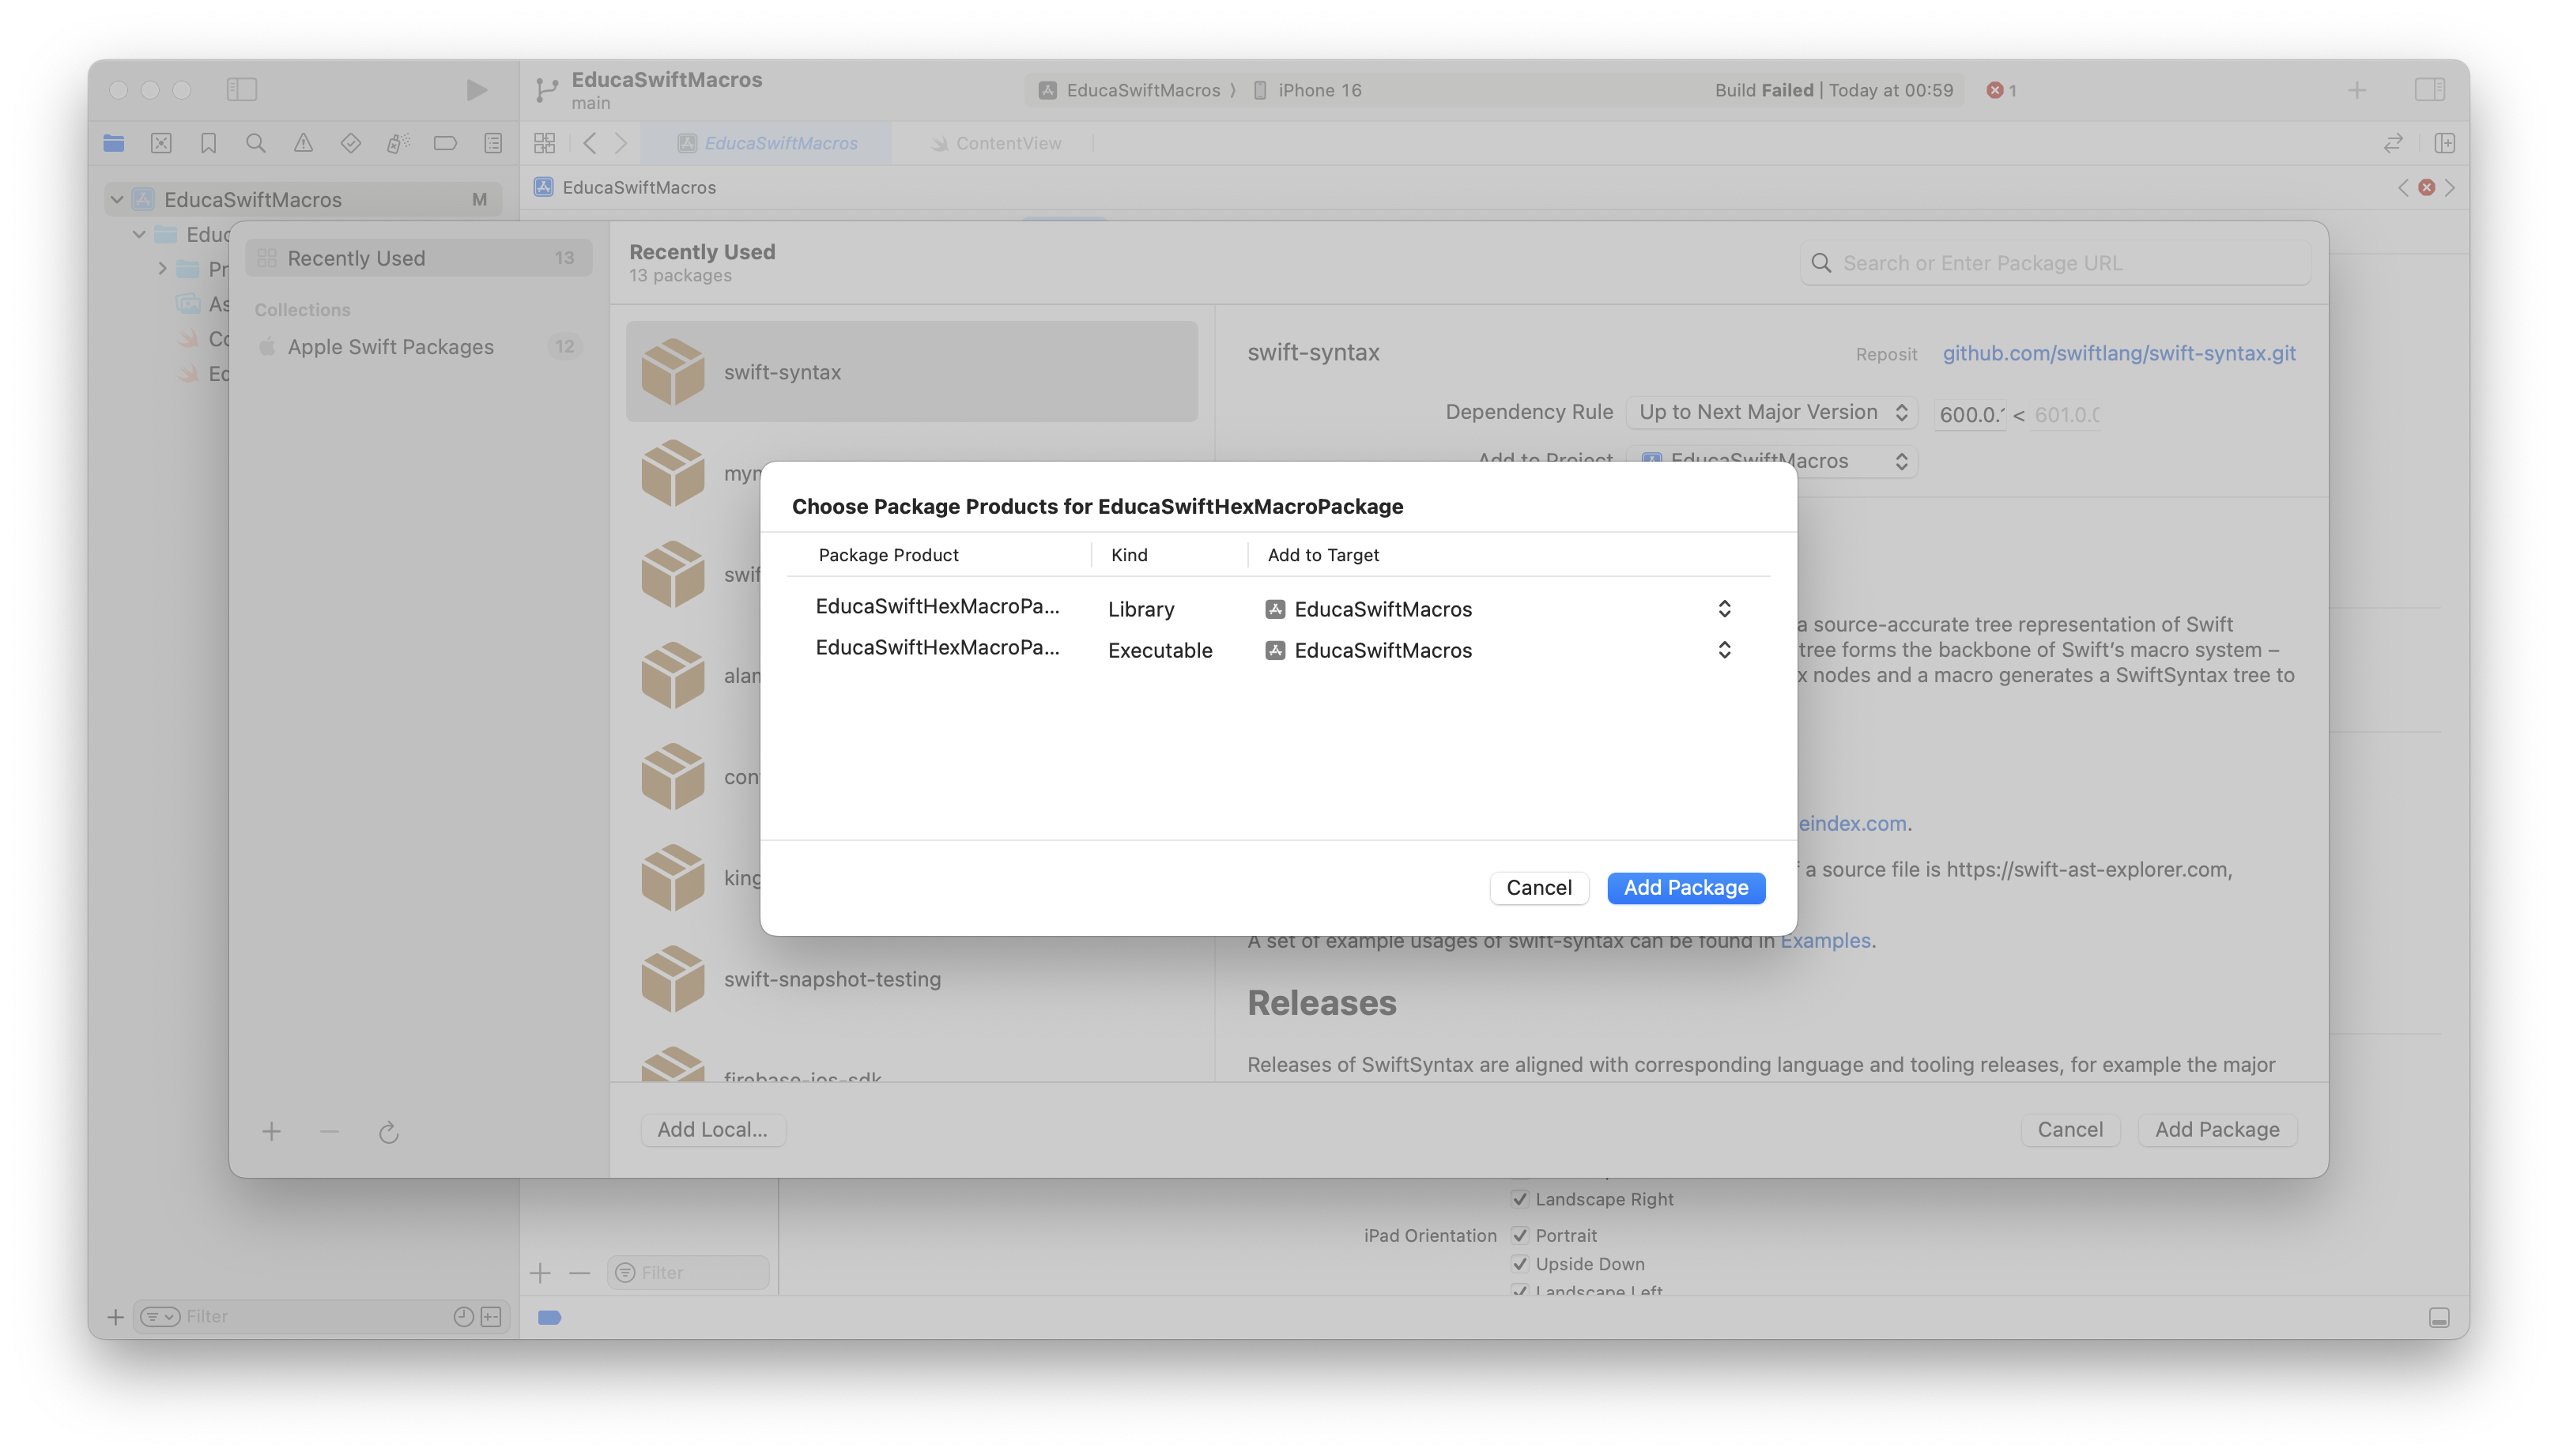
Finally, add both, Library and Executable to your project's target.
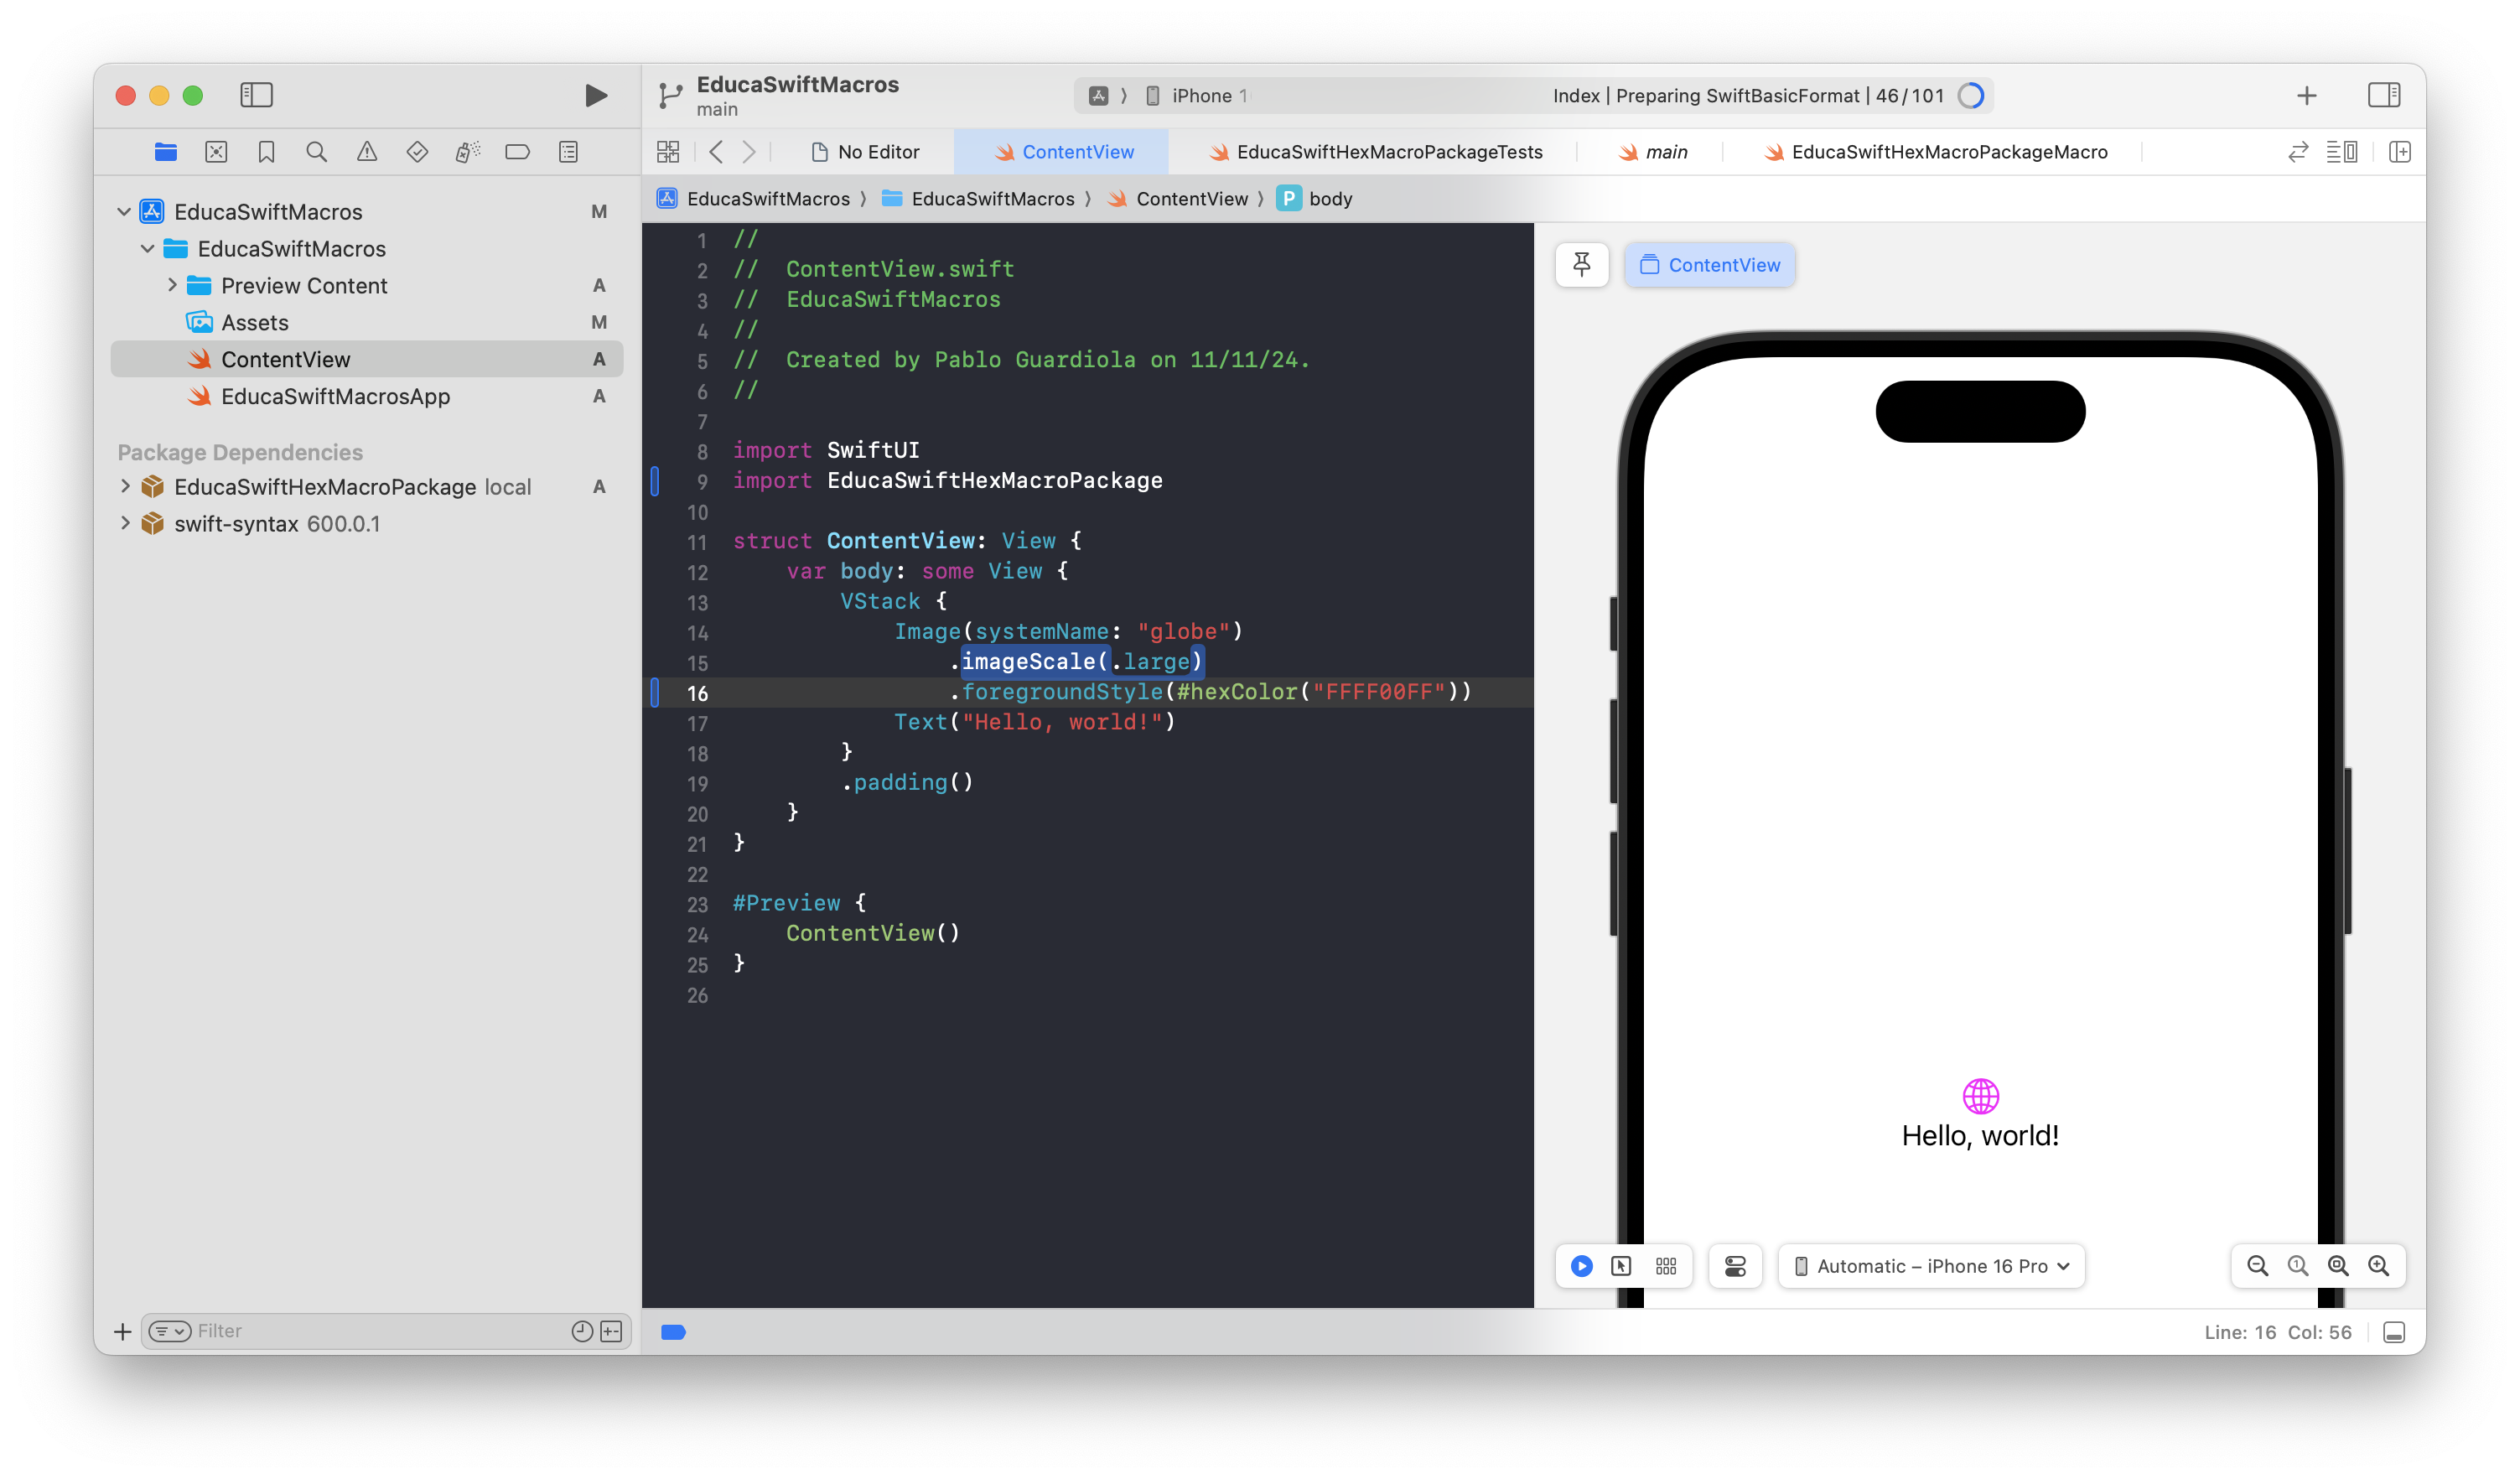
Once the package is ready, just use your new Macro #hexColor by importing EducaSwiftHexMacroPackage.
import EducaSwiftHexMacroPackage
Image(systemName: "globe")
    .imageScale(.large)
    .foregroundStyle(#hexColor("FFFF00FF"))
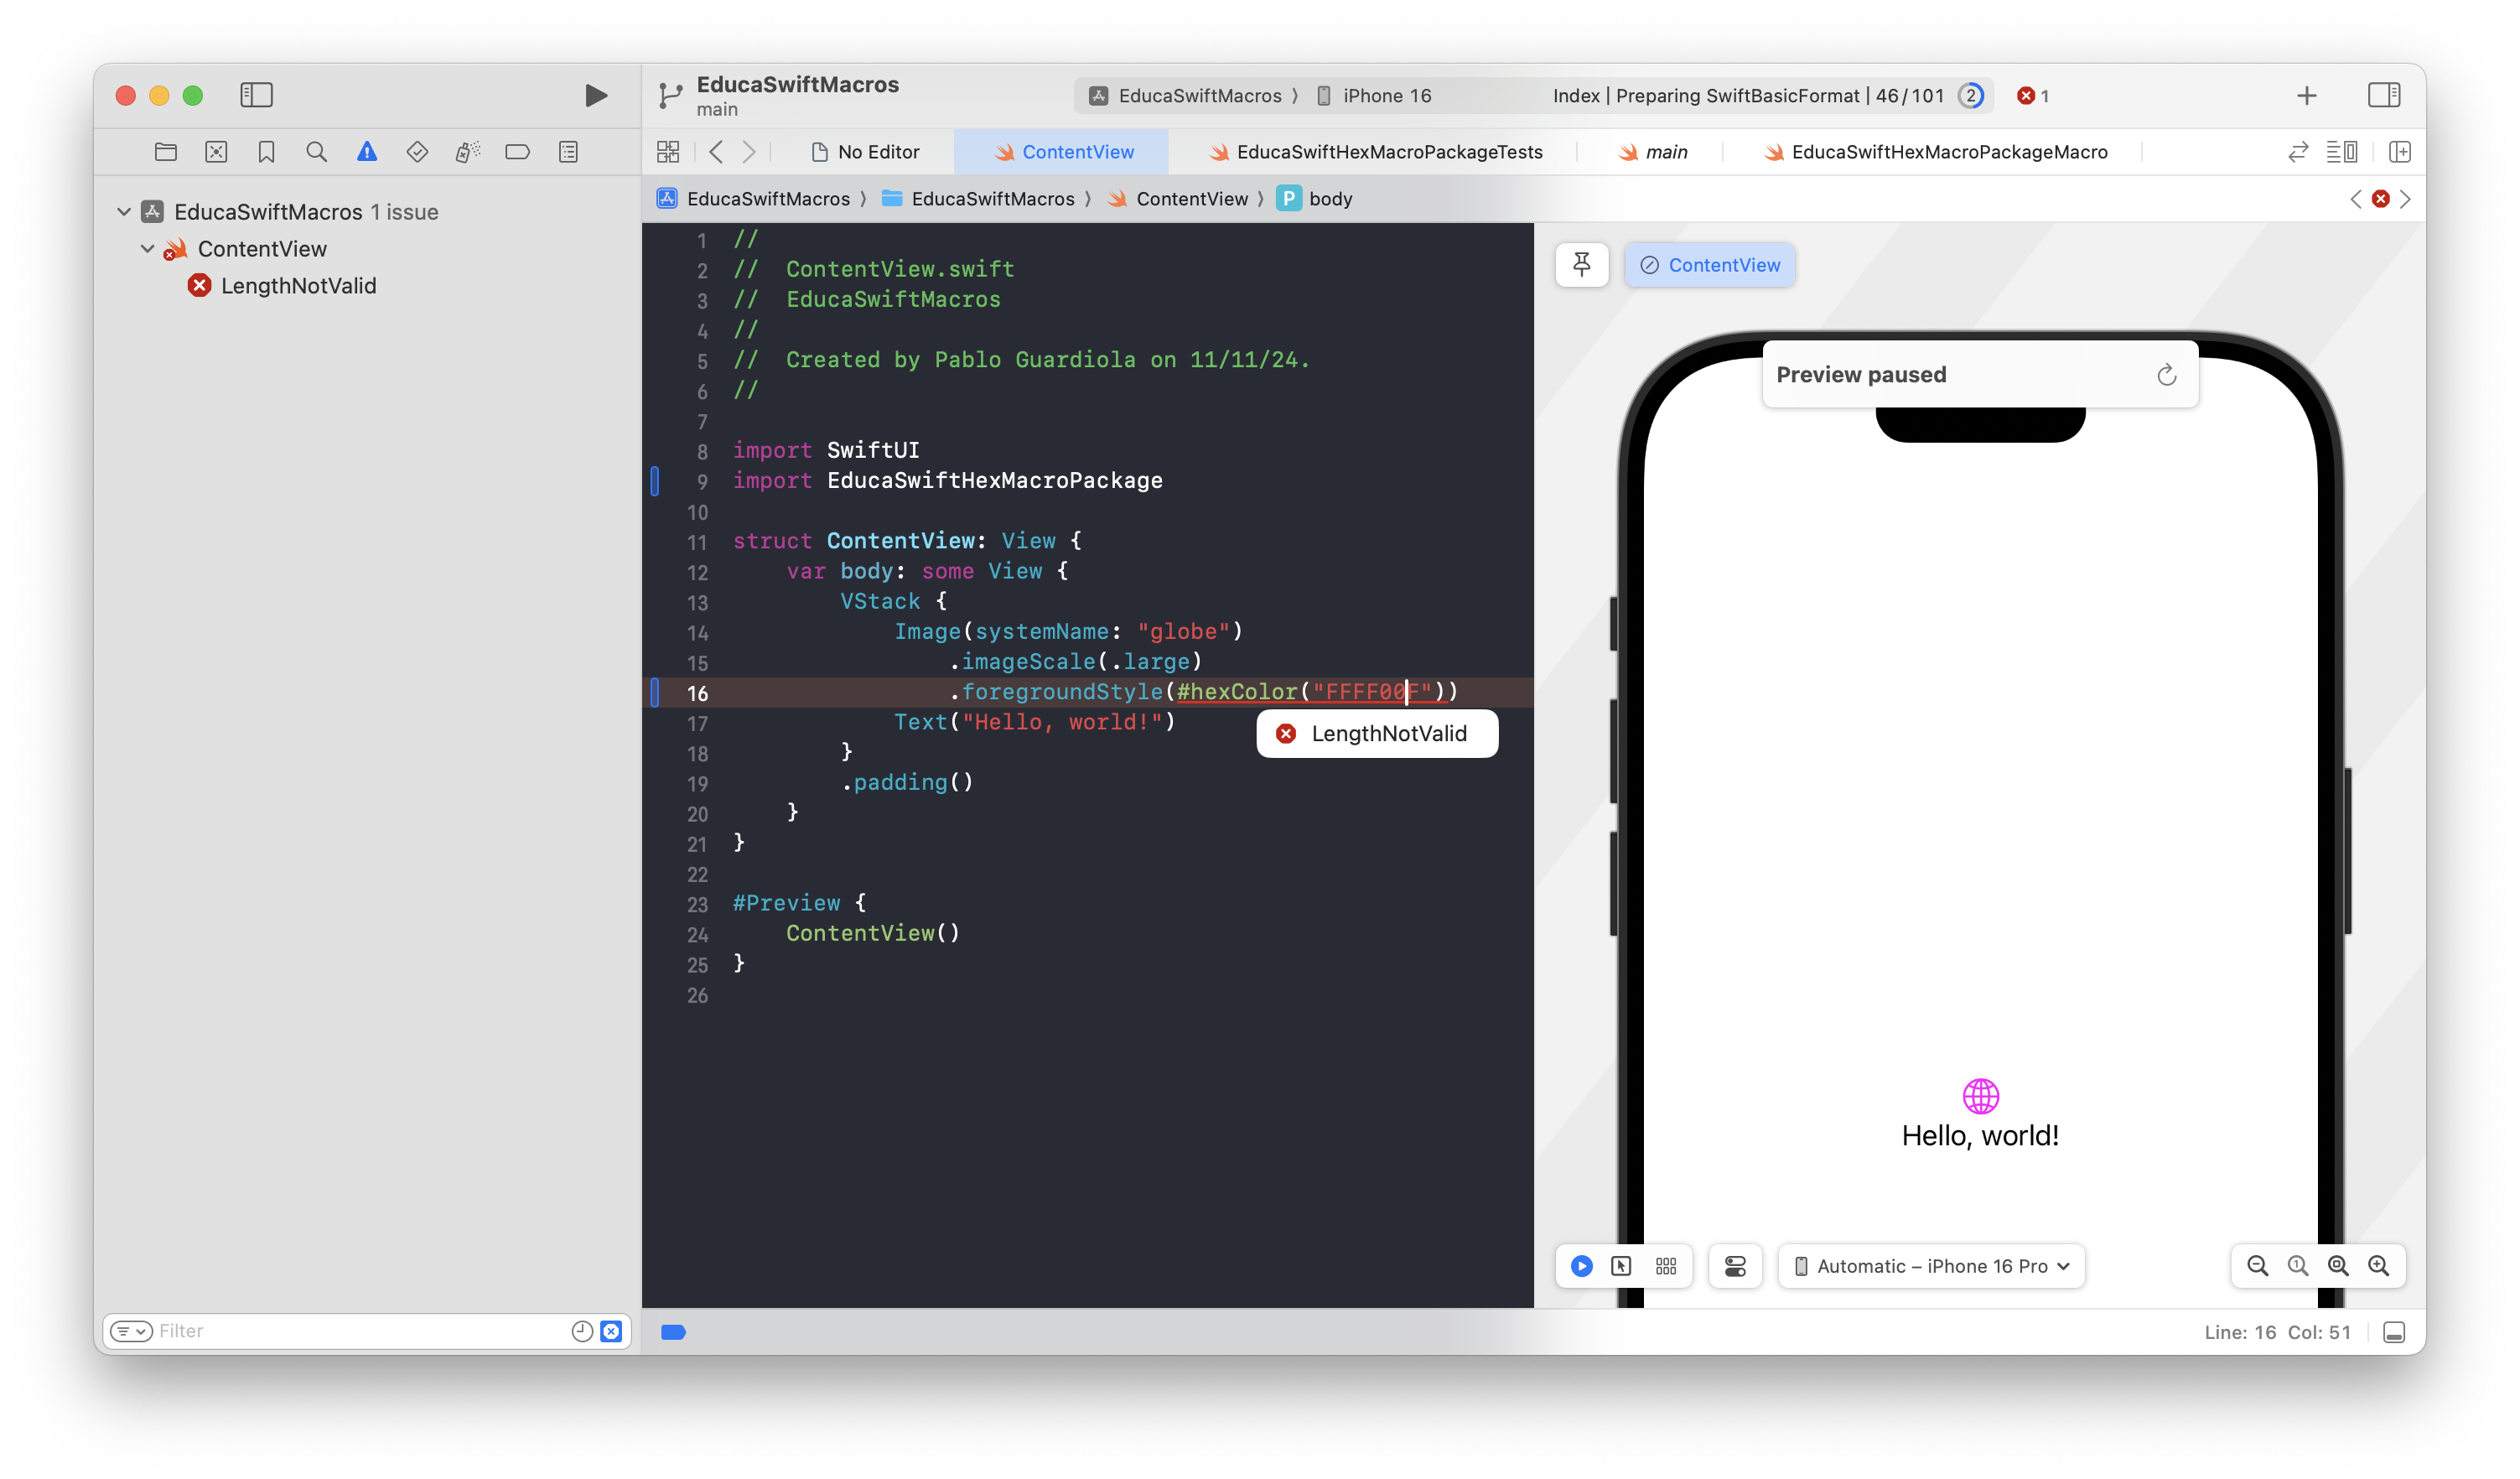
In case of having any mistake in the hex string, you'll see a compilation error that won't let you continue.
Be the first to comment