Unit testing is essential for ensuring code quality, and mastering it can take your iOS development skills to the next level. Xcode provides powerful capabilities for writing advanced unit tests that cover not only simple functions but also more complex scenarios involving asynchronous operations, dependency management, and mock data. This article delves into advanced topics to help you make the most out of Xcode’s unit testing tools.
Best Practices for Unit Testing
Here are some tips for writing effective unit tests:
- Keep tests independent: Ensure that your tests do not depend on each other’s state or results.
- Use descriptive names: Name your test methods clearly to indicate what they are testing.
- Follow the Arrange-Act-Assert pattern: Structure your tests to set up the necessary conditions, execute the functionality being tested, and verify the results.
- Mock dependencies: Use mock objects to isolate the code under test from external dependencies.
Code Coverage
Code coverage helps measure which parts of your code are executed when your test suite runs. Once you run all your tests (you can use Command + U), view the coverage report by going to the Report Navigator (Command + 9) and selecting the Coverage tab. This report will highlight which lines of code were executed during testing, allowing you to identify untested code paths.
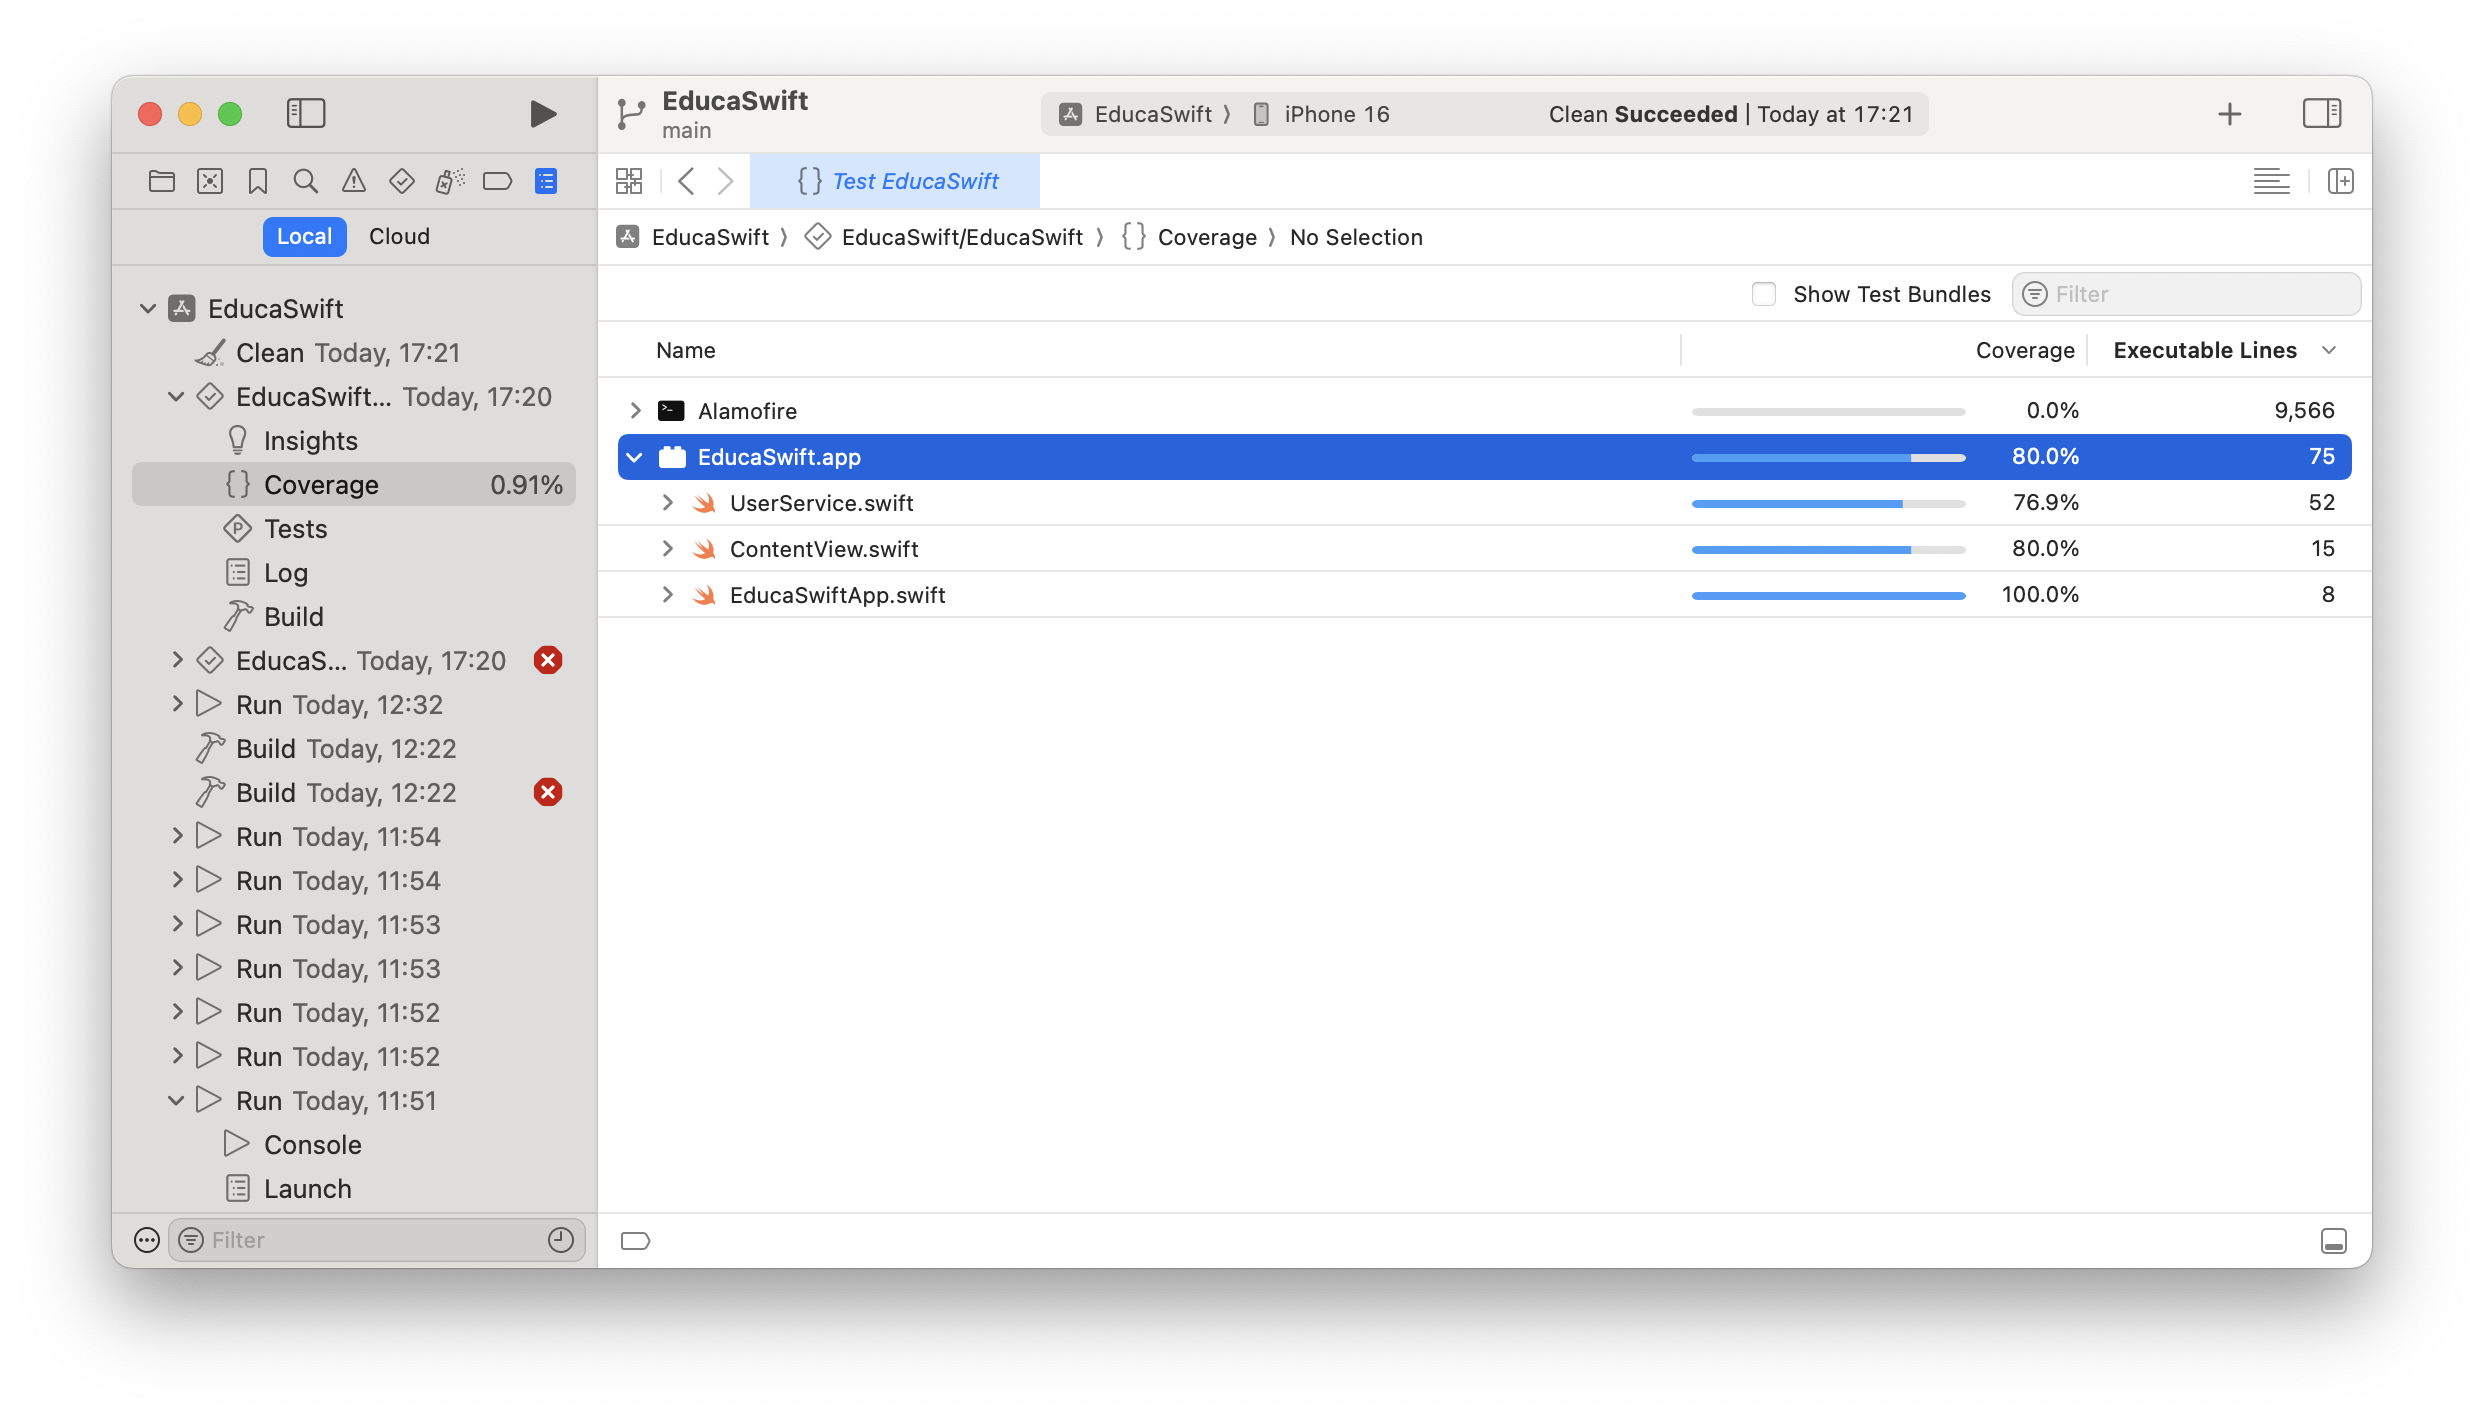
This includes the coverage of the external packages you installed, you can just ignore that and focus in your tagets.
Throwing errors
You can mark any of your unit tests with throws keyword. This will stop the test when any error is thrown by our code.
Let's imagine we have a ViewModel to test:
struct ViewModel {
    func fetchData() throws -> Int {
        return 5 // Just for demostration purposes
    }
}
We can mark our test as throws and then use try like in any other method:
func testOne() throws {
    let sut = ViewModel()

    let valueToTest = try sut.fetchData()
    let expectedValue: Int = 5

    XCTAssertEqual(valueToTest, expectedValue)
}
Setup and TearDown
XCTestCase interface provides some methods that will be called before and after each test. These methods can be overrided in order to setup our tests or do some cleanning when finished.
import XCTest

final class EducaSwiftXCTests: XCTestCase {

    override func setUp() {
        super.setUp()

        // Setup everything you need for all the tests in this file, like loading mock objects.
    }

    override func tearDown() {
        super.tearDown()

        // Clean anything you may did in your tests that could impact on other tests, like removing persitent data.
    }

    func testOne() {
        // ...
    }

    func testTwo() {
        // ...
    }
}
Performance Testing
Xcode’s XCTest framework also includes performance testing capabilities. These tests help ensure that code meets performance benchmarks and doesn’t regress as the codebase evolves.
import XCTest

class YourAppNamePerformanceTests: XCTestCase {

    func testPerformanceOfSortingAlgorithm() {
        let largeArray = Array(1...1_000_000).shuffled()

        measure {
            let _ = largeArray.sorted()
        }
    }
}
The measure block runs the code multiple times and provides metrics like execution time and standard deviation. This is useful for identifying potential performance bottlenecks.
The new Testing framework
According to Apple's documentation:
Xcode 16 and later includes Swift Testing, a framework for writing unit tests that takes advantage of the powerful capabilities of the Swift programming language. Consider using Swift Testing for new unit test development and migrating existing tests...
Using this new framework will just change the syntax of our tests, but the idea behind is be the same, test your code and follow the best practices. Let's create a small dumb test just to show the syntax of this new library:
import Testing

struct EducaSwiftTests {

    @Test func example() async throws {
        let elementToTest: Int = 5
        let expectedValue: Int = 5

        #expect(elementToTest == expectedValue)
    }
}
Be the first to comment