Navigation in SwiftUI can be challenging, especially when building complex apps with dynamic requirements. The TCA (The Composable Architecture) framework simplifies state management and enables organized navigation patterns like tree-based and stack-based navigation while handling dismissals efficiently.
In this article we are going to see how to create the same navigation in both patterns, tree-based and stack-based, how to test it, and finally how to dismiss programmatically.
You can find the Example project on GitHub, where each navigation pattern has been placed in a different target.
Each of this navigation patterns will contain the same screens:
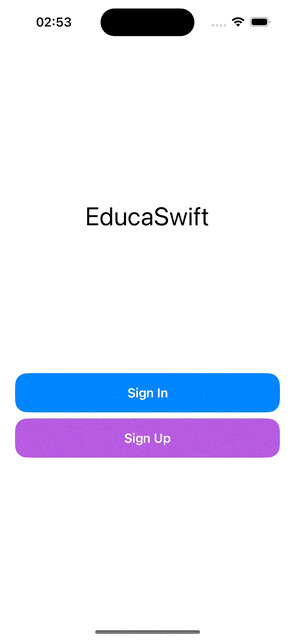
- MainMenu: The main view that shows two buttons, one to go to the SignIn screen and another one to go to the SignUp screen.
- SignIn: Nothing special, just a sample screen.
- SignUp: Here we'll find a button that will simulate the end of the sign up, opening SignUpConfirmation screen.
- SignUpConfirmation: Nothing special, just a sample screen.
Tree-Based Navigation
In this navigation pattern, each view presents the next. The advantage is avoiding all the code in one place, but the drawback is losing centralized flow control.
In order to manage view presentation we'll add Destination enum to our reducer. Each case will describe the view that we want to present.
enum Destination {
    case signIn(SignIn)
    case signUp(SignUp)
}
Then we can add the state and the action for this:
@ObservableState
struct State {
    @Presents var destination: Destination.State?
}
enum Action {
    case signInTapped
    case signUpTapped

    case destination(PresentationAction<Destination.Action>)
}
Now we can manage not only the MainMenu actions, but also the presented views actions:
var body: some ReducerOf<MainMenu> {
    Reduce { state, action in
        switch action {
        case .signInTapped:
            state.destination = .signIn(SignIn.State())
            return .none
        case .signUpTapped:
            state.destination = .signUp(SignUp.State())
            return .none

        // You can catch specific child actions like this
        case .destination(.presented(.signUp(.signUpTapped))):
            return .none
        // The rest of the children action will trigger this
        case .destination:
            return .none
        }
    }
}
To finish with the reducer, we need to add the scope of all the destinations with just one line.
var body: some ReducerOf<MainMenu> {
    Reduce { state, action in
        ...
    }
    .ifLet(\.$destination, action: \.destination) // <-- THIS LINE
}
Finaly, we only need to set the NavigationStack with all the destinations in our view.
var body: some View {
    NavigationStack {
        VStack {
            // CONTENT OF THE VIEW
        }
        .padding(20)
        .navigationDestination(
            item: $store.scope(
                state: \.destination?.signIn,
                action: \.destination.signIn
            )
        ) { store in
            SignInView(store: store)
        }
        .navigationDestination(
            item: $store.scope(
                state: \.destination?.signUp,
                action: \.destination.signUp
            )
        ) { store in
            SignUpView(store: store)
        }
    }
}
@Binding since the NavigationStack will make changes to the path, for instance, when the user dismisses a view pressing the system navigation bar's back button.
@Binding var store: StoreOf<MainMenu>
As you can see, for presenting a new screen we just need to assign a Destination's case to the state's destination. Here we can inject any data we need in the new screen's state.
.navigationDestination(
    item: $store.scope(
        state: \.destination?.signIn,
        action: \.destination.signIn
    )
) { store in
    SignInView(store: store)
}
.sheet(
    item: $store.scope(
        state: \.destination?.signIn,
        action: \.destination.signIn
    )
) { store in
    SignInView(store: store)
}
.popover(
    item: $store.scope(
        state: \.destination?.signIn,
        action: \.destination.signIn
    )
) { store in
    SignInView(store: store)
}
Stack-Based Navigation
For Stack-based navigation we are going to manage the whole flow from one screen, the MainMenu, which acts as Coordinator.
First, we need to declare the Path and its cases:
enum Path {
    case signIn(SignIn)
    case signUp(SignUp)
    case signUpConfirmation(SignUpConfirmation)
}
Then, we add the state and the actions:
struct State {
    var path = StackState<Path.State>()
}
enum Action {
    case signInTapped
    case signUpTapped

    case path(StackActionOf<Path>)
}
To finish with the reducer, we just handle the actions, and add all the Path cases scopes with a forEach function.
var body: some ReducerOf {
    Reduce { state, action in
        switch action {
        case .signInTapped:
            state.path.append(.signIn(SignIn.State()))
            return .none
        case .signUpTapped:
            state.path.append(.signUp(SignUp.State()))
            return .none

        // You can catch specific child actions like this
        case .path(.element(id: _, action: .signUp(.signUpTapped))):
            state.path.append(.signUpConfirmation(SignUpConfirmation.State()))
            return .none

        // The rest of the children action will trigger this
        case .path:
            return .none
        }
    }
    .forEach(\.path, action: \.path)
}
As you can see, for presenting a new view, we just need to append a new Path case to the state's path. This will include state of that screen, which allows to inject any data we need in there.
Finally, we set the NavigationStack in our view, and define all the destinations:
var body: some View {
    NavigationStack(
        path: $store.scope(state: \.path, action: \.path)
    ) {
        // CONTENT OF THE VIEW
    } destination: { store in
        switch store.case {
        case .signIn(let signInStore):
            SignInView(store: signInStore)
        case .signUp(let signUpStore):
            SignUpView(store: signUpStore)
        case .signUpConfirmation(let confirmationStore):
            SignUpConfirmationView(store: confirmationStore)
        }
    }
}
Handling Dismissals
We can dismiss views programmatically setting destination to nil or removing the last item of the path. This can be done only from the presenter screen, however, we can trigger a dismiss from the presented views using the dismiss dependency.
We just need to add it to our reducer:
@Reducer
struct MainMenu {
    @Dependency(\.dismiss) var dismiss

    // ...
}
And then trigger it with an effect when we need it:
case .exitButtonTapped:
    return .run { _ in await self.dismiss() }
Testing Navigation
In order to be able to test our Navigation, we must make all our screen's State, Action, Destination and Path to conform Equatable protocol.
struct State: Equatable {
    // ...
}
struct Action: Equatable {
// ...
}@Reducer(state: .equatable, action: .equatable)
enum Destination {
// ...
}
@Reducer(state: .equatable, action: .equatable)
enum Path {
    // ...
}
Then we will be able to create unit tests:
For Tree-based navigation.
@Test func mainMenuNavigation() async {
    let store = TestStore(initialState: MainMenu.State()) {
        MainMenu()
    }

    // when click sign in button
    await store.send(.signInTapped) {
        // then SignIn view is presented
        $0.destination = .signIn(SignIn.State())
    }

    // when click sign up button
    await store.send(.signUpTapped) {
        // then SignUp view is presented
        $0.destination = .signUp(SignUp.State())
    }
}
@Test func signUpNavigation() async {
    let store = TestStore(initialState: SignUp.State()) {
        SignUp()
    }

    // when click sign in button
    await store.send(.signUpTapped) {
        // then Sign In view is presented
        $0.destination = .confirmation(SignUpConfirmation.State())
    }
}
And for Stack-based navigation.
@Test func signInPath() async {
    let store = TestStore(initialState: MainMenu.State()) {
        MainMenu()
    }

    // when click sign in button
    await store.send(.signInTapped) {
        // then SignIn view is presented
        $0.path.append(.signIn(SignIn.State()))
    }
}
@Test func signUpPath() async {
    let store = TestStore(initialState: MainMenu.State()) {
        MainMenu()
    }

    // when click sign up button
    await store.send(.signUpTapped) {
        // then SignUp view is presented
        $0.path.append(.signUp(SignUp.State()))
    }

    // when click sign up button
    await store.send(.path(.element(
        id: StackElementID(integerLiteral: 0),
        action: .signUp(.signUpTapped)
    ))) {
        // then SignUpConfirmation view is presented
        $0.path.append(.signUpConfirmation(SignUpConfirmation.State()))
    }
}
Be the first to comment