Widgets provide a quick way for users to access information from your app right on the home screen. By adding a widget, you can improve user engagement and allow users to interact with your app’s data in a glanceable and interactive way. This guide will walk you through the steps of adding a widget to an existing iOS app.
Setting Up the Widget Target
First, open your existing app project in Xcode and add a new widget target:
- Go to File > New > Target.
- Under the iOS section, select Widget Extension and click Next.
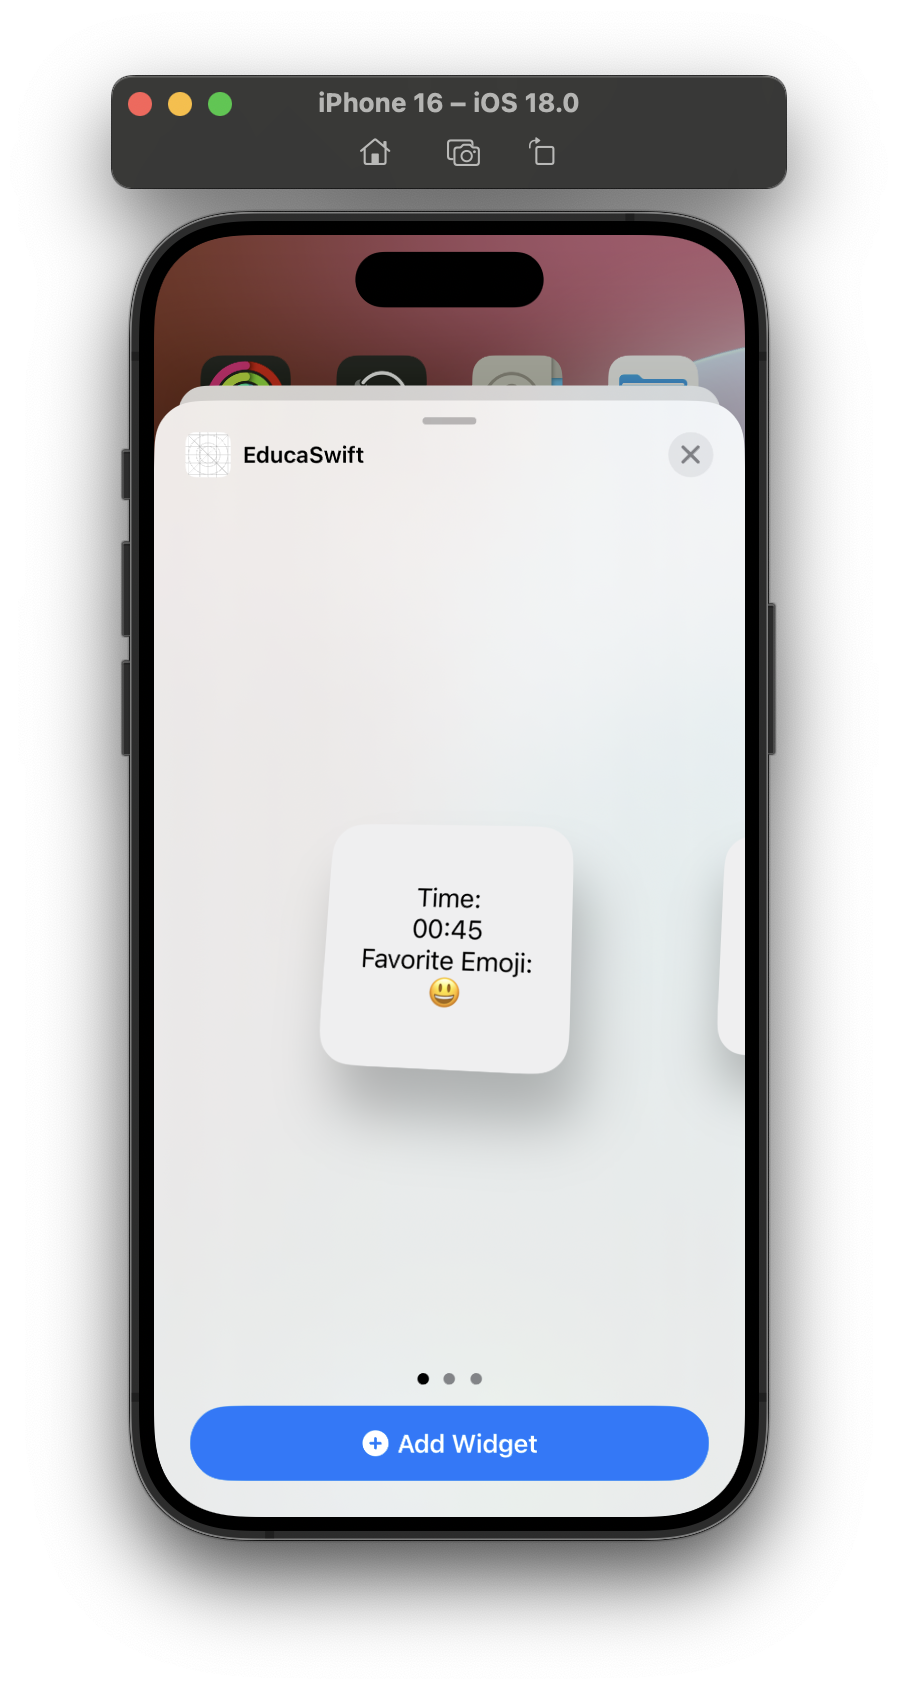
- Give your widget a name and disable the options Live Activity, Control and Configuration App Intent, these options will be explored in other articles.

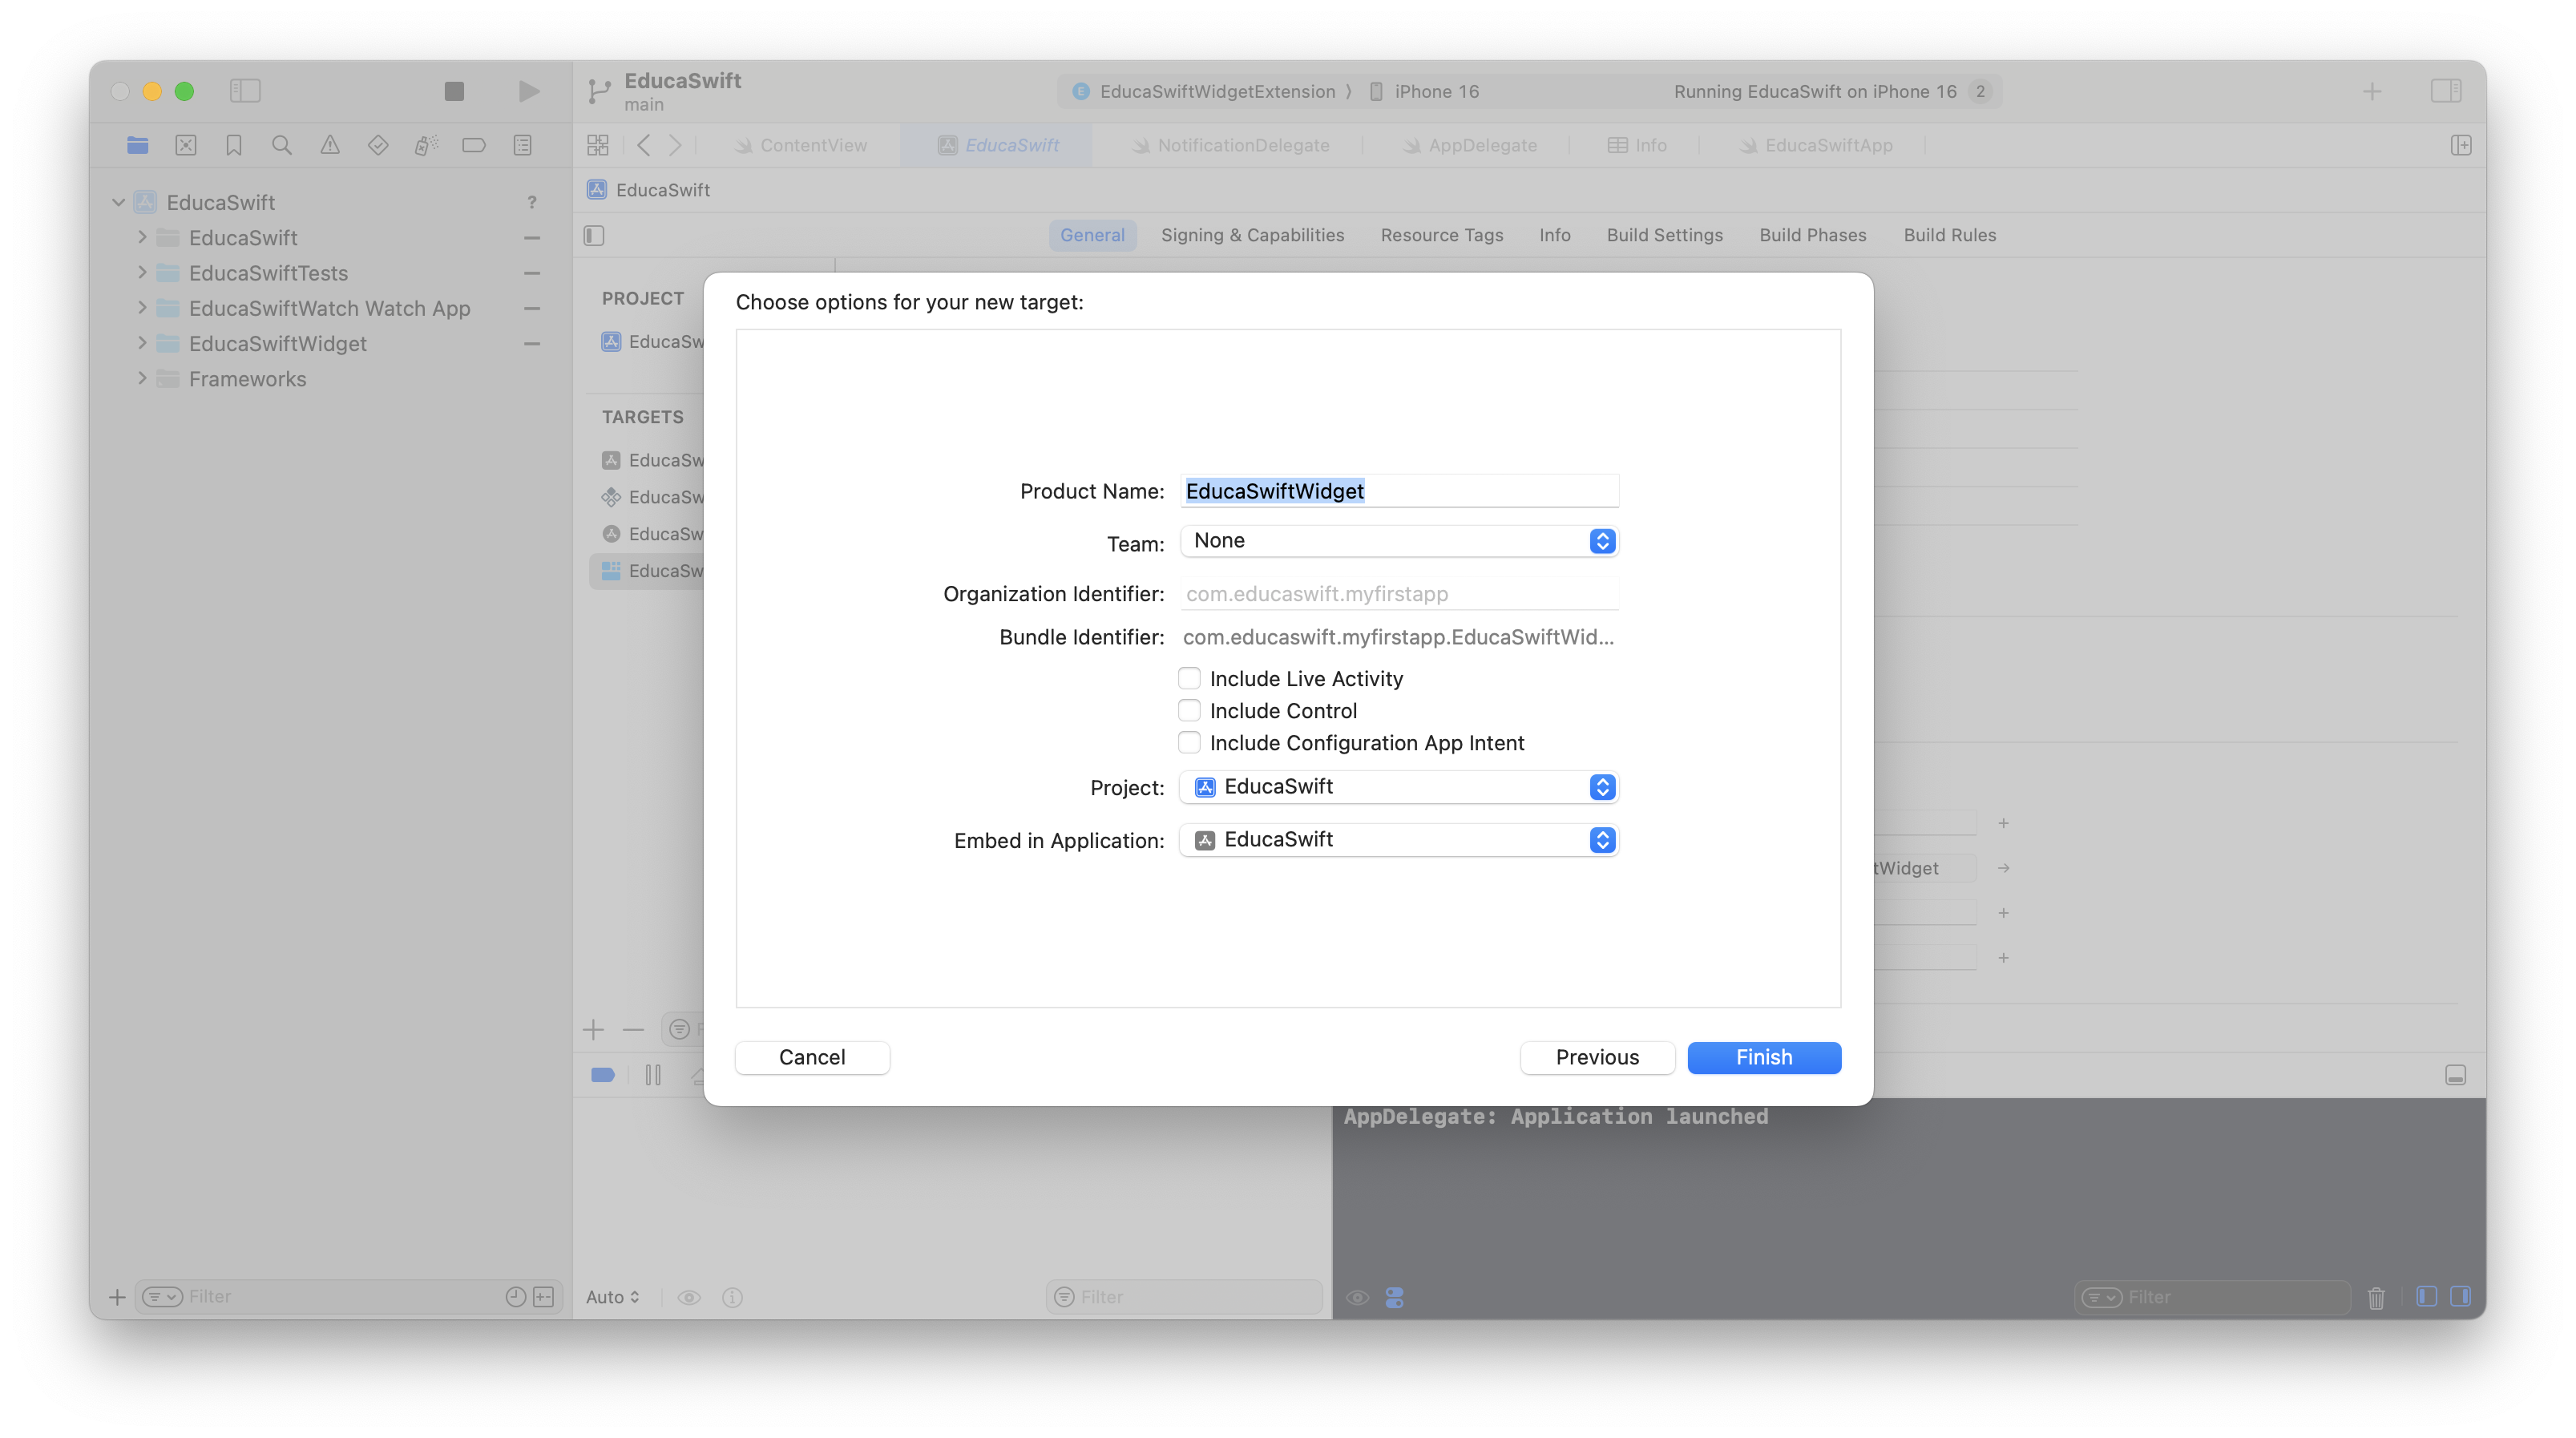
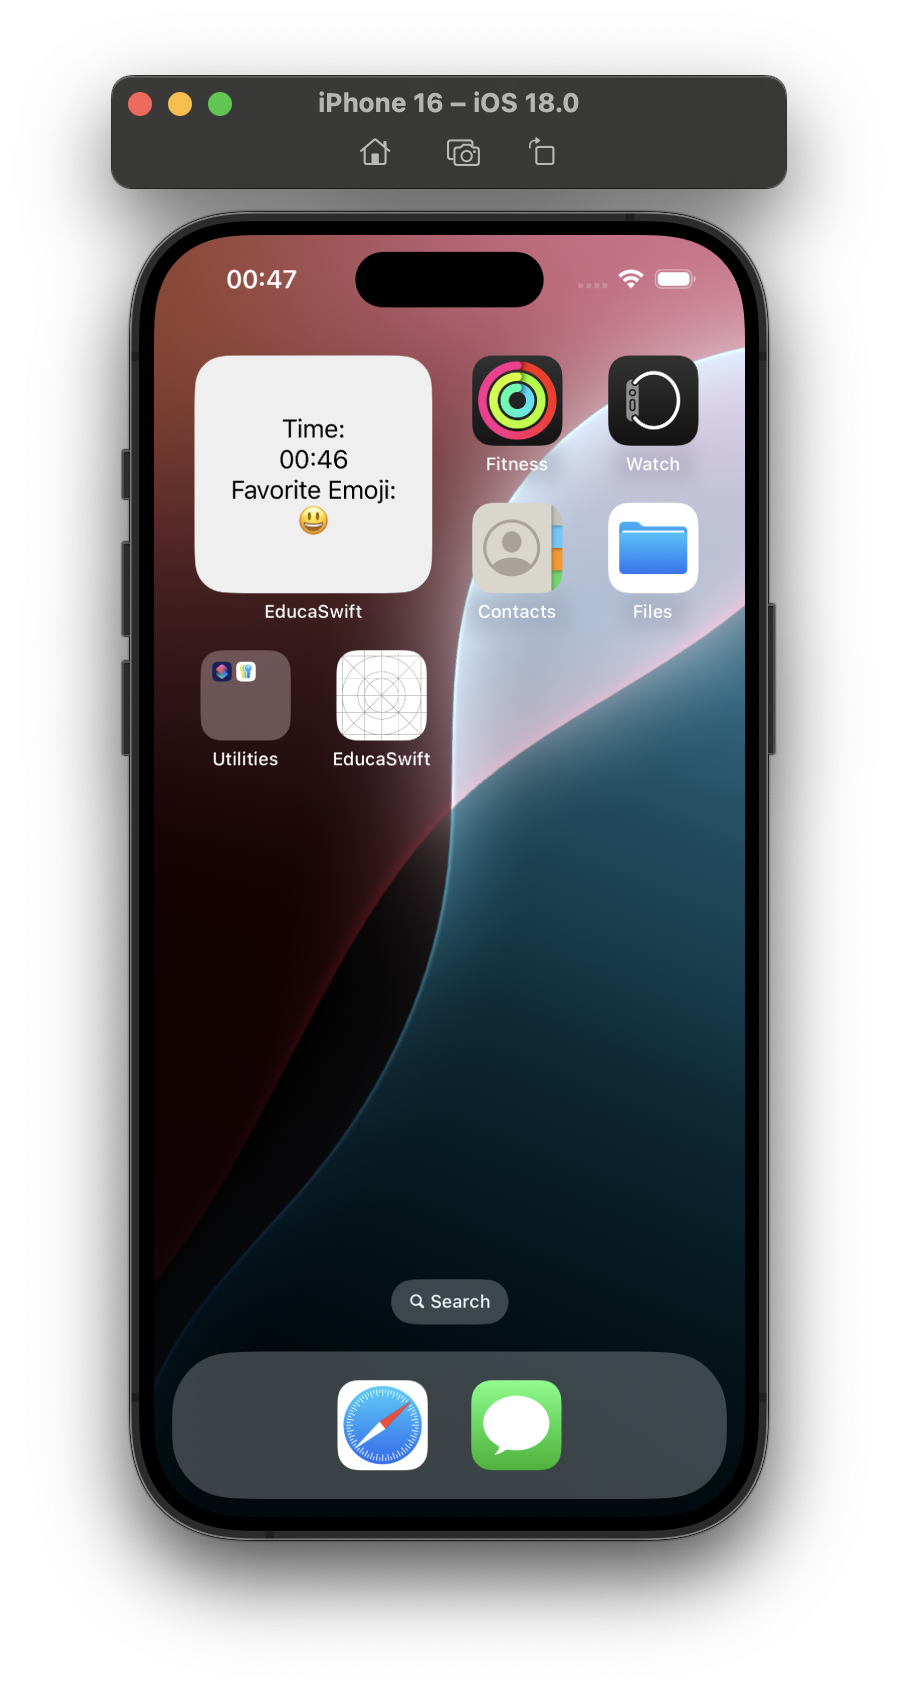
After adding the target, Xcode will create a new folder with files for your widget, including Assets, EducaSwiftWidgetBundle, and EducaSwiftWidget. The latter will include an example that we can try in the simulator if we run the App once.
Understanding the Widget Structure
Widgets rely on a timeline-based structure. A TimelineProvider determines the timeline of entries, where each entry represents a point in time when the widget should display updated data. However, the system will decide to update or not our widget. Here’s a breakdown of key components:
- SimpleEntry is the model for our widget, it must conform
TimelineEntryprotocol includingdateproperty, which indicates the date we want to be refresehd. In addition, we can include the data that we want to display in our widget. -
Provider Manages the data updates for the widget and provides a timeline. It must conform
TimelineProviderprotocol implementing three methods:placeholder(in:)returns the entry that we want to show when user is selecting the widget to add. This is usually mocked data.getSnapshot(in:completion:)is similar to the previous one but will be called when the widget appears in transient situations.getTimeline(in:completion:)returns aTimelineof entries, these entries are the real data that we want to show to the user. Optionally, it can include future dates, like we can see in the example code, in order to ask the system to refresh.
- WidgetEntryView (EducaSwiftWidgetEntryView in our example) is the SwiftUI view that defines the widget’s visual layout. This includes the associated type
Provider.Entrythat represents our model,SimpleEntry. - Widget: (EducaSwiftWidget in our example) sets up the widget’s size and design, such as
staticConfigurationfor static widgets orintentConfigurationfor configurable ones.
struct SimpleEntry: TimelineEntry {
    let date: Date
    let emoji: String
}
struct Provider: TimelineProvider {
    func placeholder(in context: Context) -> SimpleEntry {
        SimpleEntry(date: Date(), emoji: "😀")
    }

    func getSnapshot(in context: Context, completion: @escaping (SimpleEntry) -> ()) {
        let entry = SimpleEntry(date: Date(), emoji: "😀")
        completion(entry)
    }

    func getTimeline(in context: Context, completion: @escaping (Timeline) -> ()) {
        var entries: [SimpleEntry] = []

        // Generate a timeline consisting of five entries an hour apart, starting from the current date.
        let currentDate = Date()
        for hourOffset in 0 ..< 5 {
            let entryDate = Calendar.current.date(byAdding: .hour, value: hourOffset, to: currentDate)!
            let entry = SimpleEntry(date: entryDate, emoji: "😀")
            entries.append(entry)
        }

        let timeline = Timeline(entries: entries, policy: .atEnd)
        completion(timeline)
    }
}
struct EducaSwiftWidgetEntryView : View {
    var entry: Provider.Entry

    var body: some View {
        VStack {
            Text("Time:")
            Text(entry.date, style: .time)

            Text("Emoji:")
            Text(entry.emoji)
        }
    }
}
struct EducaSwiftWidget: Widget {
    let kind: String = "EducaSwiftWidget"

    var body: some WidgetConfiguration {
        StaticConfiguration(kind: kind, provider: Provider()) { entry in
            if #available(iOS 17.0, *) {
                EducaSwiftWidgetEntryView(entry: entry)
                    .containerBackground(.fill.tertiary, for: .widget)
            } else {
                EducaSwiftWidgetEntryView(entry: entry)
                    .padding()
                    .background()
            }
        }
        .configurationDisplayName("My Widget")
        .description("This is an example widget.")
    }
}
Signing your Widget
In order to sign your new Widget for release, you need to create an identifier and a profile for it (also a certificate but you will use the one you created for your iOS App). It's exactly the same you did for your iOS APP, check how to do it in our Certificates article.
As you can see, the Watch App bundle id is the same as the APP with an extra parameter, you can change the last part but it's important to keep the rest since this is an extension of it.
- iPhone app bundle ID: com.myname.myapp
- Widget bundle ID: com.myname.myapp.mywidget
Be the first to comment